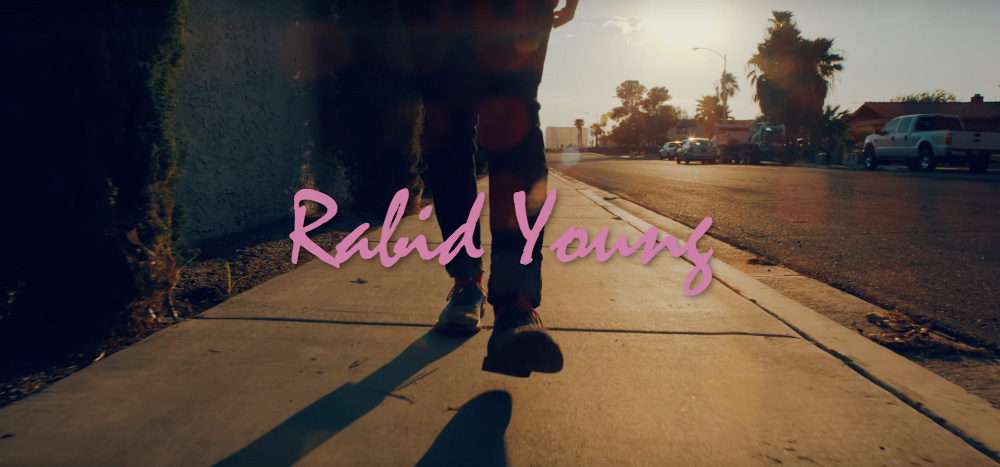
A few months back I came across Rabid Young’s music video “Before You Go” which was lensed and directed by Michael Tushaus. Almost immediately I contacted Michael about doing an interview on his work, creating the “Before You Go” music video and his take on color grading. Michael was kind enough to immediately share with me some of his wisdom so we sat down (well virtually) for an interview.
I’d like to apologize to Michael for publishing this interview only now. I got completely swamped with work on our Version 3.0 of color grading packages. Sorry Michael. Promise to be much faster next time.
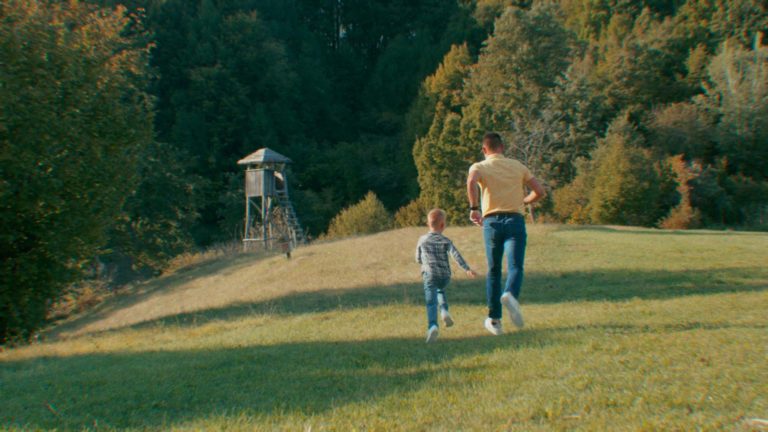
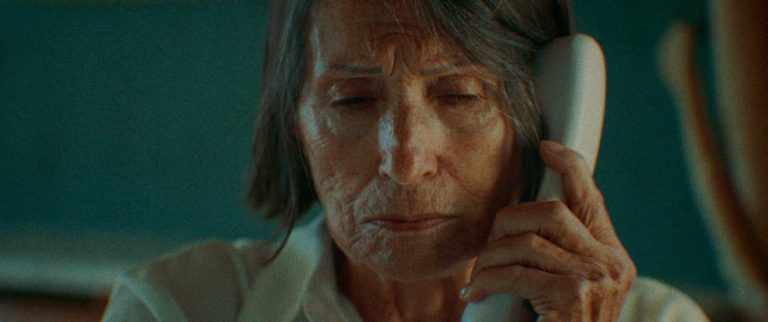
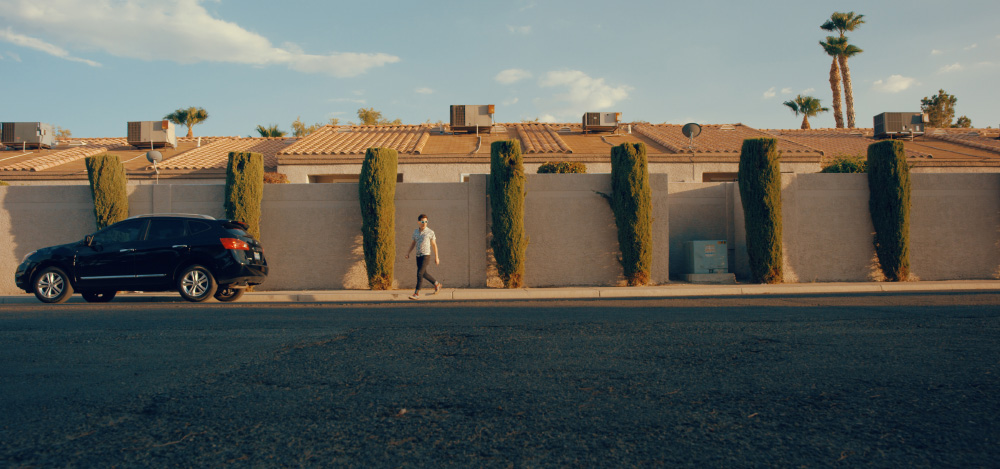
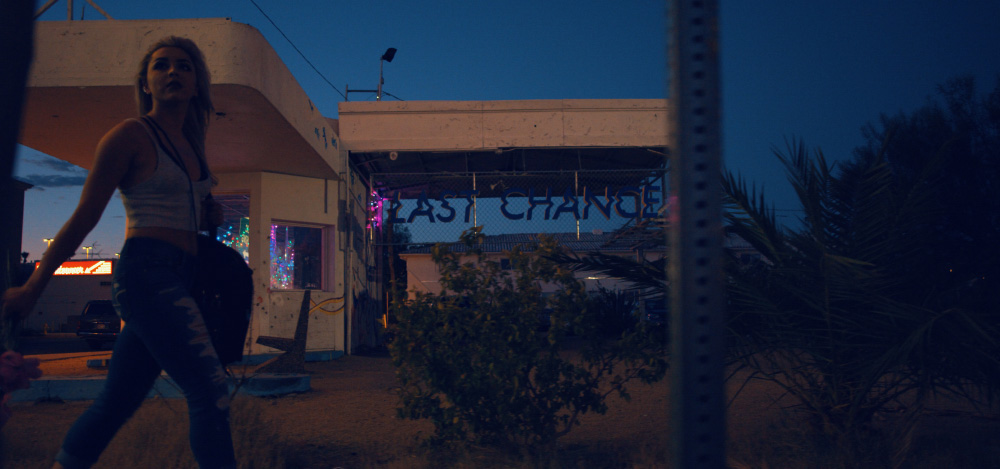
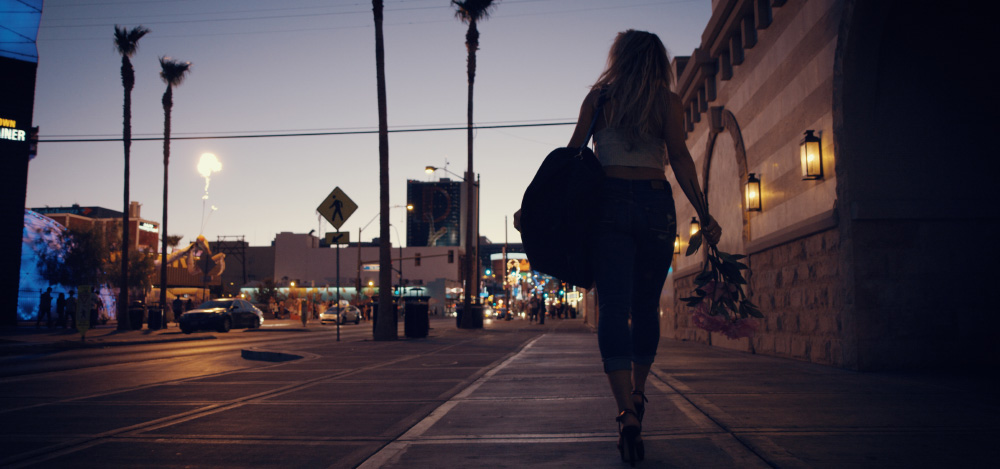
First things first, here’s the music video “Before You Go”:
So tell me a little about yourself.
“My name is Michael Tushaus, and I am a filmmaker based in Las Vegas. I run my own production company named Digisphere Productions. Feel free to check out my website at www.digisphereproductions.com.
I work on all sorts of productions, from music videos to films, to T.V. to corporate and convention shoots. Living in Las Vegas affords me to see a very large variety of productions. You just never know what you’ll be working on next. One day you’ll be on a studio shoot for a children’s show, the next you’re poolside at a Dayclub shooting gorgeous half naked people. Sometimes the projects are edgy, sometimes they’re very corporate. It’s a really crazy, but good, mix that keeps you on your toes and never gets boring.”
For how long have you been a filmmaker and what made you pick up the camera in first place?
“I have been making films since I was 10 years old. My very first video was in 1985 when I made my little sister hold our dog over her head while it wore a cape, fly by the camera, and all set to the theme of Superman. Haha. Yeah, I was the AV Club kid in high school. So, I was a nerd. But, I also played football and was an All-state soccer player, so I was more of a hybrid nerd. But, a nerd nonetheless.
I made my first feature length movie in high school as well. That was back in the days of VHS. It amazes me to think that we would work with a single master VHS tape that all the footage was edited to. Back then it was all or nothing. No back-ups, no digital workflows. Just two editing decks and a jog shuttle controller and a single master VHS cassette. It was all linear. It was a colossal pain in the ass. But, it was all we had at the time.
I was inspired by the usual suspects- Spielberg, Lucas, Zemeckis, Scorsese, Coppola. But I also loved the comedic directors such as John Hughes and Savage Steve Holland. Better Off Dead is probably my favorite comedy of all time. I love the oddball quirkiness to it, and I still quote its one-liners at least once every day. “Gee Ricky, I’m real sorry your mom blew up. The doctor says she’ll be fine…just won’t be eating any spicy foods for a while.” Hahaha.”
Is it the same things that get you going today as it was back then? If not, what is it now that drives you?
“In many ways, yes. I always aim to still be playing, and not working. When I was a kid with that VHS camera, I was always playing. I was only limited by my imagination. We didn’t care back then about 1080p vs. 4k, or what the dynamic range of the camera was. It wasn’t in our vocabulary. We just went and played. We created. We tried to make ourselves laugh, and more importantly at the time, make our friends and parents laugh. If I could get my parents to laugh at our videos, I knew we had succeeded. If they would just sit there with a dead look on their faces, I knew what we had just made really sucked. It was a good way to learn filmmaking. Make video after video, and always screen it to see what the reactions would be. If the reactions were good, I keep doing more of that-or bad, then stop doing that.
In many ways, I always aim to still be playing, and not working.
So, today, things are somewhat different, of course. I work to make a living and get paid for what I do, but I make sure it still feels like playing, and that my audiences enjoy what they’re seeing. I still have mini-screenings in my living room to see the reactions from my family, my girlfriend, her kids, her mom, my family, etc. If they laugh, or cry or react how I had hoped, I know I’m on the right track.
After Zander, my girlfriend’s 6-year old son, watched “Before You Go” for the first time, we asked him what he thought, and he started clapping slowly and almost to rhythm. Like the old 80’s movie clap that starts with one person and turns into a crowd cheering wildly. I took his 80’s clap as his approval. Hahaha.”
What would you say are the most important things you have learned about cinematography?
You have to go with your gut and stay organic and make changes on the fly. And you gotta make a lot of projects on your own to make those early silly mistakes and get them out of your system.
“Cinematography and Videography have always been a strong passion of mine. But it took a really long time to get the images right. I think the best thing was repetition. Shooting again and again and again. I learn a lot from every project I shoot. I’ve so many times in the past got to the editing stage and was disappointed in the image I had shot. Either the white balance was way off, or the focus was slightly blurry, or the framing was off, or there was some stupid object in the shot that we didn’t see on set that ruined the shot. I’ve even seen my own stupid self in reflections in windows and sunglasses and such. But hey, you learn. You learn from these stupid mistakes and eventually you get past most of them. I still find shots that I’m not happy with all the time, but I am finding less and less of them. And my clients are finding less, too, which means happier clients who are calling me back.
So the moral of the story, you can learn in books, and you can know every little technical thing about where to set your zebras for middle gray, and crop factors, and black shading, and exposing to the right for Log, etc., but I believe there’s still a very human aspect to getting the shot, too. You still have to go with your gut and stay organic and make changes on the fly. And you gotta make a lot of projects on your own to make those early silly mistakes and get them out of your system.”
What would you say is the most important thing you have learned about color grading? Is there any particular style of color grading you find yourself attracted to? Why this?
“Color grading is the holy grail of filmmaking. Haha. Really. You can get all the aspects right, but if your grade sucks, your film will never feel right to your audience, or to you. I cannot say how many times I have finished a project, but hated the color. Like, really hated it. And I couldn’t ever get it to pop the way I wanted. I would scour the internet for solutions, for filters, LUTs, and the sort. I’ve tried so many different add-ons and was usually disappointed.
Color grading is the holy grail of filmmaking.
I like contrast and saturation, but neither are very popular in the color game when it comes to truly cinematic grades. That was probably my biggest mistake earlier on. Everything would be too saturated and the contrast would be too extreme. I would crush blacks to where details would get lost.
I guess with time I got more mature about it. And I would pay attention to what other films and projects were doing. I would pay attention to guys like Philip Bloom and what he would do with his grades. I would say that I still lean more saturated than some filmmakers, but I have really cut it back. For me, I really like to see color and warm and pleasing skin tones, but I just want it to be very pleasant to the eyes. The Lutify.me LUTs do this for me. They’re like voodoo. I don’t exactly get how you guys develop them, but damn do they work.”
Let’s talk a bit about Rabid Young Before You Go music video. Tell me about the process.
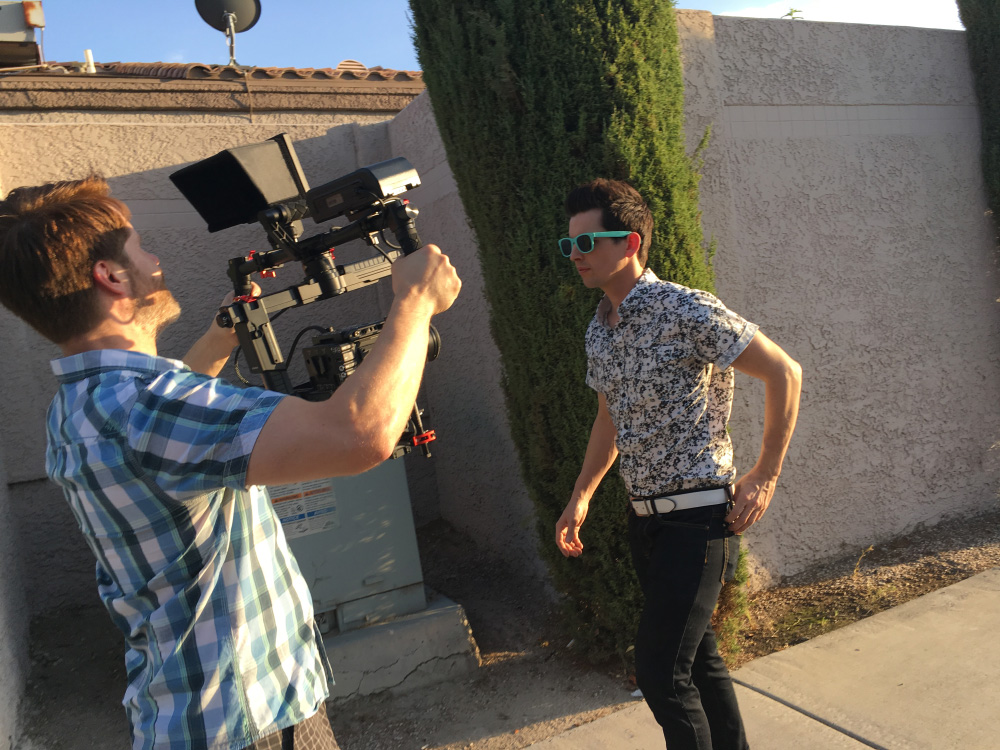
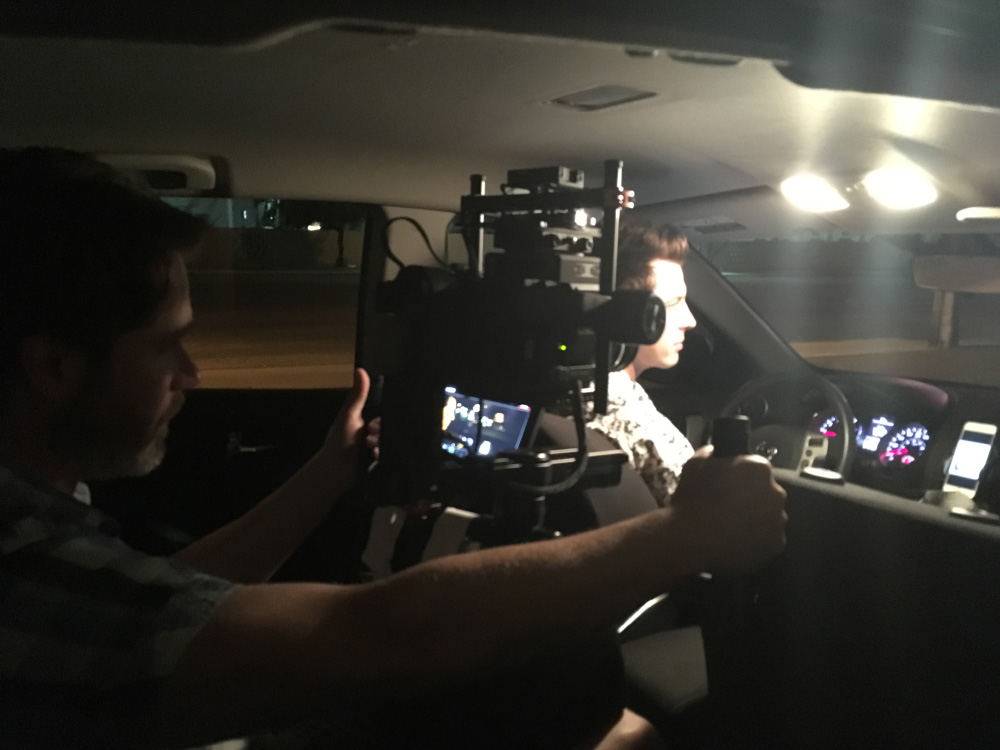
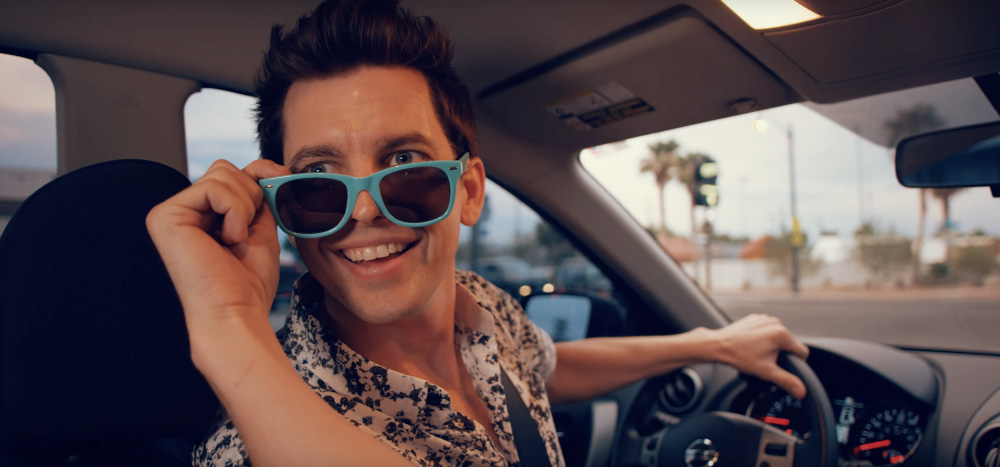
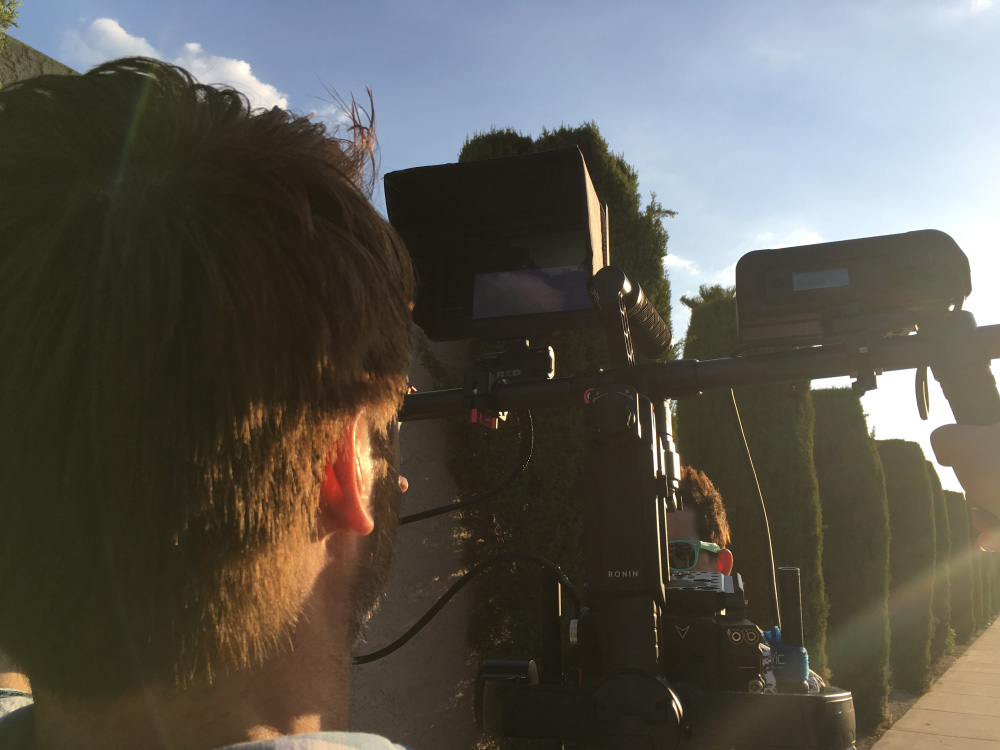
“The video concept went through a lot of phases. Eric Rickey, the band’s lead singer, and I sat down several times and talked about different concepts. I had directed his last video, “Beautiful Things” on the Sony FS5 and A7SII, and this time I was equipped with the wonderful RED Raven. Ultimately, we compromised on combining a couple of concepts into one, and we shot a third concept that ended-up getting completely cut out and will be used for their next video instead. I’d say more, but it’s a trick I should keep up my sleeve for now.
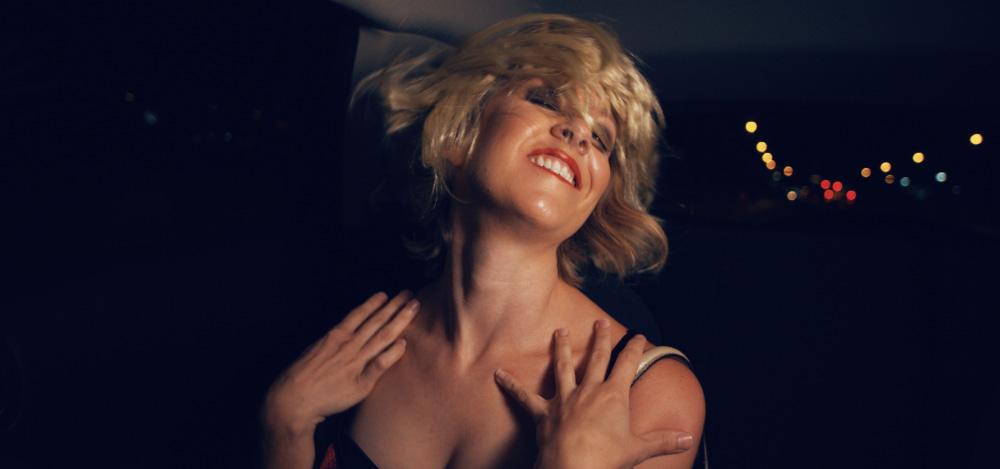
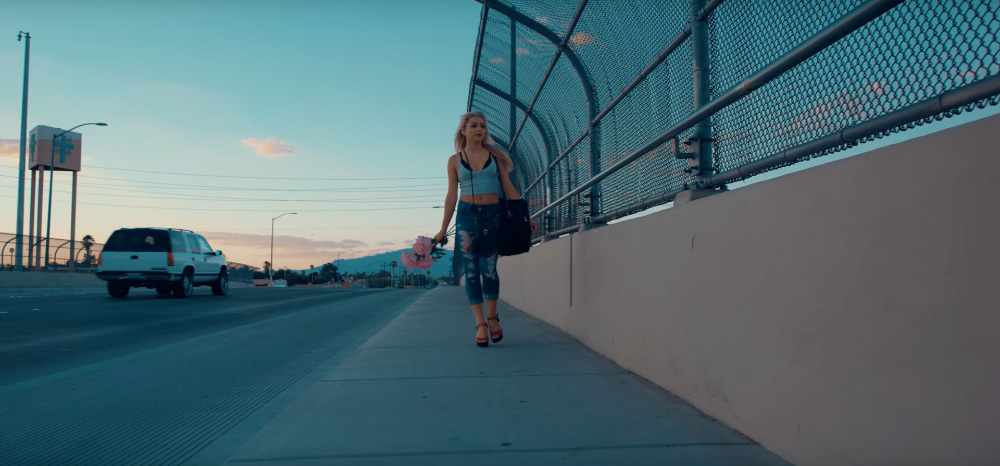
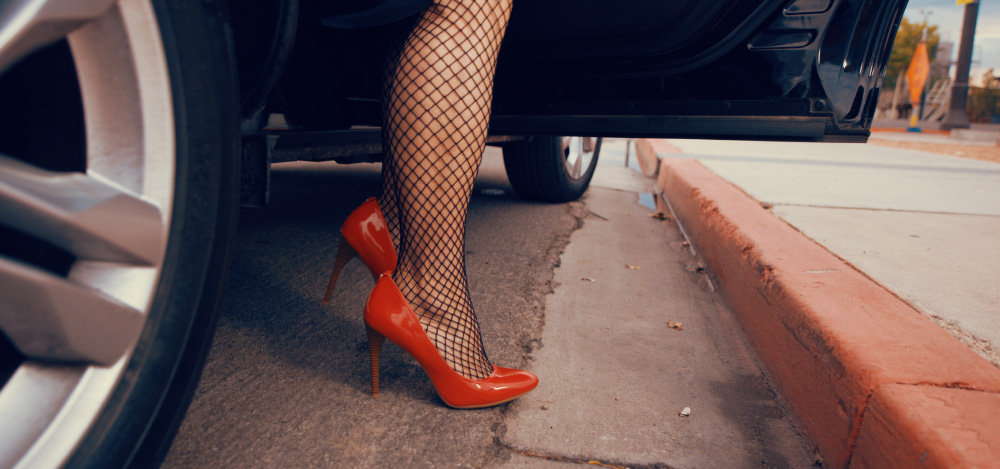
Anyhow, we shot the video over three days in Vegas, and centered around two story lines- the girl who leaves her life and boyfriend behind, and Eric who plays our Uber-like driver who picks up the other bandmates who play the zany characters – Elvis, a purse snatcher, and a stripper. And I can’t ignore our other featured characters played by my girlfriend, Getti, the hula-hooper, and her mom, Annie, the drunk and playful nun with the high heels – and yes, those are her real legs! Hahaha. I should note they were both former circus performers who originated from Bulgaria, and hold multiple World’s Records for their circus feats. Being in Vegas has its advantages. You never know who you will run into or from what country they’re from or what skill-set someone possesses.
Eric’s main request is that the video be both funny and also bizarre.
Take our cop who chases the bank-robber. He works for Cirque du Soleil now as a performer, but he used to make a living as a professional wrestler in the WWE. I guess you could probably presume such a thing when you consider how big this guy is. He’s ridiculously big. Scary big. But Barri is a great guy and we had a lot of fun with his bit.
Eric’s main request is that the video be both funny and also bizarre. He kept using John Waters as an inspiration. He liked the idea of having such an odd mish-mash of characters who, at first glance, aren’t really who they seem to be. I think we achieved that pretty well. My favorite, as is for most people, is Annie’s nun. I love that we go there with her. And that we go beyond the single gag. Yeah, she’s a drunk, ok, but then the high heels. Haha. She walks off towards the bar and you’re like, “What the F-?” And believe me, living in Vegas, you see these things all the time. NOTHING is a surprise here. I recall sitting out on a bar patio downtown there, and my buddy and I take a selfie making silly faces. I look at the photo, and we see Big Bird in the background. I look back and sure enough there’s someone walking down the street in a full-fledged Big Bird costume. And no, not even close to Halloween. Nope, just Vegas. Haha.”
What were the obstacles you faced? How did you overcome them?
“Time. We had very little time to get this video shot. They had just released the EP and Eric was leaving with the band to go on tour, and we wanted to get it shot before they left. And, everyone involved had other gigs to go to at varying times of each day, so it was difficult to wrangle everyone.
Barri, the giant cop guy, was on-set from 4:15pm till 5pm. I had to shoot all of his set-ups in almost no time at all. Not to mention the alley we chose was being patrolled by a rent-a-cop and we didn’t get prior permission. Fortunately, Barri’s presence was intimidating to say the least, and he was, well, dressed like a cop. He gave the security guy the “cop-nod” as he drove through the alley. The guy waved and drove on. Hahaha. Pretty funny stuff.
Our solution to time was working fast and efficiently. We shot the majority of it in downtown Las Vegas, near Fremont street. So, we rented out a hotel room with street access and had each of the cast members meet us there. We would take them out individually, shoot their section, and then return them to the hotel. Each time we would leave or return, we had to go through the little front lobby there. It was rather amusing watching the front desk girl and security guard there react to each of our characters. But, again, it’s Vegas, they weren’t too shocked.”
Could you tell me please about the color grading?
“I edited the video in Adobe Premiere. I have a lot of experience with FCPX as well, but I have come to learn that FCPX doesn’t deal as well with color. I edited and graded a short Star Wars fan film I shot on my Sony FS5 in FCPX recently mainly because it was a lightning turnaround to get it entered into the fan film contest. After the dust settled, I went back and tried re-grading it because I was not impressed with the color. The FS5 has a magenta shift in skin tones that drives editors crazy.
I exported the project clean of all the grading and started over in Premiere. I was shocked how much better everything looked right away. Initially I tried some of their built-in LUTs in Premiere since my license for other color grading product is for FCPX only. This is one of the great things about Lutify.me – you can use your LUTs in any platform without additional licenses or software. They work great in the Premiere Lumetri interface, and I have subsequently been able to re-grade other projects in FCPX using Pixel Film Studio’s free LUT loader with Lutify.me LUTs. Yes! It works! But make sure to install the very latest version of their LUT Loader and completely uninstall any older version of it. From there, you can copy your Lutify.me library into the FXplugin folder for LUT Loader and all of your LUTs will show up in the drop down menu. Also be sure to take them out of their subfolders and copy them all to the same folder to see them in the drop down menu.
This is emoting however I wish both FCPX and Adobe Premiere would address. They need to allow us to have sub-folders in our LUT browsers. Right now, you have to copy all of your LUTs outside of their sub-folders. Hopefully this will be addressed in later updates.
Anyhow, back to the topic, I edited everything in Premiere. I corrected the Raven’s footage using REDCINE-X. This meant I corrected exposure, tweaked White Balances (because of overcast skies), and tweaked my curves and color. All pretty subtle shifts as the footage out of the camera is very pleasing to begin with. That’s what I love about RED cameras is that they give you a really good base to start from. I’ve worked with other cameras like the Sony FS5 which are a real pain color-wise. You have to fight with them to give you the color you really want. RED doesn’t give you that fight. They give you that solid foundation in the image that then allows you to paint to your heart’s content.
I initially then graded with a preexisting LUT in the Lumetri color panel. “BIG HDR.” It worked okay, but it had a yellowish tint in the skin tones that was unpleasant. I wanted richer skin tones and more of a traditional Teal and Orange palette that was more cinematic and pleasing to watch.
When I applied your LUTs, it was like…well, the way to describe it is like…when you have been wearing shitty cheap sunglasses for years, and for the first time you try on some wonderful polarized Ray Bans on a nice sunny day.
While this was going on, Jonny Mass and Edward Khoma of Abandon Visuals had just released their short film, “The Underdog” which many of us are now aware of as being one of the first films shot on the new RED Weapon 8k Helium Super 35 Camera. God that thing is beautiful. The camera that is. And yes, the film, too! It’s gorgeous. I saw that and said to myself, “I wish I could achieve a look like that.”
And then! I saw Jonny posted Edward’s blog about the process of making that film. I read it being I am a huge fan of RED, and had just shot on my second-owned RED, the RED Raven, (my first was a Scarlet), for my music video. And then I read about how the film was graded with Lutify.me and he was sharing a 10% off code to buy the package. I immediately went to your website and looked at all that was offered. You guys had the looks I was always seeking for. And, they would work in either of my editing platforms. SOLD!
And, I had a little music video sitting on my computer that was in dire need of the right grading LUTs. And I finally had them. I went to work and went through the Teal and Orange options specifically. I loved them all, but two prevailed in creating the look I wanted to achieve so badly. When I applied them, it was like…well, the way to describe it is like…when you have been wearing shitty cheap sunglasses for years, and for the first time you try on some wonderful polarized Ray Bans on a nice sunny day. Your eyes are immediately darting all around because you can’t believe the colors you are seeing. You take the glasses off for a moment, and the world looks drab again. So, you put them back on and soak in how beautiful the colors of the world are. This is seriously how I feel about these LUTs. All of a sudden everything pops! And you immediately feel so much better about your project and really, all of your life’s decisions. Haha. You’re like, “Where have these been all my life?!”
Now with that said, I am not an ace at color correction. I’m much more of a cinematographer than a colorist. But this is what is great about these LUTs. They make the difference for guys like me who work on a project that cannot afford a professional colorist. A guy like me and many of you out there that are Swiss Army Filmmakers. Guys and gals who are making films on their own shoestring budgets, but have something beautiful to share. Lutify.me LUTs are that little extra tool, no, weapon, to use that gets you that amazing look that you could have never achieved sitting there for hours with your color wheels in your editing software. You’re pulling your hair out because your Sony FS5 has some serious magenta shift and you can’t fix it without screwing something else up. I was able to finally fix that magenta shift on another project thanks to these LUTs.
I didn’t use any in-camera LUTs, though I’d like to experiment with this in the future. The fact is, since it is REDCODE raw, it’s very flexible to work with. As long as you expose correctly and are in focus, you’re good. You can adjust WB in post. You can tweak ISO or gain in post. And you can shift from RED Gamma to REDlogfilm all in post. I love this workflow. I love not having to worry about shooting in LOG format first. I hate dealing with S-log with Sony or V-log in the GH4. Too many variables can throw you off a bit. Obviously it can be achieved successfully with these formats, but in my experience, it’s been more problematic. However with the RED workflow, I’ve spent a great deal more time reveling instead of lamenting the images I’ve captured.”
What is your advice to the less experienced photographers out there?
“Color grading is the final and most important step of the filmmaking post-process, visually, that will make or break your film. Sound is also extremely important. But visually, if I had to pick one, it’s color. Of course your framing, focus, edit and image overall are important. But if you color it incorrectly, it will come off as amateurish and will leave a bad taste in the viewer’s mouths.
Take the extra time and correct and then GRADE your footage. And then, do it again. Our eyes get too used to what we see. Correct it. Take a break. Correct it again. And then Grade it and grade it again until it feels right. Spending the extra few dollars to get a professional LUT package like the Lutify.me LUTs will add a lot of production value to your project. They’re pretty inexpensive, but they’ll make your project look a lot more expensive. Your actors will love you for making them look better, too.”
For more of Michael’s work visit his website or his Vimeo.