If you’ve been shooting with a RED camera for some time you’re probably familiar with RED’s relatively new IPP2 workflow. IPP2, which was released back in 2016 introduced a new log format and a color space for RED cameras, namely the Log3G10 and REDWideGamutRGB.
REDWideGamutRGB
REDWideGamutRGB is a camera color space designed to encompass all colors a RED camera can generate without clipping. Essentially REDWideGamut is a standardised CameraRGB color space. Those of you who remember the days of the CameraRGB and are familiar with it, can think of the new color space from RED as CameraRGB albeit standardised.
This means RED is now using one color space rather than infinite number of color spaces differing upon the characteristics of the camera and the development settings of the raw information. This simplifies the workflow tremendously.
RED Log3G10
Log3G10 is a log curve specifically designed to encode camera data in REDWideGamutRGB color space for subsequent color grading and transformation to HDR, SDR or any other encodings.
Log3G10 is named for its key properties. The 3G represents the mapping of 18% mid grey to 1/3, and the 10 represents the extent of the log curve encoding a linear light value up to 10 stops above mid grey before the curve reaches an output value of 1.0.
The main benefits of the new IPP2 color pipeline from RED are easier color grading process and a much better compatibility with the HDR workflows.
Basic workflow in IPP2
Working with Log3G10 and REDWideGamutRGB is simple and greatly simplified.
- Process your RED footage into Log3G10 and REDWideGamutRGB. This ensures no clipping occurs to the colors coming from the sensor as REDWideGamutRGB can encompass all colors coming from a RED camera.
- Grade in this wide gamut log space.
- Apply appropriate viewing/outputting conversion at the end of your pipeline.
Premiere Pro and IPP2
Premiere Pro supports IPP2 workflow for quite some time. However, there’s a caveat to that. The most obvious choice isn’t the one you would want to use in most cases.
![]()
While having this setting is very convenient, it is applied at the beginning of our color grading process. This means that the conversion into Rec709 (or Rec2020) takes place at the beginning of your color grading process and as such all your color grading decision from this point on would take place in Rec709 (or Rec2020).
Assuming you converted into Rec709 using the Premiere’s built in transform function, if you were later on to create additional output for Rec2020, you would most likely have to re-grade your footage as your color grading decisions from Rec709 wouldn’t translate very well into the much wider Rec2020. That’s not what we want at all.
So what should we do? We should convert our footage into Rec709, P3, Rec2020 or any other color space at the very end of our pipeline so it’s the last action that is applied on our footage.
Let us examine the following case. We will assume you are color grading on a standard Rec.709 monitor. You’d apply a conversion from Log3G10 REDWideGamutRGB to Rec.709 at the end of your pipeline. If you’re working on a P3 projector, you’d probably want to use a Log3G10 REDWideGamutRGB log conversion into P3. If you are grading on one of the HDR displays, you’d probably want to convert into Rec.2020.
Now, let’s go back to us color grading on a standard Rec.709 monitor. Once we’re finished, we would like to see the result on an HDR monitor. Since we converted into Rec709 at the end of the pipeline all we would have to do is plugin the new monitor, swap the conversion from Rec.709 to Rec.2020 and all our color grading decisions would carry through to the new space since the color grading took place directly in the neutral wide gamut space which is REDWideGamutRGB. How simple is that?
So how do we do that practically?
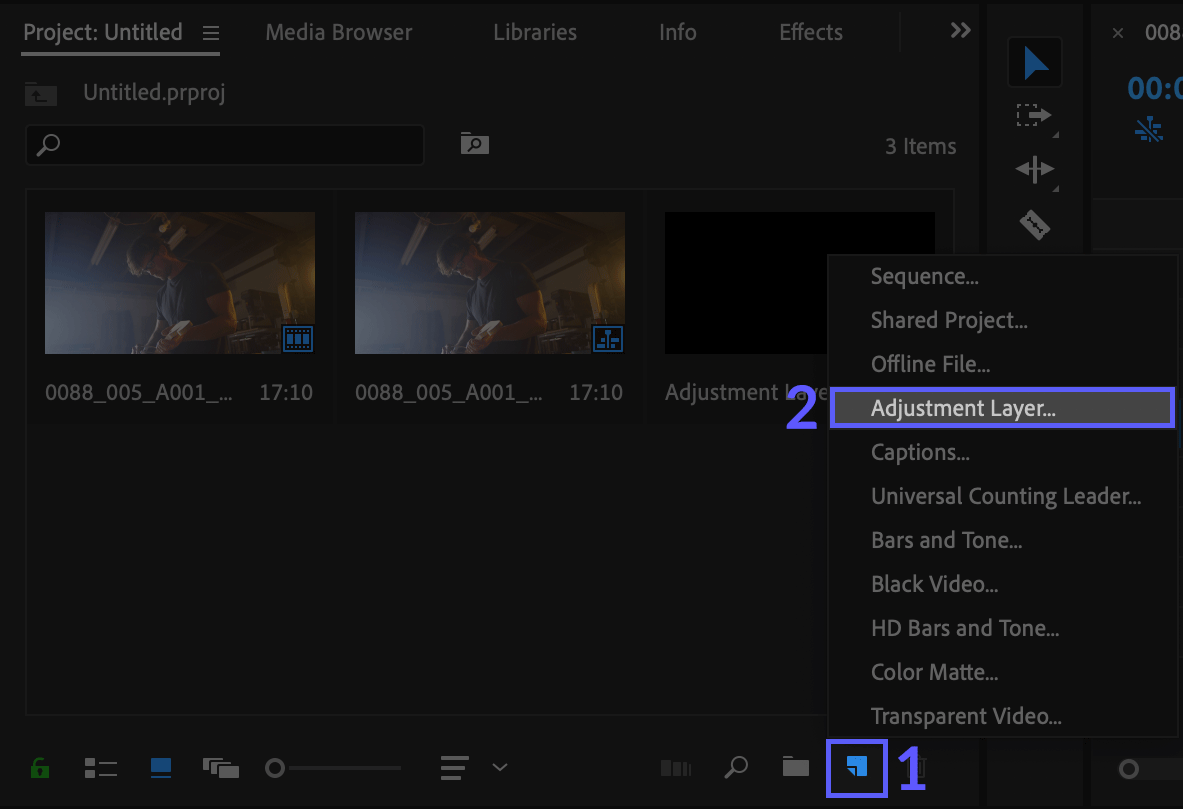
The short answer is – adjustment layers.
Please have a look at this short video tutorial explaining how to work with IPP2 footage in Premiere Pro.
If you are unfamiliar with the concept of adjustment layers in Premiere Pro, you can think about them as “transparent videos” which you would place above your footage and each of these “videos” can hold many sets of different instructions, including color grading instructions, which will then be applied to the video clip beneath them.
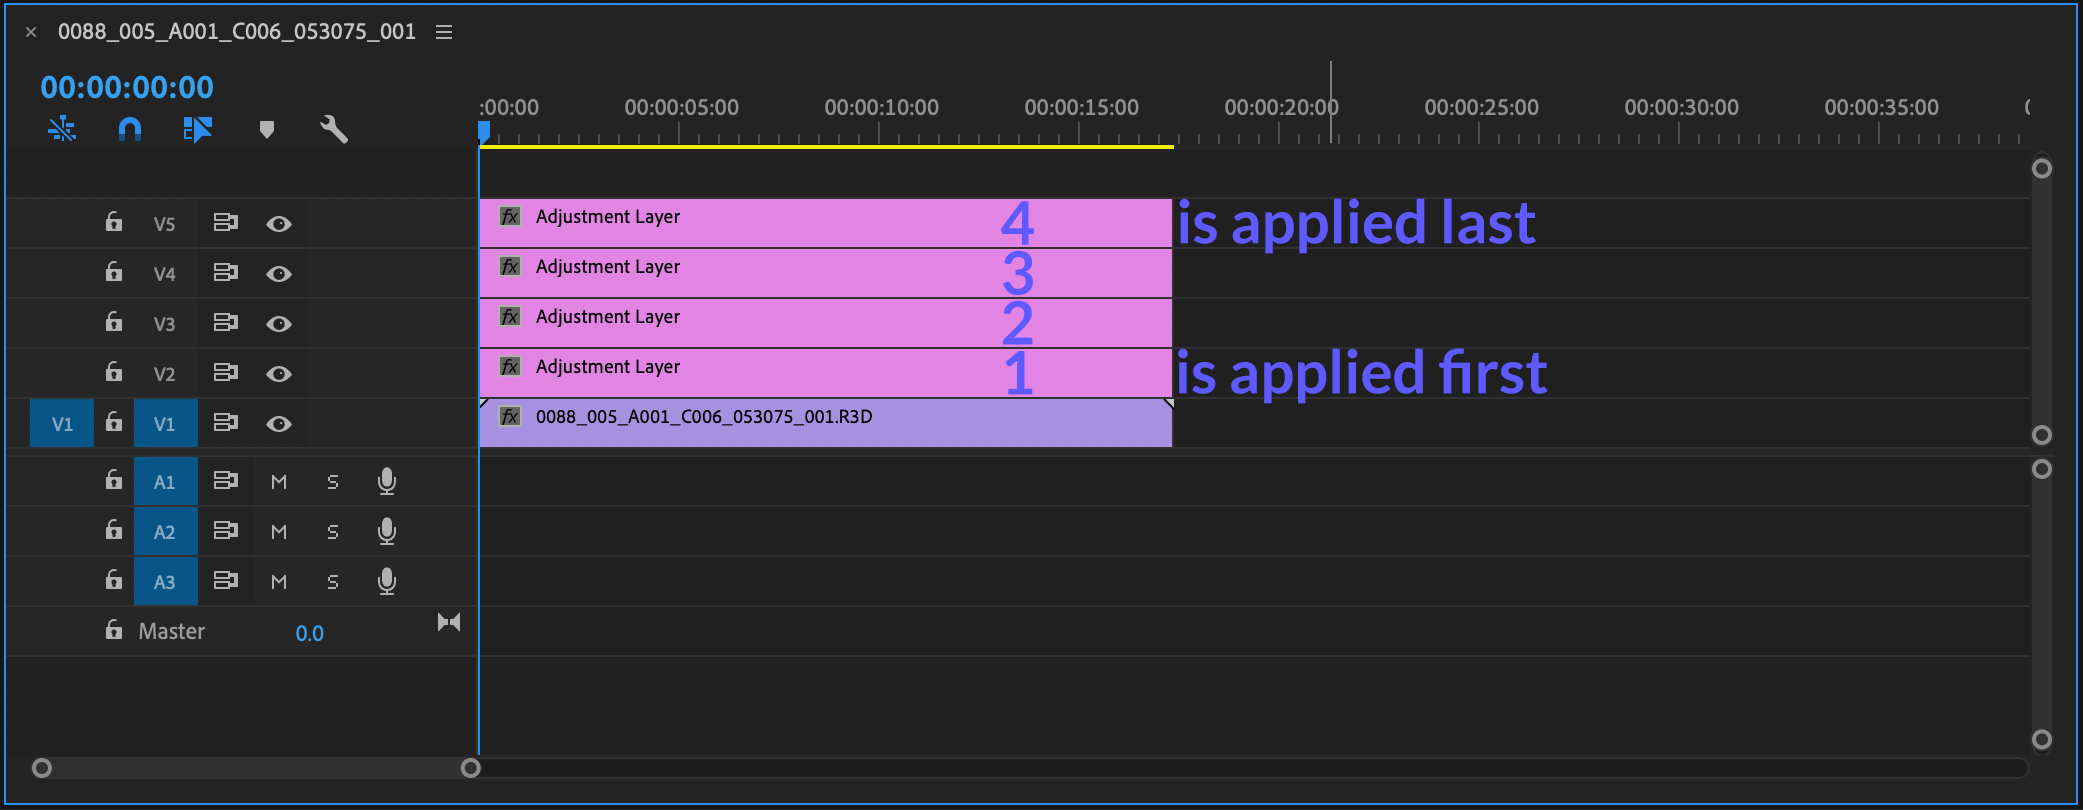
Adjustment layers are applied bottom to top in Premiere Pro, so whatever happens on the adjustment layer closest to the clip itself takes place first and whatever happens on the adjustment layers farthest from the clip takes place last. Also, each adjustment layer “feeds” the adjustment layers above it with the set of instructions that are applied to it.
For example. Let’s say we have a clip which we want to grade. So we apply 2 adjustment layers to it. On adjustment layer 1 we brighten our footage. Adjustment layer 2 would be “fed” with that brightened image and whatever we would apply to adjustment layer 2 would effectively be working with the result of original clip + the actions that took place on adjustment layer 1 and so forth.
Back to IPP2. We want to apply our log conversion into Rec709 at the end of our pipeline. So how do we do that? We simply apply a log conversion LUT, from REDWideGamutRGB Log3G10 into Rec709 (or any other color space) on the top most adjustment layer we place above our footage.
In order to make all of our color grading decisions directly on the REDWideGamutRGB Log3G10 footage, we would place additional adjustment layers, beneath that log conversion adjustment layer and apply all of our decisions on these adjustment layers leaving the top most adjustment layer for conversion. Typically, we would want to have at least 4 adjustment layers placed above our footage.
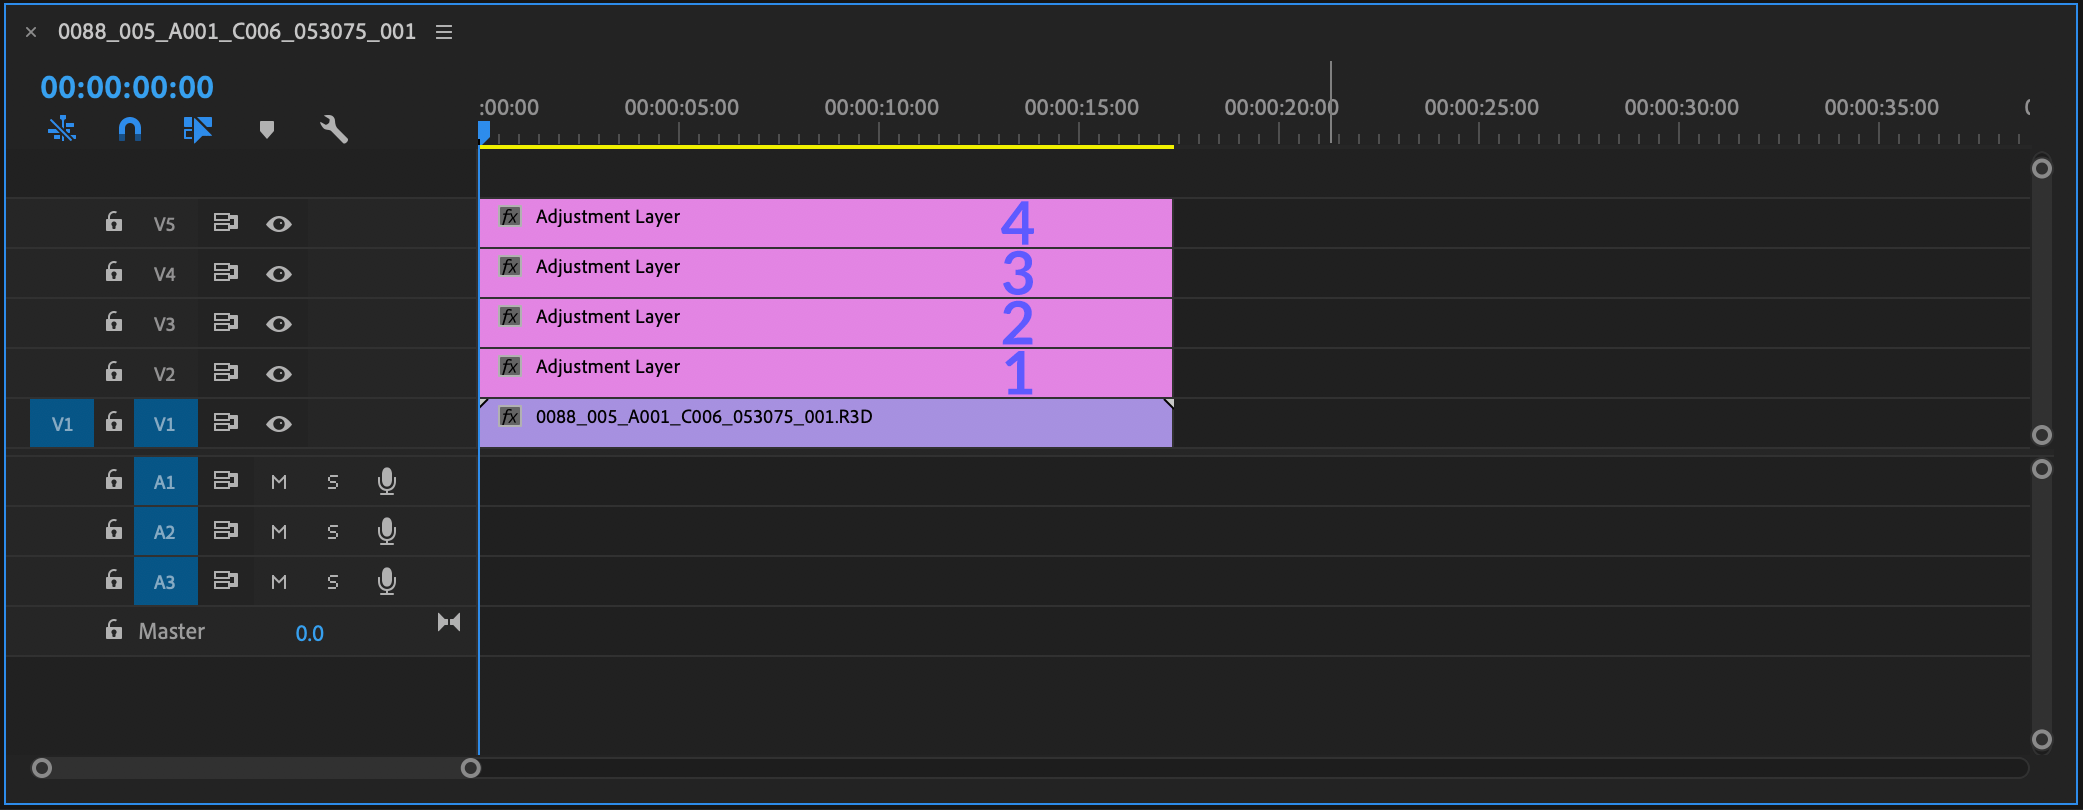
Adjustment layer 1 – should be reserved for primary corrections such as white balance, exposure, contrast, etc.
Adjustment layer 2 – should be reserved for a creative LUT, if using LUTs in your workflow. Now I should mention, that if you are using LUTs in your workflow to color grade your footage, these must be IPP2 tailored LUTs as we are applying them directly on the REDWideGamutRGB Log3G10 footage. You cannot use Rec709 LUTs here as the result will look very different from the expected outcome. If you are using our LUTs, this is not an issue since we offer IPP2 tailored LUTs in our Professional package and you would simply use the LUTs from the IPP2 folder.
Adjustment layer 3 – should be reserved for secondary corrections such as HSL or any other color grading decisions that should take place after you’ve applied the creative LUT on layer 2.
Adjustment layer 4 – should be reserved for conversion into Rec709, P3, Rec2020 or any other color space.
Obviously, you may want to have more or less adjustment layers depending on your needs but having our grade organised in this way ensures all of our color grading decisions take place directly in the REDWideGamutRGB space which means we can safely change the conversion at the end of our pipeline and benefit from not having to re-grade the footage when changing output among other obvious benefits of working in a wide standardised color space.
To take your color grading game one step forward we suggest to use our LUTs Previewer to quickly preview, mix and match different LUTs to decide on and create your look. If you’re still unfamiliar with our revolutionary LUTs Previewer, here’s a quick preview of this wonderful tool.
We hope you enjoyed this tutorial and that you’ve learned something new that will further improve your color grading game. We would love to hear back from you in comments down below what you think of this workflow.
As always, should you have any questions please contact us.