Maarten Slooves is a Dutch filmmaker whose recent A.I. Revolt passion project won first place in Dutch Drone Film Festival in the “Most Artistic” category. Maarten also won second prize in the Italy Peugeot Drone Film Festival and was a finalist in the Los Angeles Drone Film Festival. When Maarten approached us about writing a guest blog post about color grading the short we naturally said yes.
First things first, here’s the A.I. Revolt short.
Since Maarten is a cool guy, he also created a behind the scenes video going into details behind the making of his passion project.
Following is Maarten’s guest blog post about the process that went into color grading. Enjoy!
As filmmakers we know how important color grading is. It’s obvious why high end productions usually involve a specialist solely for the purpose of grading. However, in situations where budget doesn’t allow for that or when we are working on passion projects with no budget at all, we will have to make it work ourselves.
A.I. Revolt was a passion project which I submitted for the Dutch Drone Film Festival recently and won the most artistic award. I enjoyed working on this a lot! I was super happy to use Lutify.me LUTs in the grading process. For the record, I don’t want to say I am a professional colorist, but I learned some things along the way which may be interesting to you as well.
I graded this in Adobe Premiere Pro. First of all, we shot all ‘ground shots’ with a RED EPIC DRAGON at 6K 25fps by DOP Roderik Patijn. Some shots in slow motion, but not too many. In camera we used DRAGONcolor2, REDgamma4 and shot everything Raw on ISO800 at 5500 Kelvin. This method of shooting feels comfortable to us, as it gives us a good perspective on what we are shooting, while still recording the complete image in Raw.
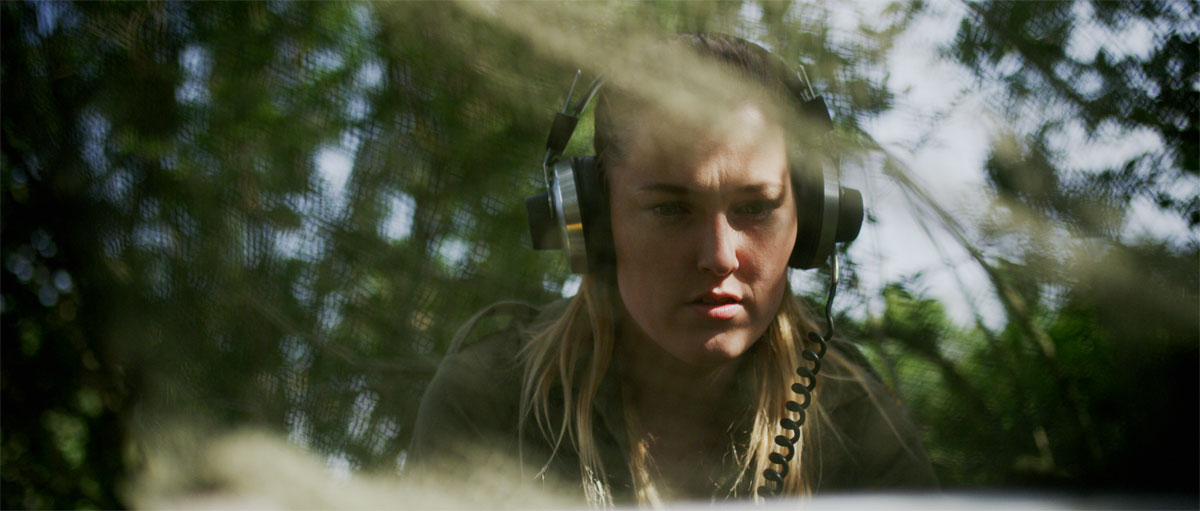
This is an example of the image we saw on the monitor:
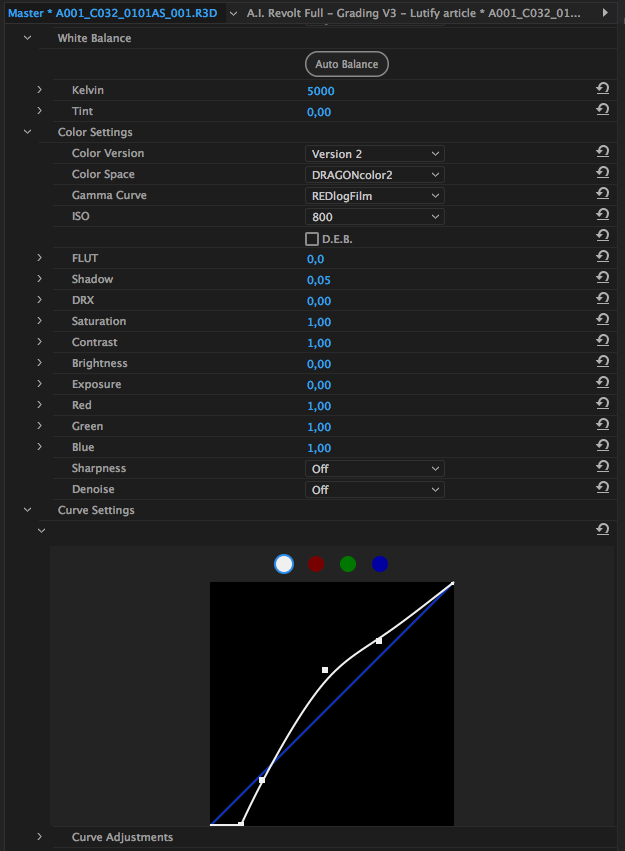
The first step in post was interpreting the master file as REDLogFilm:

From here I made initial adjustments in the master file to get to a starting point:
Here are the basic corrections of that grade in Lumetri:
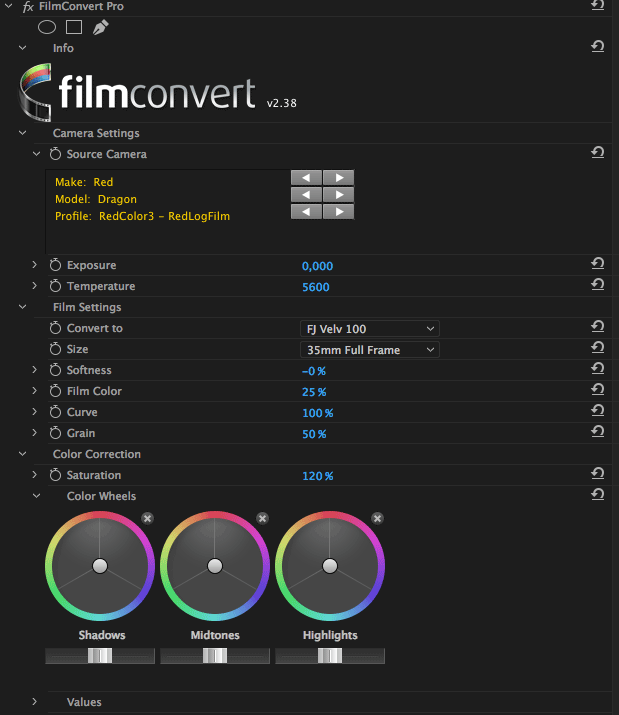
The next important step was to add an adjustment layer and mildly apply Filmconvert. Personally I like the grain, not too much though. I used the FJ Velv 100 profile and as you can see in the settings, I’ve turned the “film color” down to 25%, the saturation a bit up to 120% and the grain down to 50%.
This gave the following result:
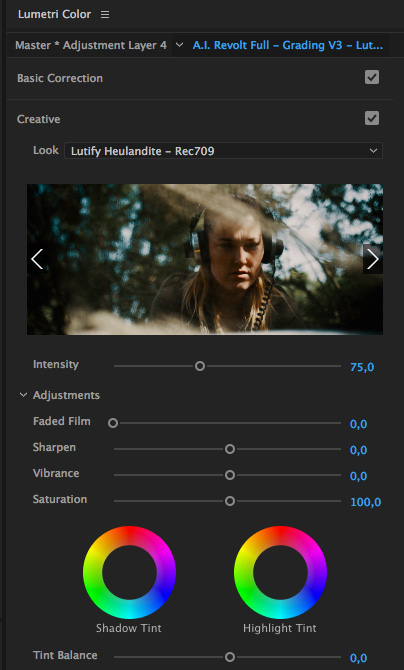
From here I needed to add some ‘feel’ to the image. This is where Lutify.me LUTs came in.
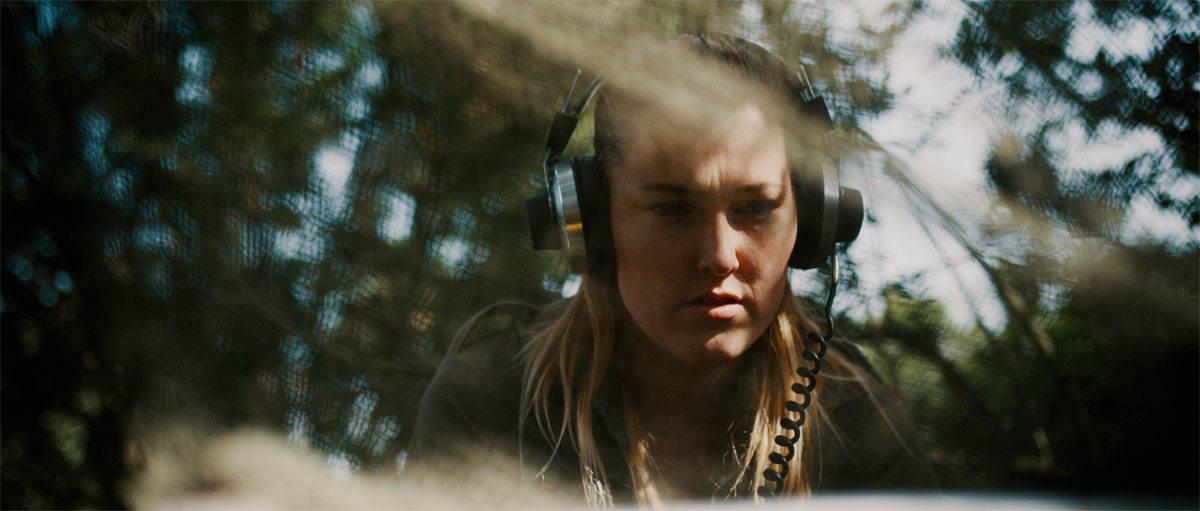
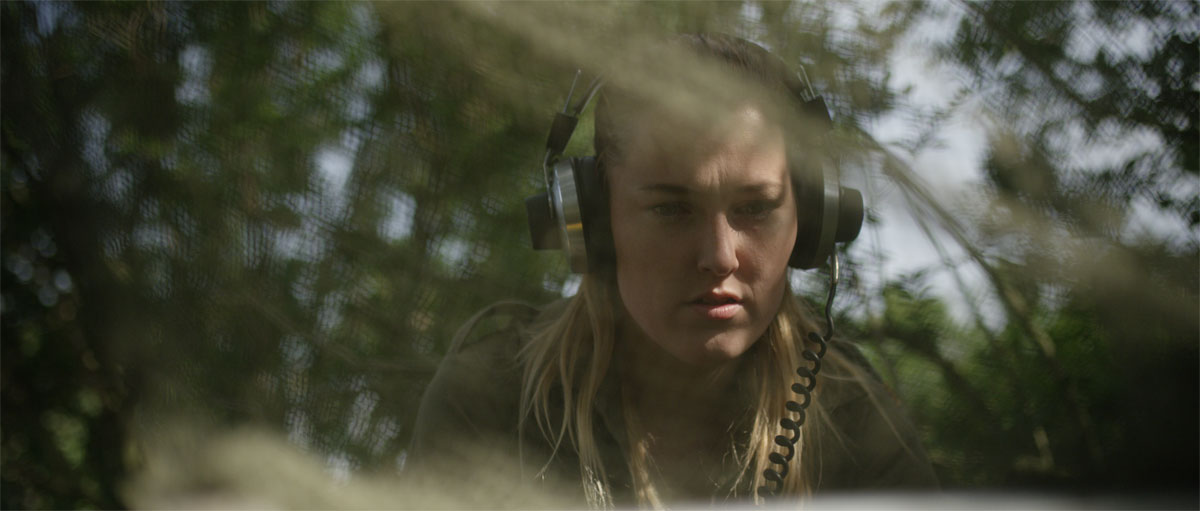
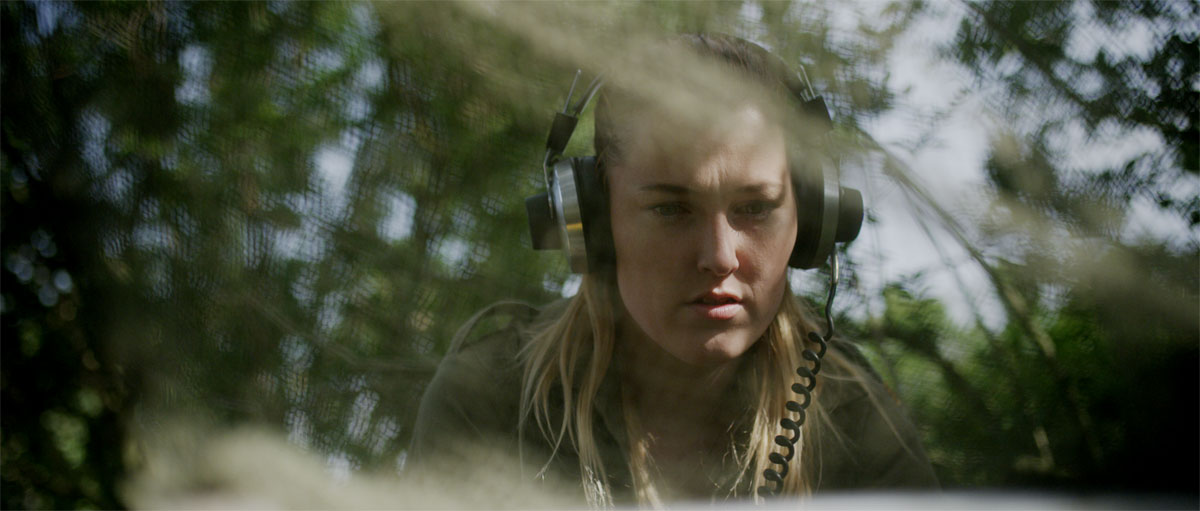
I found Heulandite the most suitable for the feel I wanted to get. At 100% it was a bit too much, but turning it down to 75% gave me just about sufficient feel. This scene is a part of the film where the actress is hiding, so I liked the general darkness of this shot.
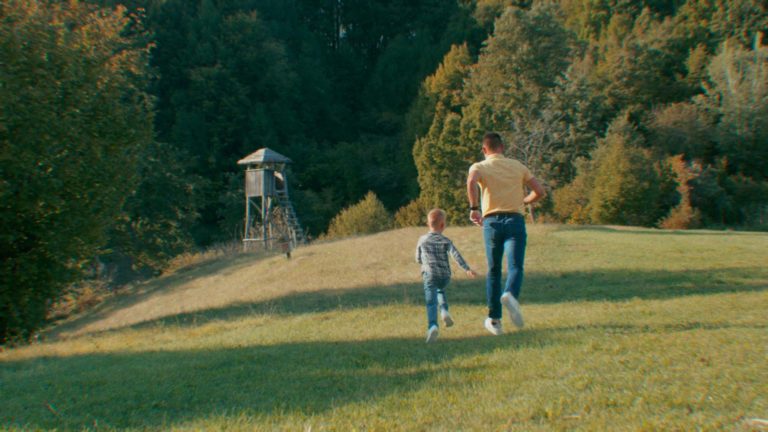
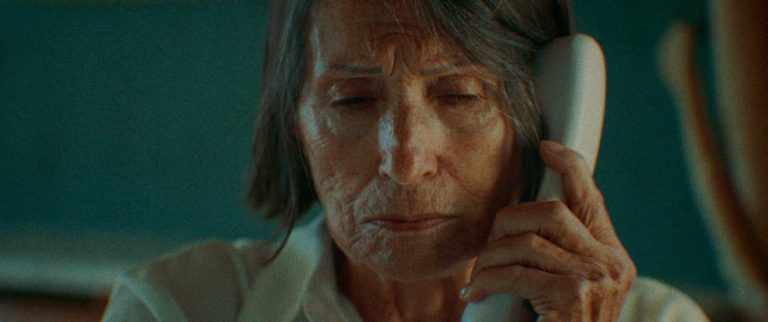
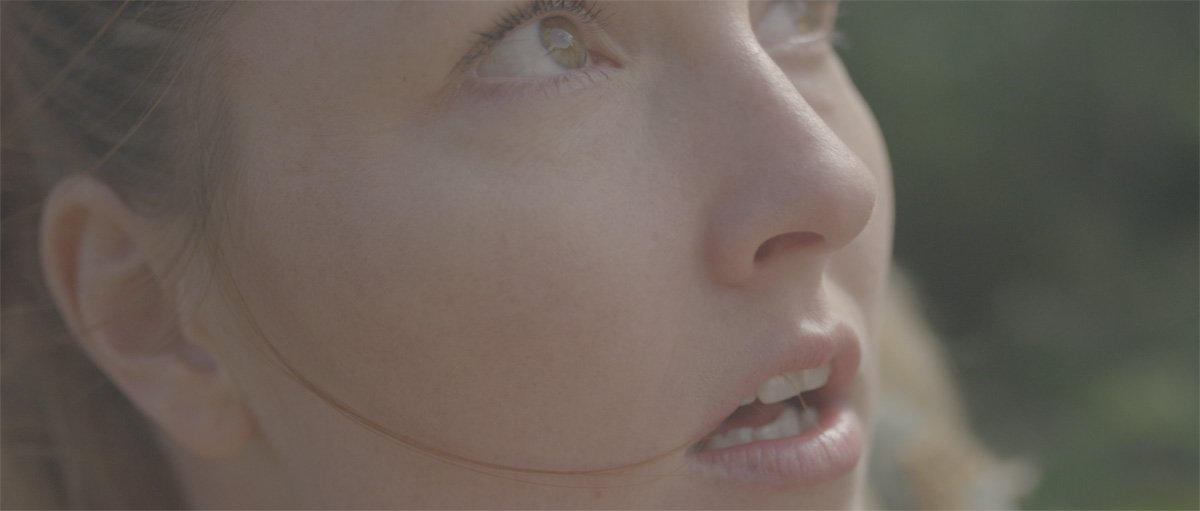
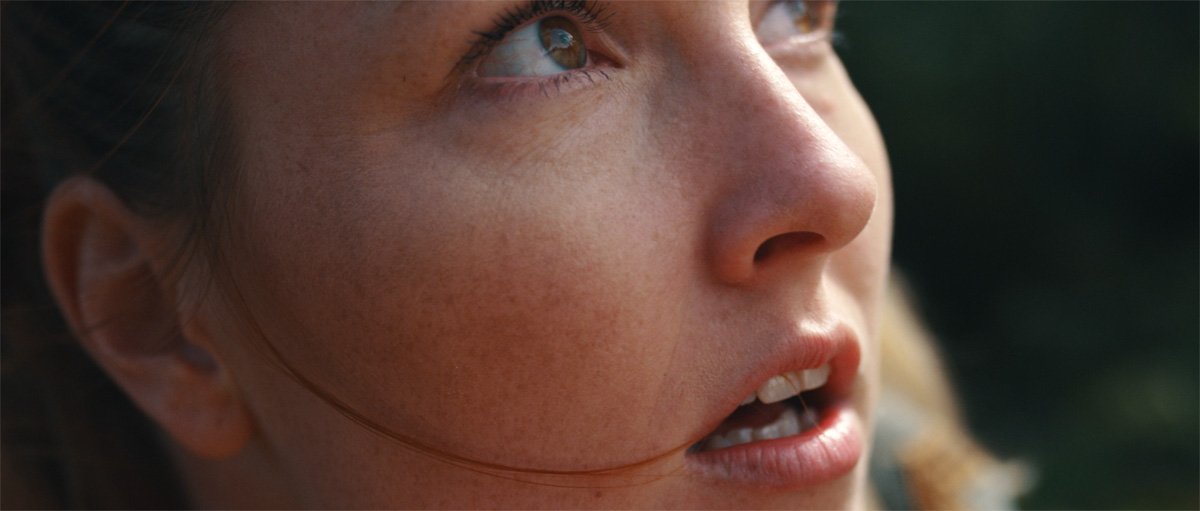
Here are some additional before and after shots:
To sum it up, I was very happy with the addition of Lutify.me. It gave me the possibility to add a feel to my liking.
Thank you Maarten for sharing this with us. It was a pleasure! Keep doing the excellent work that you’re doing. By the way, you can download Heulandite and 6 other LUTs for free.
For more of Maarten’s work visit his website.
Want to share your story with us? Shoot us an email.