Hey folks!
I’m particularly proud to be writing this post. I’m glad to announce that Lutify.me now offers all of our LUTs in a Capture One compatible format. You can now enjoy the best of both worlds – creativity of LUTs with the flexibility of Raw format.
Over the past few months we were working extremely hard to introduce LUTs for Capture One software. This wasn’t an easy task though. Capture One allows ICC profiles to be loaded and applied which could contain 3D LUTs. However, there’s no agreed upon standard on a way the LUTs are used within an ICC profile. This meant we had to adapt all of our LUTs to some extent to the way Capture One handles LUTs within ICC profiles. However, as Capture One allows only one ICC profile to be applied, we couldn’t simply load our (Capture One adapted) LUTs on top of already camera-specific ICC profiles.
If this was possible it would have been a perfect solution as the basic raw handling could be handled by cameras specific ICC profiles much like the log conversion is handled with a format specific log conversion LUTs as we have been doing from start. Separating the basic image handling from the creative look of the LUT is a best practice and we would have been happy to adopt it in this case as well.
As this wasn’t possible though, and it wasn’t feasible to create hundreds and possibly thousands of LUTs variations, each specific to a certain set of camera settings and picture profiles times 204 (the current number of LUTs in the Professional Package) we had to find a different solution. The solution we’ve come up with is finding a middle ground for basic raw handling. Kind of generic log settings.
This middle ground would have to work well enough with all camera formats and profiles supported by Capture One software.
Trust me, this wasn’t an easy task, but it’s a task I’m particularly proud of the outcome we’ve come with. What we have done is profile a large number of raw formats from different cameras and find the common ground for them all. Sounds impossible, but I think we’ve managed it.

#impossible
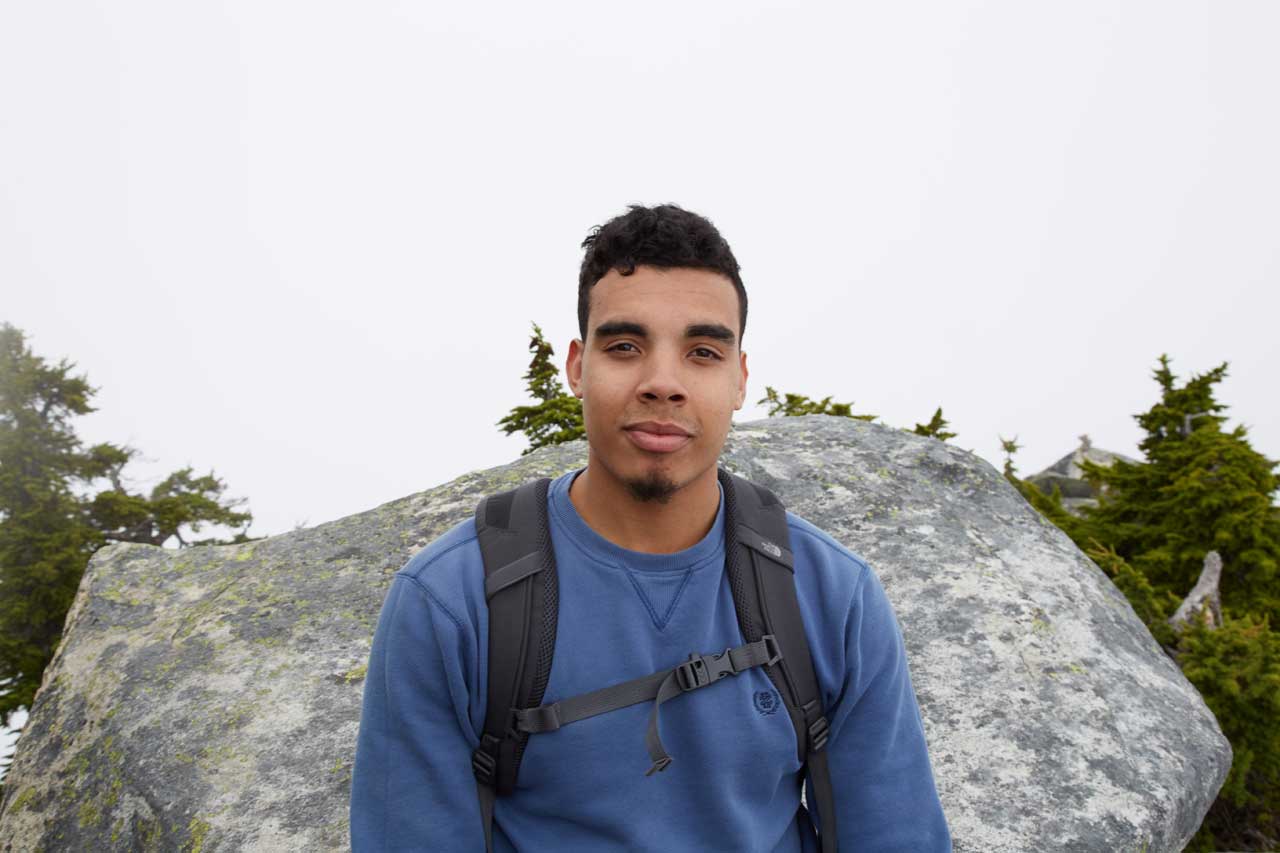
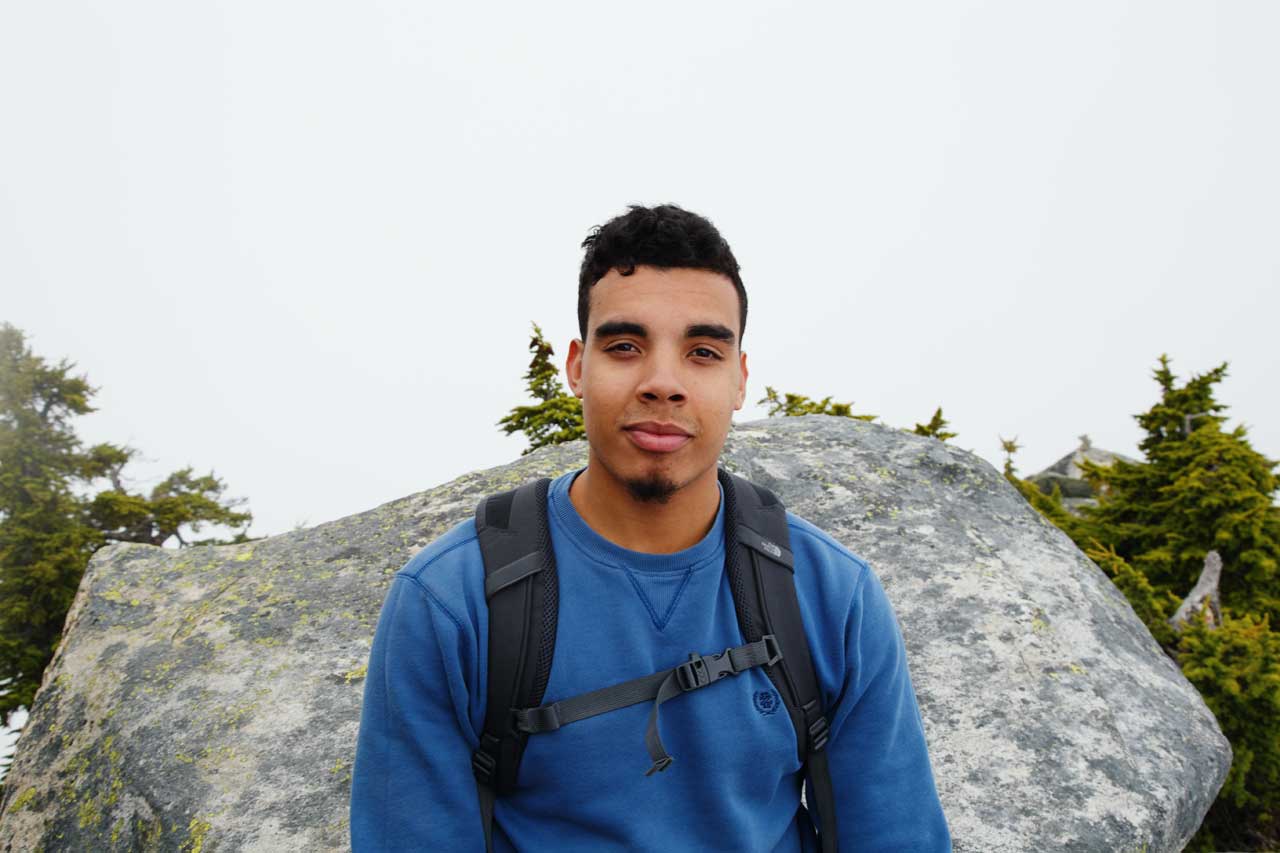
Allow me a few moments to demonstrate what this middle ground means with a quick demonstration. The following image was captured on Nikon D7100. The image was opened in Capture One with no adjustments to it whatsoever. The camera profile used in Capture One is ‘Nikon D7100 Generic V2’. This image was shot by Allison Fann and is taken from wesaturate.com.

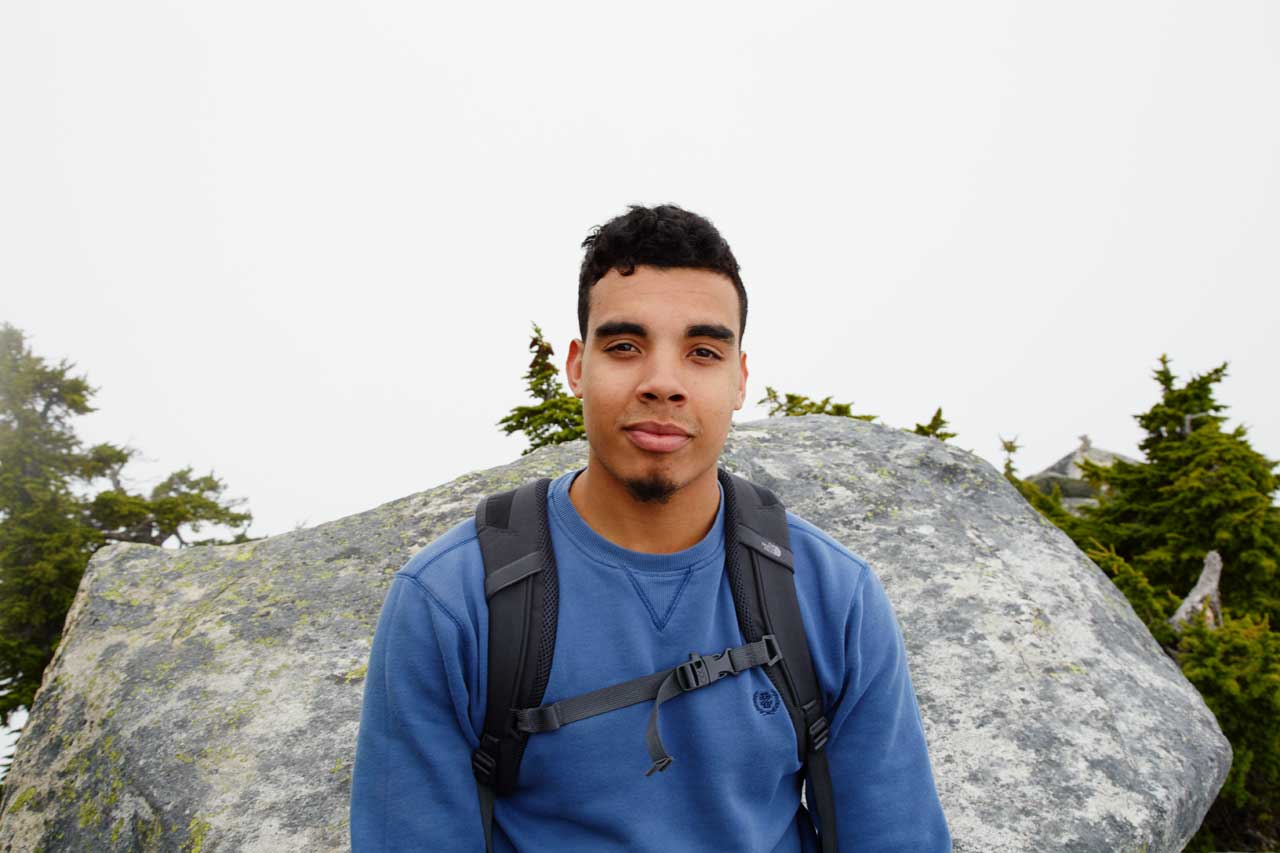
Here is the same image with Hasterion LUT applied to it in Photoshop on a direct export from previous image. Hasterion LUT is a LUT from the Contemporary Color Films category of the Professional Package and is inspired by Fuji Astia film stock.

Here is the same image with Hasterion LUT applied to it in Capture One, once again, no changes were done to the image apart from applying the LUT.

As the LUT is applied on top of our “middle ground”, which handles the basic raw adjustments, for most Nikon cameras we slightly need to lower the saturation of the LUT applied in Capture One. The reason for this is that our “middle ground” color primaries are slightly different from the ones in the Nikon ICC Profiles. They have to be, as this “middle ground” has to handle all camera formats supported by Capture One. After adjusting the saturation, we get the following result:

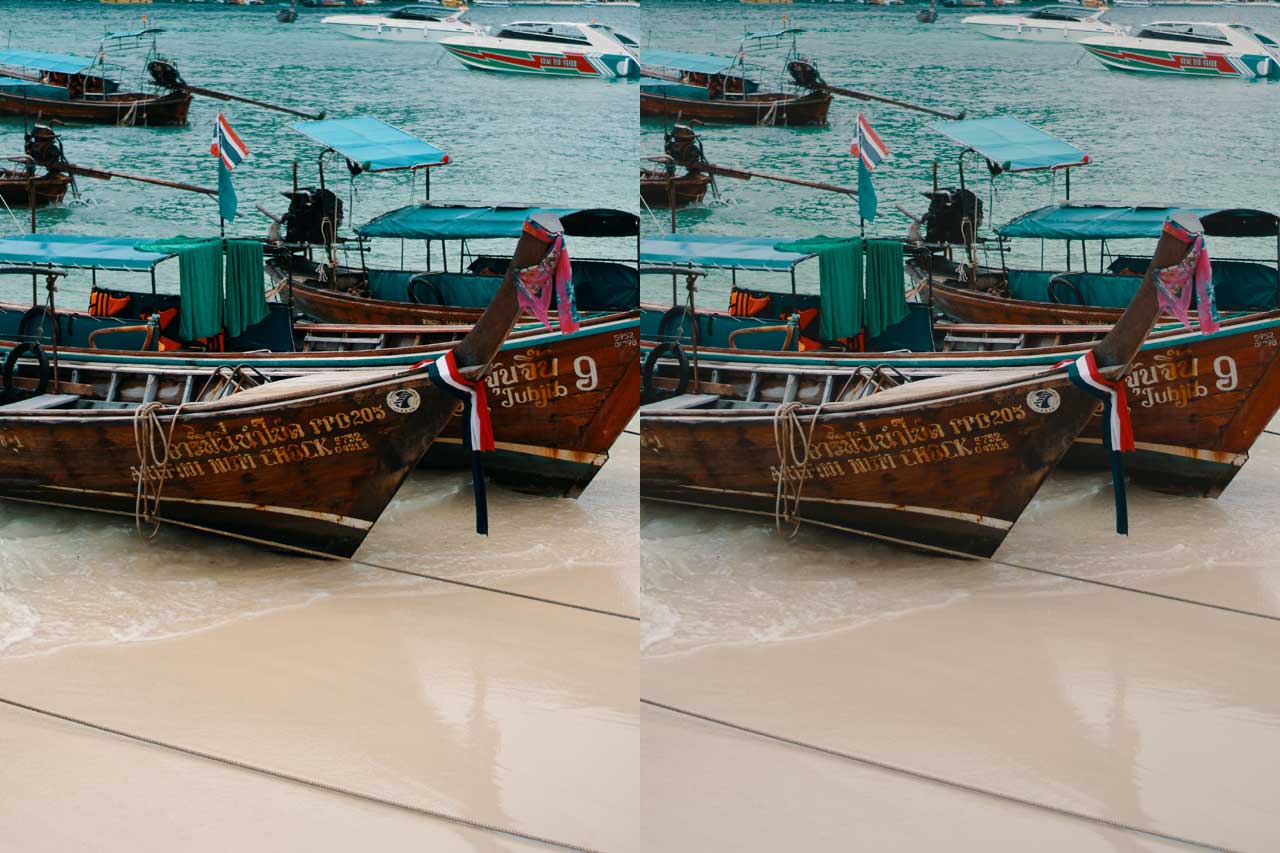
Here are the two images side by side. Generic D7100 profile in Capture One with Hasterion LUT in Photoshop on right and Hasterion LUT applied in Capture One on the left with slightly lowered saturation.

As you can see our base “middle ground” profile upon which Hasterion LUT is applied in Capture One matches pretty well the default Nikon D7100 Generic profile and the result nicely matches the Photoshop + Nikon D7100 Generic profile combo.
Let us have another look, this time at a photo taken by Canon 6D. We’ll be applying the same Hasterion LUT. Image by Gifton Okoronkwo from wesaturate.com. First, Canon EOS-6D Generic Profile.
Next, Hasterion LUT applied on top of that image in Photoshop.
Now, Hasterion LUT applied in Capture One, without any adjustments whatsoever.
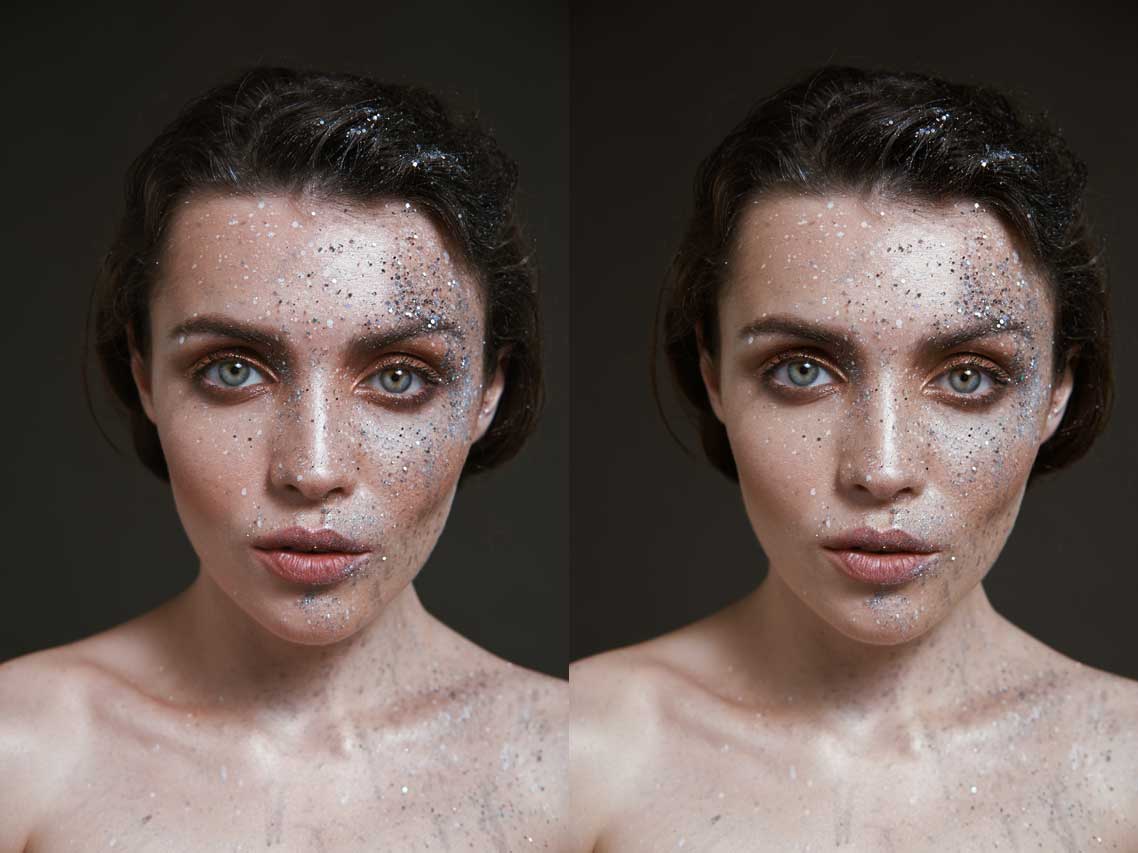
And finally side by side comparison. Capture One LUT on the left, Photoshop on the right.

There is a difference in highlights tint, but overall, the images match pretty well. Nothing a quick correction couldn’t solve. Let’s see some more side by side comparisons. Capture One LUT is always on the left and the Photoshop is on the right.
Sony A6500, Macrux LUT. Image by Milad Zolfaghari from wesaturate.com.
Fujifilm XT10, Dectra LUT. Image by Maksim Gladkiy from wesaturate.com.
Olympus E-M10, Merope LUT. Image by Broloss from wesaturate.com.
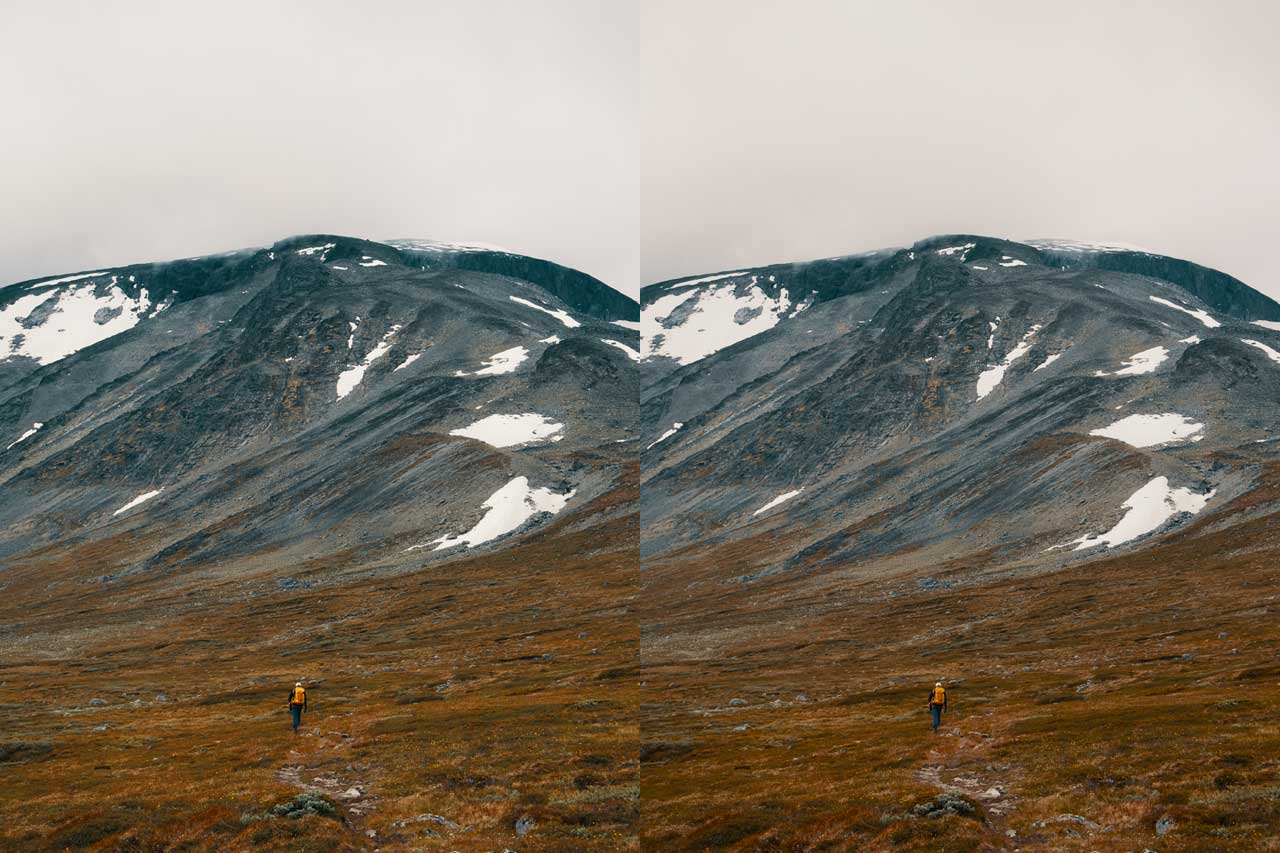
The most important aspect of creating this “middle ground” profile for us was making sure the skin tone is “right” and while there will be some differences between a LUT applied in Photoshop and LUT applied in Capture One, they should match fairly well.
So what’s the fuss about Capture One support?
You may be thinking “big deal, it’ just another supported software”. But you would be wrong. Very wrong. Unlike LUTs that work in Premiere Pro for example (which Adobe support out of the box) we had to build these LUTs from scratch in a format that would work with Capture One software so it was a great deal of work for us.
However, above all this is the first time ever LUTs can be used for raw photos!
This means you get to enjoy the best of both worlds. Creativity of LUTs with flexibility of the Raw format. You get creative looks, many of which are impossible to recreate with standard color tools available in Capture One and retain full raw editing capabilities. Highlight and shadows recovery, film grain, curves, levels, local adjustments and even healing clone options all work as usual. That’s what we call a game changer.
Moreover, all supported workflows by Capture One simply work. You can apply LUTs on import or use them for your tethered session. Impress your clients with creative colors during the shoot! You can apply one LUT to multiple images or use them to get a real time preview of the different looks. And since LUTs are applied as an ICC profile, which is basically a metadata, all edits are non-destructive.
This is a real game changer for stills photographers, but I think filmmakers will greatly benefit from this update as well. In my future blog posts I’ll focus on how filmmakers can benefit from this update as well.
I’m rather late to post this update, but for a good reason. We’re cooking new exciting features and products. Perhaps even more exciting than LUTs for Capture One. Shhhh… If you still haven’t got a chance to download the latest update from your account, go ahead and give them a try. They’re all shiny and new and waiting to be downloaded. LUTs for Capture One are offered in the Professional Package only.
We also offer 7 free LUTs for Capture One for you to try out, so go ahead and give them a try.
As always, should you have any questions please contact us.