Setting a correct white balance point for your footage is usually the very first step you should do on every shoot.
Get your white balance correct and you’ll have a nicely color balanced image across the entire range making it easier and faster to color grade. Set it wrong and your image will suffer from strong color tint, making it sometimes hard to fix and wasting a precious time on what should have been correct in first place.
If your camera has the option to shoot raw, your life is only that much easier as you can set the white balance after the shoot, but you still should get it correct in camera as often dailies are created without correcting the white balance and you don’t want your client seeing a footage with incorrect color balance.
As we discussed before, balancing your shot before color grading it and applying creative LUTs is extremely important. It’s the foundation for the color grade. But what do you do if the white balance is all wrong?
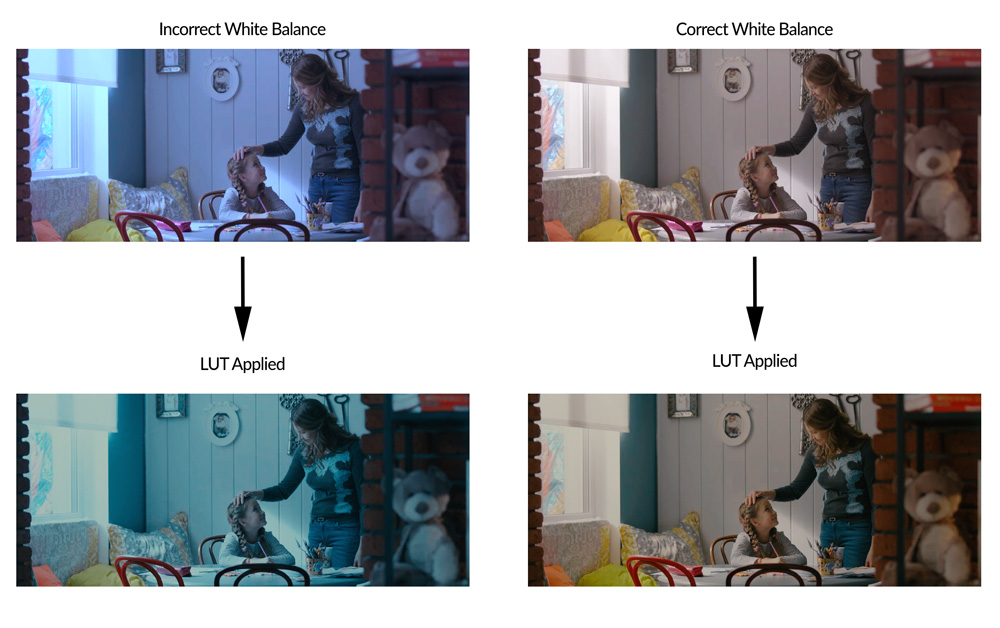
Well you correct it of course because otherwise it would be impossible to color grade your footage and if you’re using LUTs as a part of your color grading process, you would get unexpected results. Too often I’ve seen filmmakers struggling with correcting the white balance of their footage.
The amount of color tint in shadows is different, at least visually, form the amount of tint in mid tones and highlights and it requires a different amount of correction.
Getting this right, can be often tricky and always time consuming.
Enter white balance correction LUTs.
We’ve created a set of 20 white balance correction LUTs that will help you correct just about any white balance color shift and save you a precious time and effort correcting incorrect white balance. The best thing is, we’re giving these away completely free. No registration required, no email form. Just download the LUTs at the bottom of this post and start using them. These will complement nicely the free color grading LUTs we offer.
All LUTs have self explanatory names that will help you match different lighting sources but before we examine the LUTs, lets quickly cover the terms CTO and CTB as these are important in understanding the color correction values.
In case you’re not familiar with the CTO and CTB values, these relate to transparent color gels used for correcting the white point of a light source.
Back in the film days, there were basically two type of film stock – daylight balanced and tungsten balanced. Since setting the white balance was not possible on film cameras there were two options – either use the correct film stock for the type of lighting or correct the light source to match the balance of the film stock.
In practice, almost always there would be a mix of lighting sources on set and that meant you would have to correct the lighting sources to match and give a nicely balanced result. This is very much true today as well.
There are three main types of color correcting gel filters:
CTB (Color Temperature Blue). A CTB gel converts tungsten light to ‘daylight’ color.
CTO (Color Temperature Orange). A CTO gel converts ‘daylight’ light into tungsten color.
Different manufacturers’ gels yield slightly different colors. As well, there is no precise definition of the color of daylight since it varies depending on the location (latitude, dust, pollution) and the time of day.
Third type of gel filters are gels that remove the green cast of fluorescent lights and are called minus green. Gels that add a green cast are called plus green.
Fractions such as 3/4, 1/2, 1/4, and 1/8 indicate the strength of a gel. A 1/2 CTO gel is half the strength of a (full) CTO gel. A value of 1.00 means full, while a value of 0.34 means a third.
So let’s examine the white balance correction LUTs. Here’s an example of a LUT’s name:
3200 Kelvin – 5500 Kelvin – 1.00 CTO.cube
This LUT will help you balance a footage that was shot with Daylight balanced (5500 Kelvin) light source, but the white balance was incorrectly set to 3200 Kelvin during the shoot. Note the full 1.00 CTO (Color Temperature Orange) value in the name. This should have been the correction on the light source if it was to match the white balance on the camera (or better yet a Tungsten balanced film stock). In our case since the image was shot with a 5500 Kelvin light source but the white balance was set to 3200 Kelvin, we get an image with a blue tint and therefore we need a gel filter with CTO value to correct this tint.
Let’s have a look at another example.
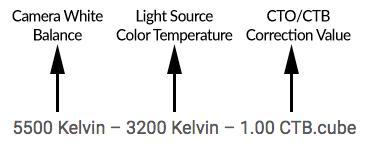
5500 Kelvin – 3200 Kelvin – 1.00 CTB.cube
Here we have the exact opposite. The footage was shot with a Tungsten (3200 Kelvin) light source but the white balance was set to 5500 Kelvin, resulting in warm orange tint. Once again, if we were to correct the light source to match the white balance during the shoot (or better yet a Daylight balanced film stock) we would use a CTB (Color Temperature Blue) gel filter to correct for the too warm tint.
So LUTs naming structure is as following:
Use this naming convention in deciding which white balance correction LUT you should use.
Here we have an image shot with a daylight balanced light source and correctly set white balance in camera.
Here is the same image, with incorrectly set white balance of 3200 Kelvin resulting in an image with a blue tint. Since this was shot in raw, it was possible for demonstration purposes to set incorrect white balance.
And here is the previous image (the blue one) corrected with the 3200 Kelvin – 5500 Kelvin – 1.00 CTO LUT.
In case you want to compare the correctly white balanced image (the first one) with the LUT corrected one (third image), here’s a before and after. On the right we have the corrected image.
[twentytwenty]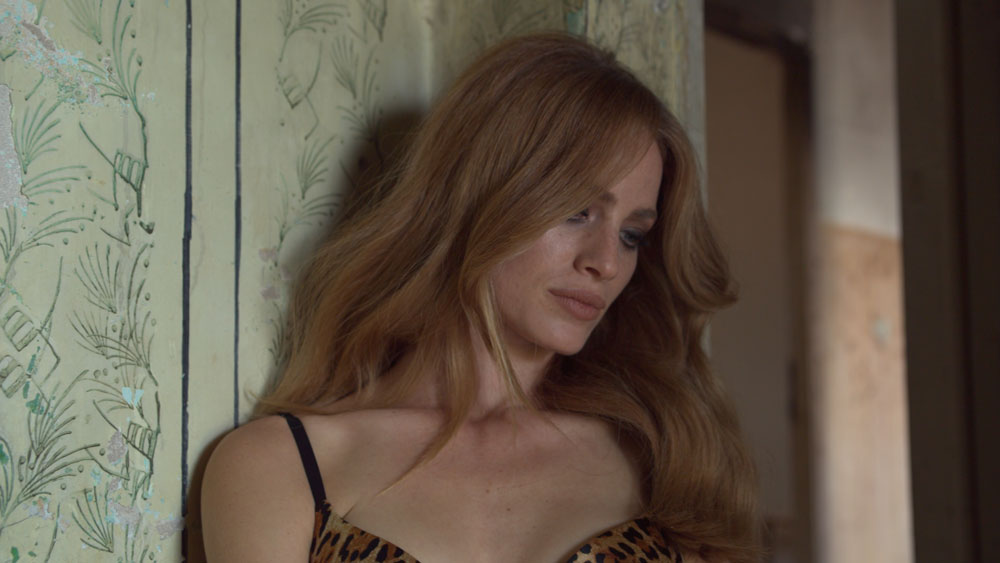
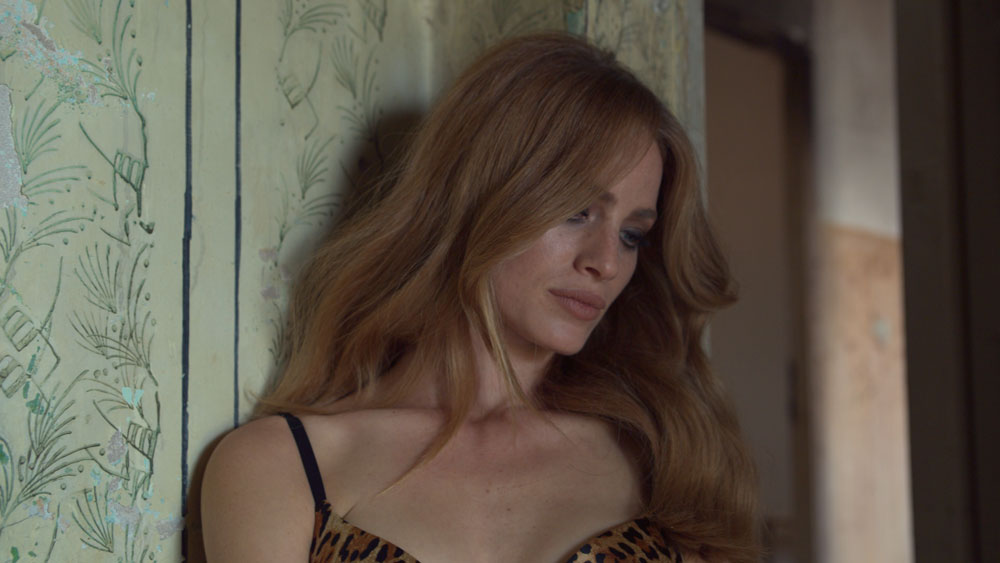
Goes long way for one click. Doesn’t it?
As I mentioned earlier, we offer 20 white balance correction LUTs with these white balance values 2800, 3200, 4300, 5500 and 6500 Kelvin allowing you to cross-correct just about any lighting-white balance error you may encounter.
Please bear in mind these LUTs expect normalised or log-corrected image to work properly. If your footage is of log type your should normalise it prior to applying one of the white balance correction LUTs.
The easiest way to accomplish this would be using one of our Log conversion LUTs from any of our paid packages.
License
These LUTs are offered under the Creative Commons Attribution-ShareAlike 4.0 International License. Please respect this license so we can continue to offer these downloads for free.
This means you are free to:
Share – copy and redistribute the material in any medium or format
Adapt – remix, transform, and build upon the material
for any purpose, even commercially.
Under the following terms:
Attribution – You must give appropriate credit, provide a link to the license, and indicate if changes were made. You may do so in any reasonable manner, but not in any way that suggests the licensor endorses you or your use.
ShareAlike – If you remix, transform, or build upon the material, you must distribute your contributions under the same license as the original.
No additional restrictions — You may not apply legal terms or technological measures that legally restrict others from doing anything the license permits.
Please note this is a human-readable summary of (and not a substitute for) the license.
Download
To download these free white balance correction LUTs please use the following link:
Download: Free White Balance Correction LUTs
If you’re linking to this download from your website, please don’t link directly to the download link but instead link to this page. Thank you for understanding.
Download for our customers
All our customers can download the updated LUTs color grading packages from their ‘My Account‘ section of our website.
Professional, Standard and Basic LUTs color grading packages versions were bumped to 2.0.2. You will find the new LUTs inside the Utility LUTs folder inside your package.
As always, should you have any questions please contact us.
I’d love to hear from you in comments below what you think of these white balance correction LUTs.

