Hey folks!
Today we are releasing an update 2.0.4 for all color grading LUTs packages. The update is already available for download inside My Account.
This was second most requested feature, so we delivered. We are releasing monitoring LUTs in the form of Arri Look Files for the range of supported Alexa/Amira cameras.
From today on, you can monitor on set using any of our LUTs in real time with a range of supported Alexa/Amira cameras.
You’ll find the monitoring LUTs in the ‘Monitoring LUTs’ sub folder of the ‘Utility LUTs’ directory inside your color grading package.
Please note however, these LUTs are intended for monitoring purposes only with the line of supported Alexa/Amira cameras and should be used accordingly. For all your color grading needs please use our regular LUTs.
How do I load monitoring LUTs to my camera?
First consult your camera documentation in regards to support of loading Arri Look files. Not all cameras in the Arri range support live monitoring using LUTs, so make sure your camera does before trying the following procedure. We’ll demonstrate the procedure of loading monitoring LUTs on the Arri Alexa Mini.
First make sure that the USB thumb drive that came with your camera is ready for use. The folder structure on the thumb drive should look similar to the following image. Please note, the folder structure tree is expanded in this picture on a Mac OS X.
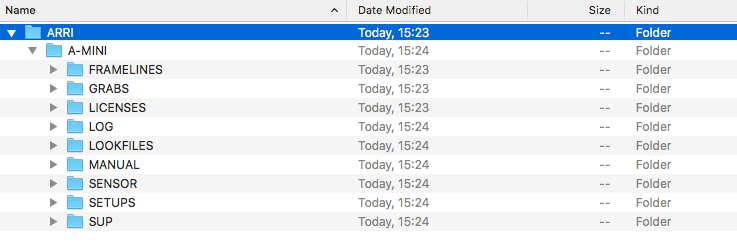
If your folder structure differs or if your thumb drive is empty you’ll have to format it in camera.
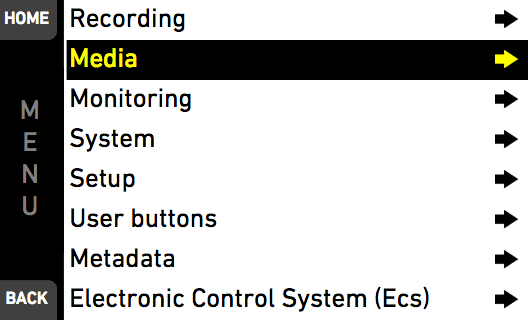
In order to format the USB thumb drive, place it in the slot behind the rear door underneath the CFast 2.0 card slot (in case of Alexa Mini). In the camera’s menu, navigate to Menu > Media > Prepare USB medium and select Confirm.
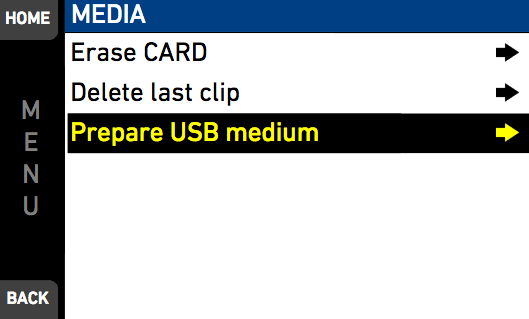
You should see a message that the folder structure was created successfully.
We are now ready to copy the Arri Look files from your Lutify.me package to the USB thumb drive. Please note that the name of the Arri Look file including the .aml file extension cannot be longer than 28 characters. If you haven’t renamed any of our Arri Look files you’re good to go. In case you have renamed the files, make sure that their names are less than 28 characters.
Connect the drive to your computer and copy the Arri Look files into the following folder (in case of Alexa Mini):
ARRI > A-MINI > LOOKFILES
Once copied, eject the drive, and connect it to the camera.
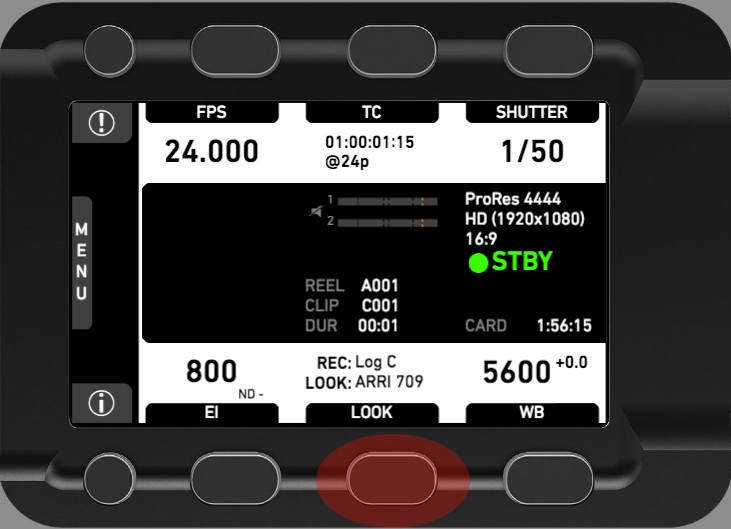
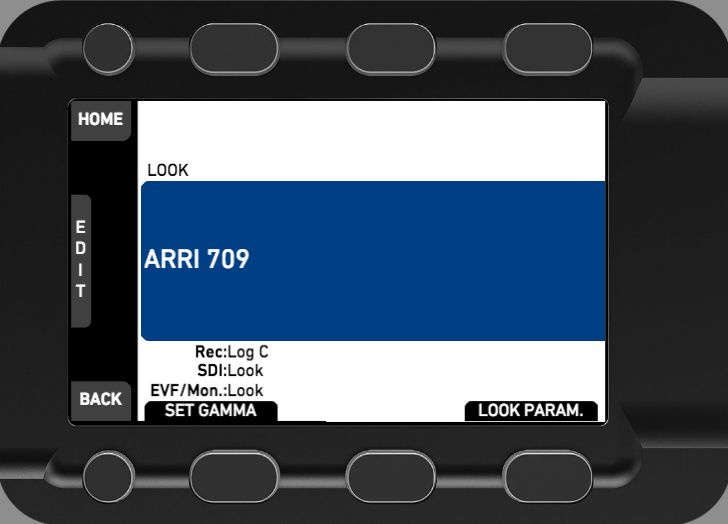
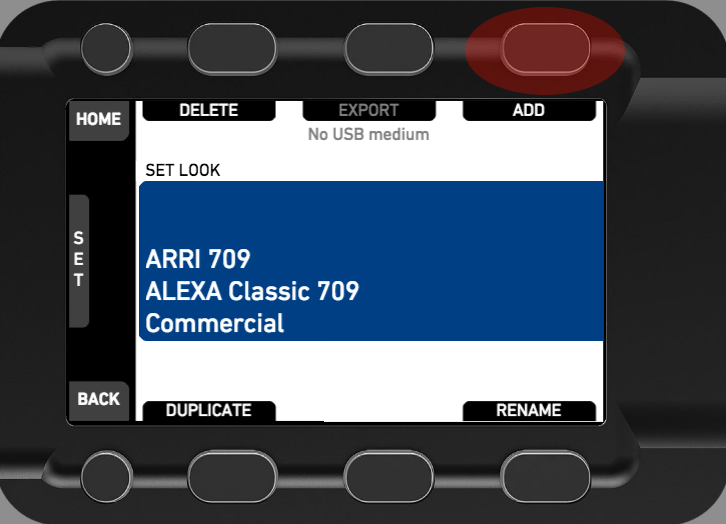
To load your custom look file and set it as the active look, which can be applied to any of the “Rec” (internal recording), “SDI” (monitor out) or “EVF/Mon.” (the camera’s eyepiece and flip-out LCD monitor) signal paths, on the camera’s flip out menu interface, do the following:
Look > Edit > Add > Select > Back > Set
Next, assign the current loaded Look to the EVF/Mon option, if it isn’t already, in order to see your custom look in the camera’s EVF (or on the SDI monitor out if you are using a monitor connected via SDI).
If the Look file you are loading isn’t a drastic change from the regular Rec.709 image it may be hard to see the difference. We suggest first trying the procedure with a drastic Look file so the change in the EVF and SDI monitor is evident (to be sure you have loaded the Look file correctly) and than repeating the procedure for the Look file you would actually like to monitor with.
You can download the updated 3D LUTs packages from the My Account section of our website.
As always, should you have any questions please contact us.