Introduction
Tethered sessions allow you to connect your digital camera with Capture One software for direct image capturing into the software. Tethered sessions are fully supported by our LUTs.
Solution
Please follow these steps to use LUTs in a tethered session.
Step 1
Connect your camera as you normally would.
Step 2
Once your camera is connected go to Capture tab.
Step 3
Shoot the first image. Adjust white balance, contrast, exposure, etc.
Step 4
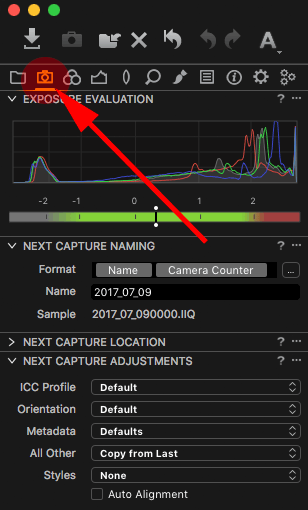
In the Capture tab, under Next Capture Adjustments select the following:
- ICC Profile – Default (Once the LUT is selected under Styles setting, this setting will change to Controlled by Style)
- Orientation – Default
- Metadata – Defaults
- All Other – Copy from Last
- Styles – Select the desired LUT from your package. Before selecting the LUT you will have to install the LUTs into Capture One.
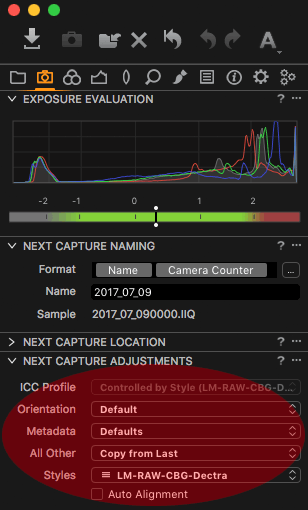
Please note settings 4 and 5 in this step are most important. Setting No. 4 will copy all your adjustments from previous photo to following captures so your white balance, exposure and contrast edits are preserved for following shots. As long as your shooting conditions haven’t changed you should be copying the settings from previous capture. Setting No. 5 will apply the appropriate LUT from your package.
Step 5
Further adjust white balance, exposure and contrast if necessary.
Step 6
If you change your shooting conditions, adjust the white balance, exposure and contrast to match the new conditions and continue with your session. As long as Copy from Last setting is set, the new edits will carry through to the next capture.