Introduction
In order to be able to easily change the strength/opacity of the 3D LUTs in Premiere Pro you should apply them to Adjustment Layers. First, learn how to apply a 3D LUT in Premiere Pro, by visiting the “How do I apply 3D LUTs in Adobe Premiere Pro” document. In this document, we’ll explain how to create adjustment layers and how to reduce/increase their strength/opacity.
Reducing the strength/opacity of a 3D LUT
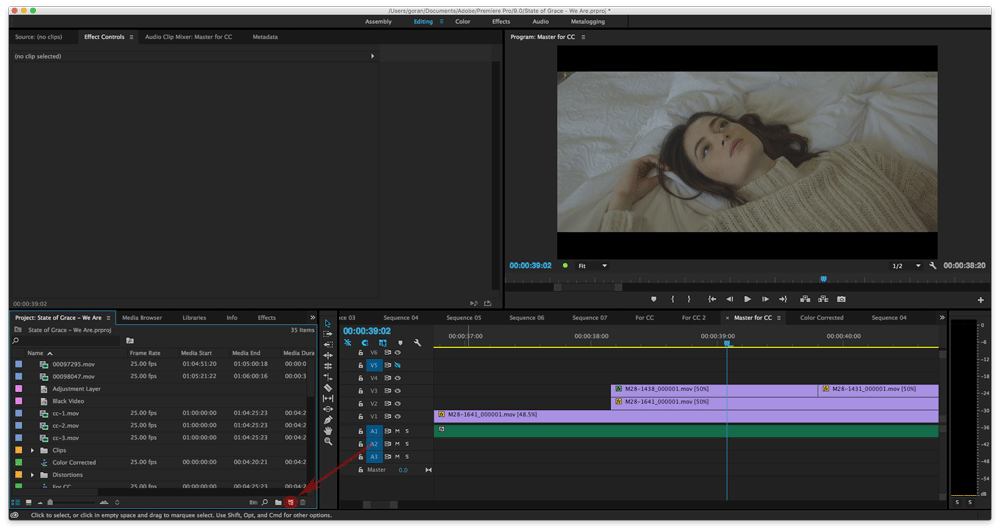
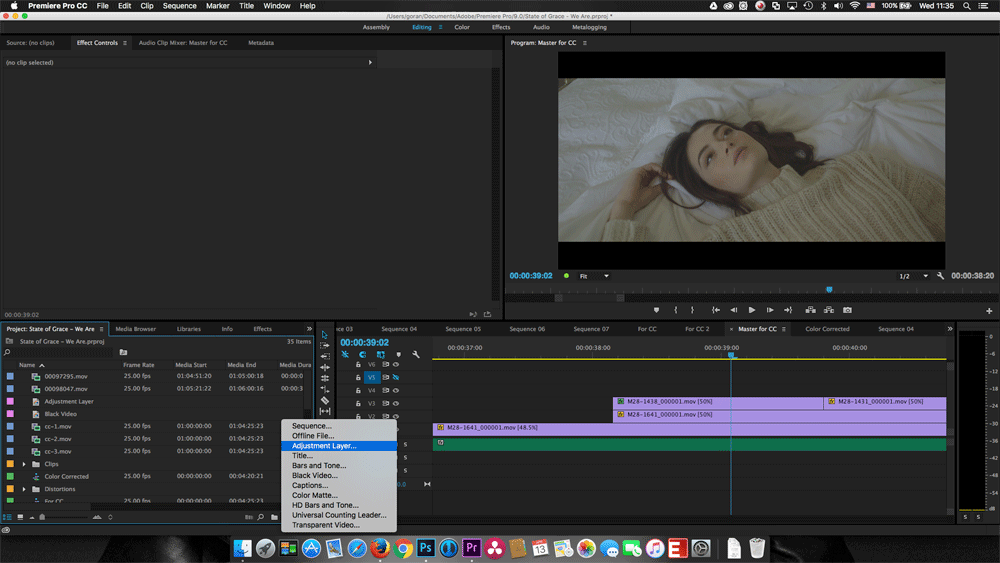
1. Create an Adjustment Layer by clicking on the New Item button and then choose Adjustment Layer.
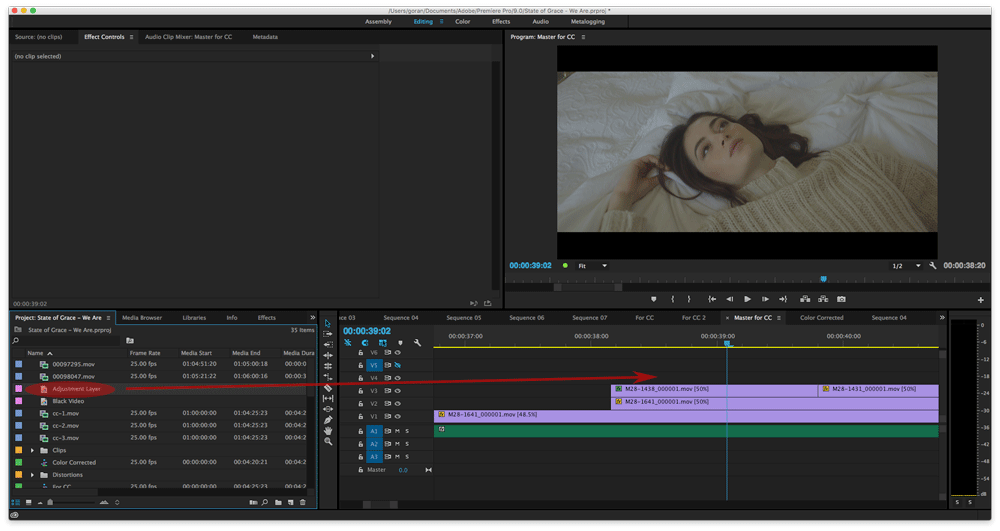
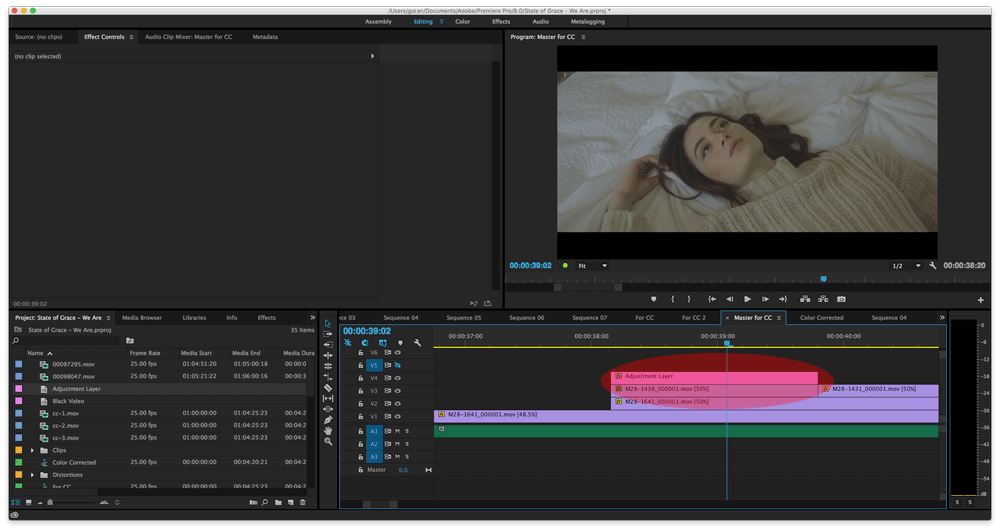
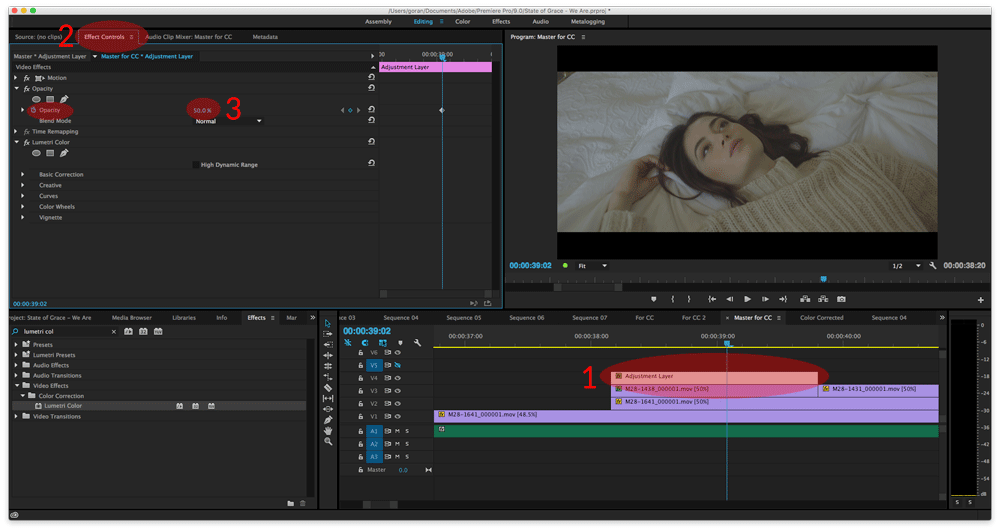
2. Drag your newly created adjustment layer and position it above your clip. Adjust its length so it affects the clip you’d like to color grade. Please note that adjustment layers will affect anything below them, so make sure your adjustment layer covers only the required clip/clips.
3. Apply the 3D LUT to the adjustment layer
4. Select the adjustment layer on timeline, go to Effect Controls and change the opacity of the adjustment layer.
5. You’ve reduced your 3D LUT opacity.
Increasing the strength/opacity of a 3D LUT
1. Create an Adjustment Layer by clicking on the New Item button and then choose Adjustment Layer.
2. Drag your newly created adjustment layer and position it above your clip. Adjust its length so it affects the clip you’d like to color grade. Please note that adjustment layers will affect anything below them, so make sure your adjustment layer covers only the required clip/clips.
3. Apply the 3D LUT to the adjustment layer
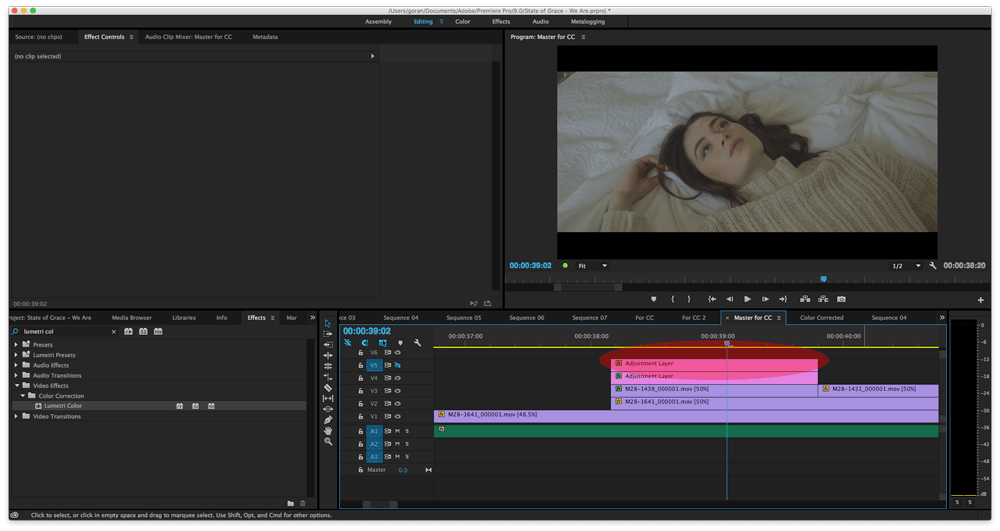
4. Create another adjustment layer, position it above the current one and apply the same 3D LUT to it.
5. Go to Effect Controls and change the opacity of the second adjustment layer if the effects is too strong.
6. If you wish to push the effect even further, you may create additional adjustment layers to further increase the effect 3D LUT has.
7. You’ve increased your 3D LUT opacity.
Please note, in Adobe Premiere Pro CC 2015 you can change the strength of the LUTs by changing the value under Intensity in either Color Interface Tab or under Effects Control.

