Introduction
Adobe Photoshop CS6 or higher supports the use of 3D LUTs. If you have a version prior to CS6 consider upgrading to a newer version.
Applying a 3D LUT in Adobe Photoshop
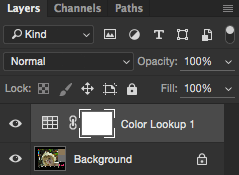
1. Make sure your Layers panel is visible
Make sure your Layers panel is visible by going to Window > Layers. If there’s a check mark next to Layers, go to step 2. If not, click on Layers to make the Layers panel visible.

2. Create a new Color Lookup Adjustment Layer
Click on the New Adjustment Layer button and choose Color Lookup.
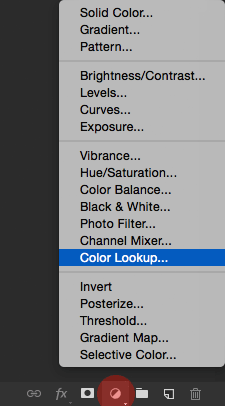
This will create a new Color Lookup adjustment layer that will allow you to apply a 3D LUT to your image.
3. Double click the Load 3D LUT option inside the Properties window
Click the Load 3D LUT… option to open the drop-down menu and click it once again to open a dialog box that lets you choose a 3D LUT to apply to your image
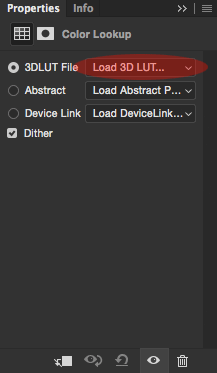
4. Select the appropriate 3D LUT
Navigate to your Lutify.me 3D LUTs package folder and choose the appropriate 3D LUT to apply to your image.
5. Repeat the process for more LUTs
Should you wish to apply more 3D LUTs, repeat steps 2-4.
Since 3D LUTs are applied in adjustment layers you can treat them just as any other adjustment layer. This means you can change their blending mode or change their opacity. Please refer to this document to learn how to change Color Lookup adjustment layer opacity or blending mode.