Introduction
In order to use 3D LUTs in Davinci Resolve, they must be first placed in the 3D LUTs folder inside Davinci Resolve.
There are two ways to accomplish this:
1. Manually copy the 3D LUTs into the specified location
2. Copy the 3D LUTs from within Davinci Resolve
Manually copying the 3D LUTs into DaVinci Resolve
In order for DaVinci Resolve to recognise the 3D LUTs they should be placed into the following folder:
Mac
Macintosh HD > Library > Application Support > Blackmagic Design > DaVinci Resolve > LUT
You can copy the 3D LUTs there as a folder or you can copy individual 3D LUTs.
Windows
C: > Program Data > Blackmagic Design > DaVinci Resolve > Support > LUT
You can copy the 3D LUTs there as a folder or you can copy individual 3D LUTs.
Please note that the above folder may be invisible by default on your version of Windows. In order to find out how to show invisible folders please consult this Microsoft support document.
Copying the 3D LUTs from within DaVinci Resolve
A much simpler and easier way is to copy the 3D LUTs into the specified folder from within DaVinci Resolve. Please follow the following steps:
1. Launch DaVinci Resolve
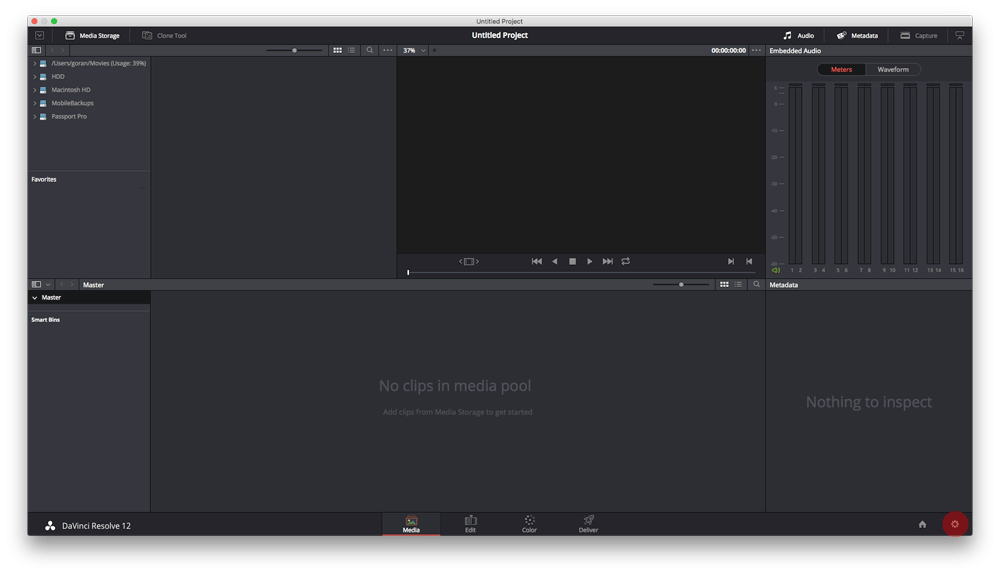
2. After the software has launched start a new project or open existing one and than click on settings icon in the lower right corner (lower left in previous DaVinci Resolve versions)
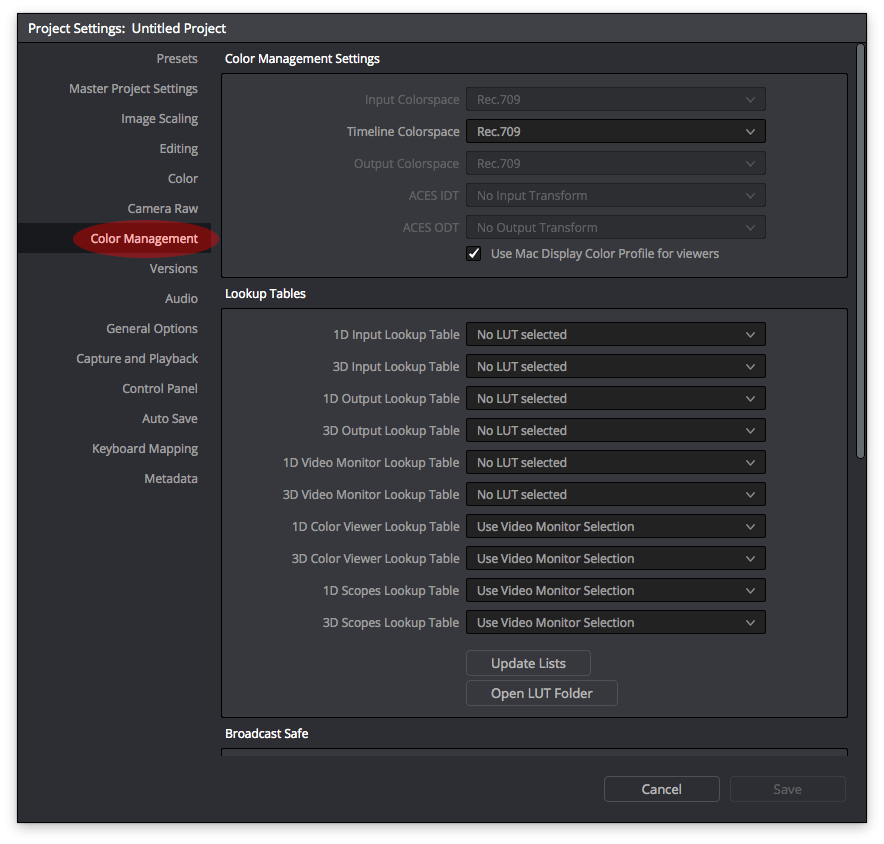
3. Once inside the settings panel, click on Color Management on the left.
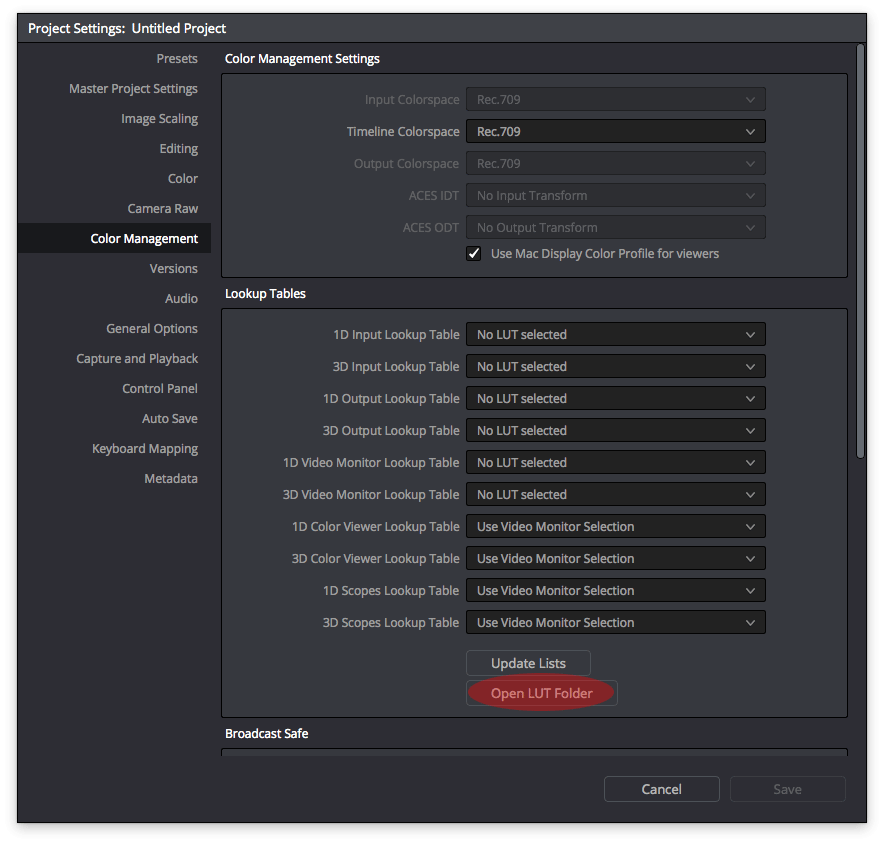
4. Than, click on Open LUT Folder
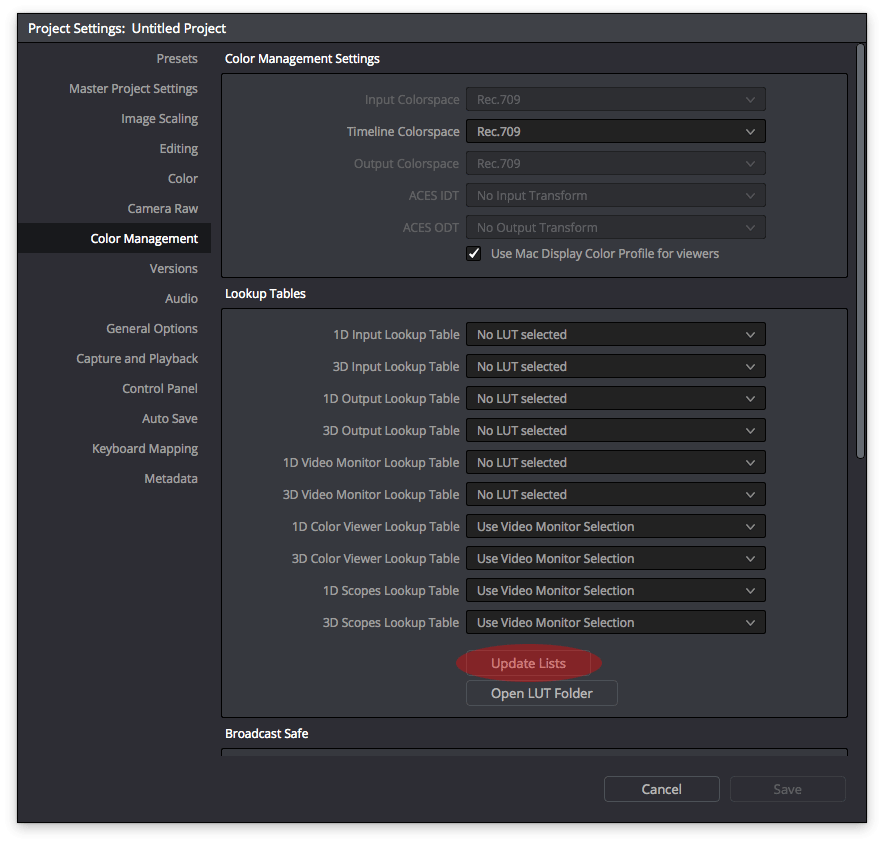
5. This will open the LUT folder into which you should copy the 3D LUTs. You can copy the 3D LUTs there as a folder or you can copy individual 3D LUTs. Once finished copying, click on Update Lists.
6. Once in place your 3D LUTs are ready to be used.
Using 3D LUTs in DaVinci Resolve
There are many ways to apply the 3D LUTs to footage inside DaVinci Resolve. For simplicity reasons we’ll demonstrate two:
1. Applying the 3D LUT to a node
2. Applying the 3D LUT to a clip’s thumbnail
Please follow these steps to apply a 3D LUT to a clip in DaVinci Resolve:
1. Launch the Software
2. Create a project or open an existing one
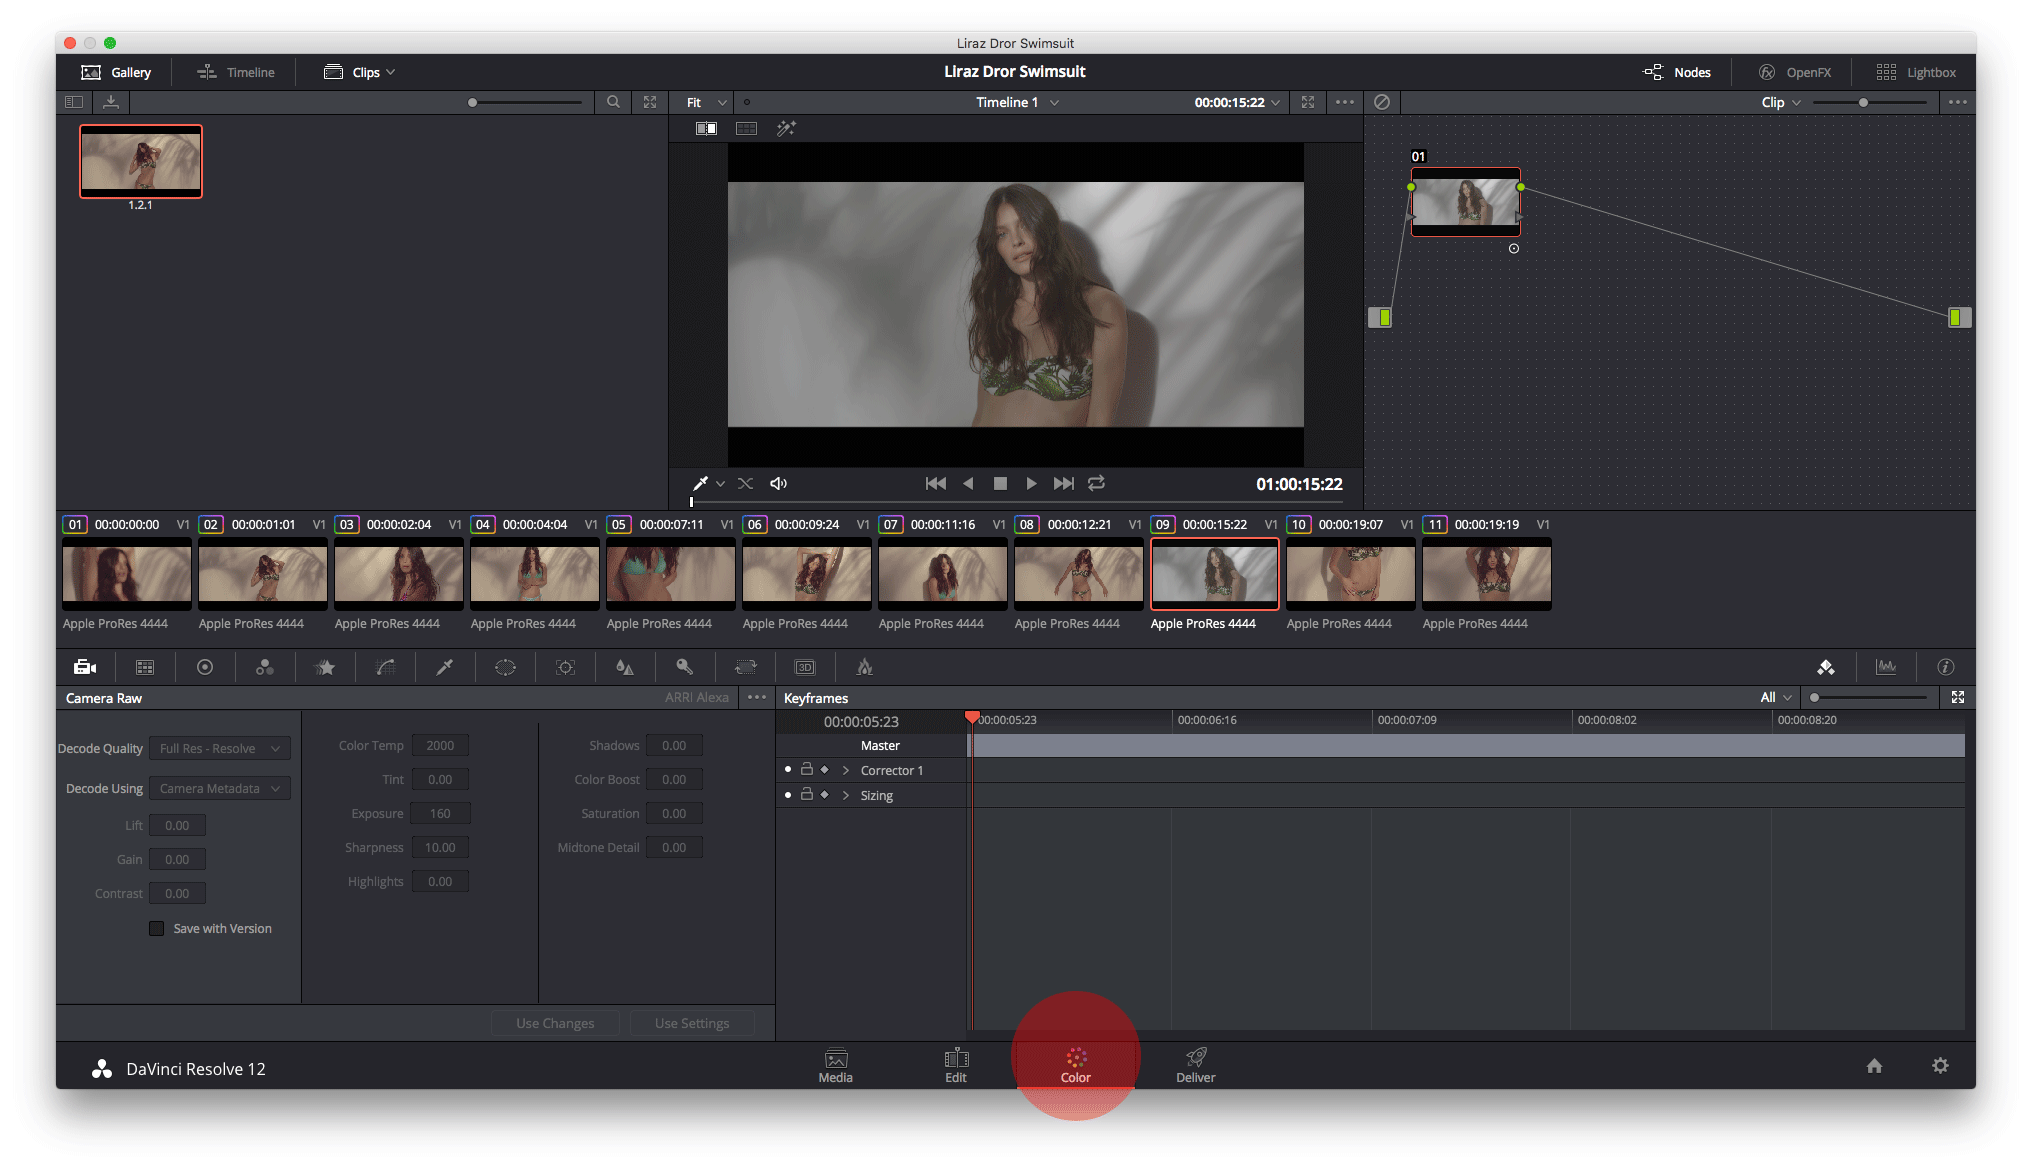
3. Inside the main software window, go the the Color tab at the bottom.
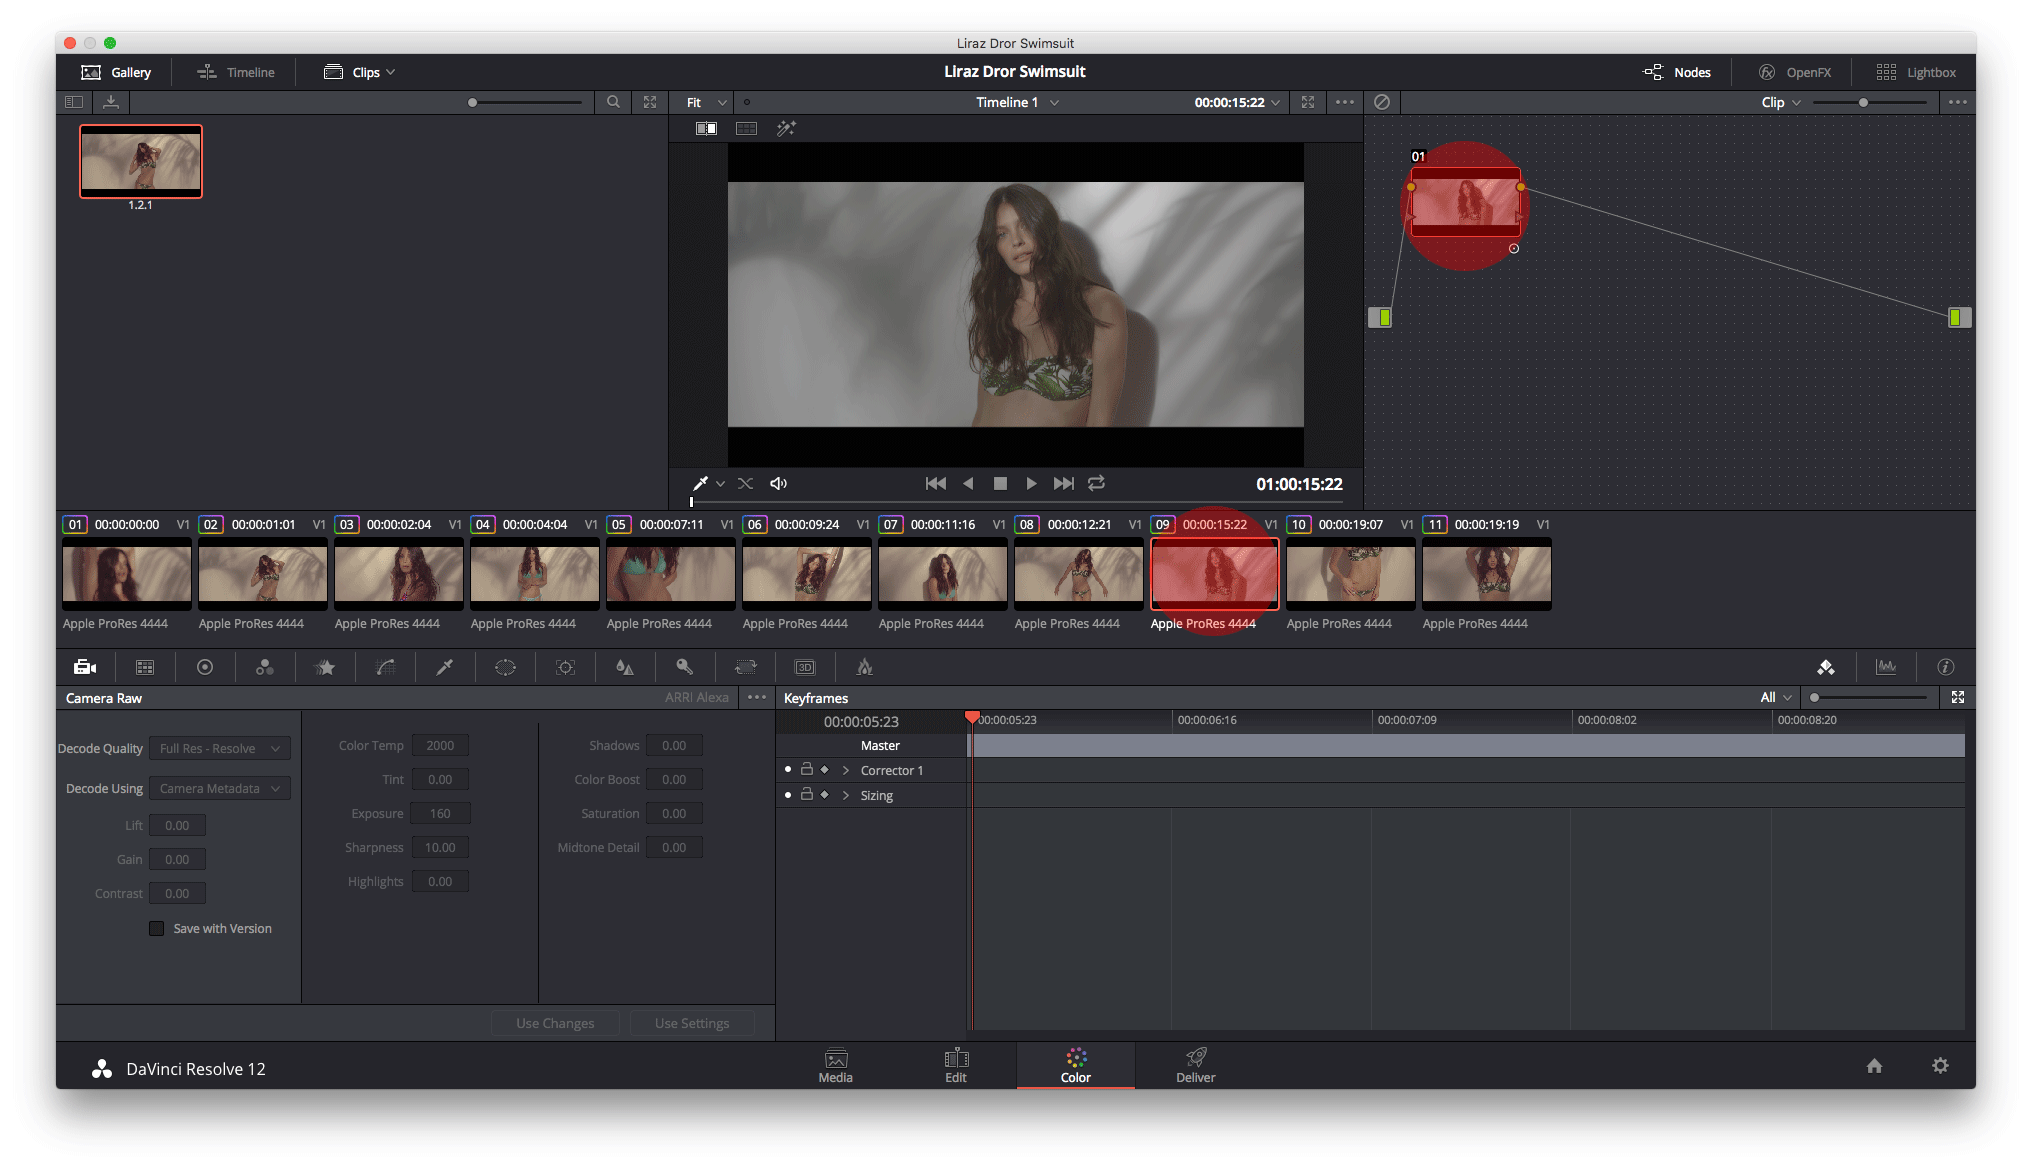
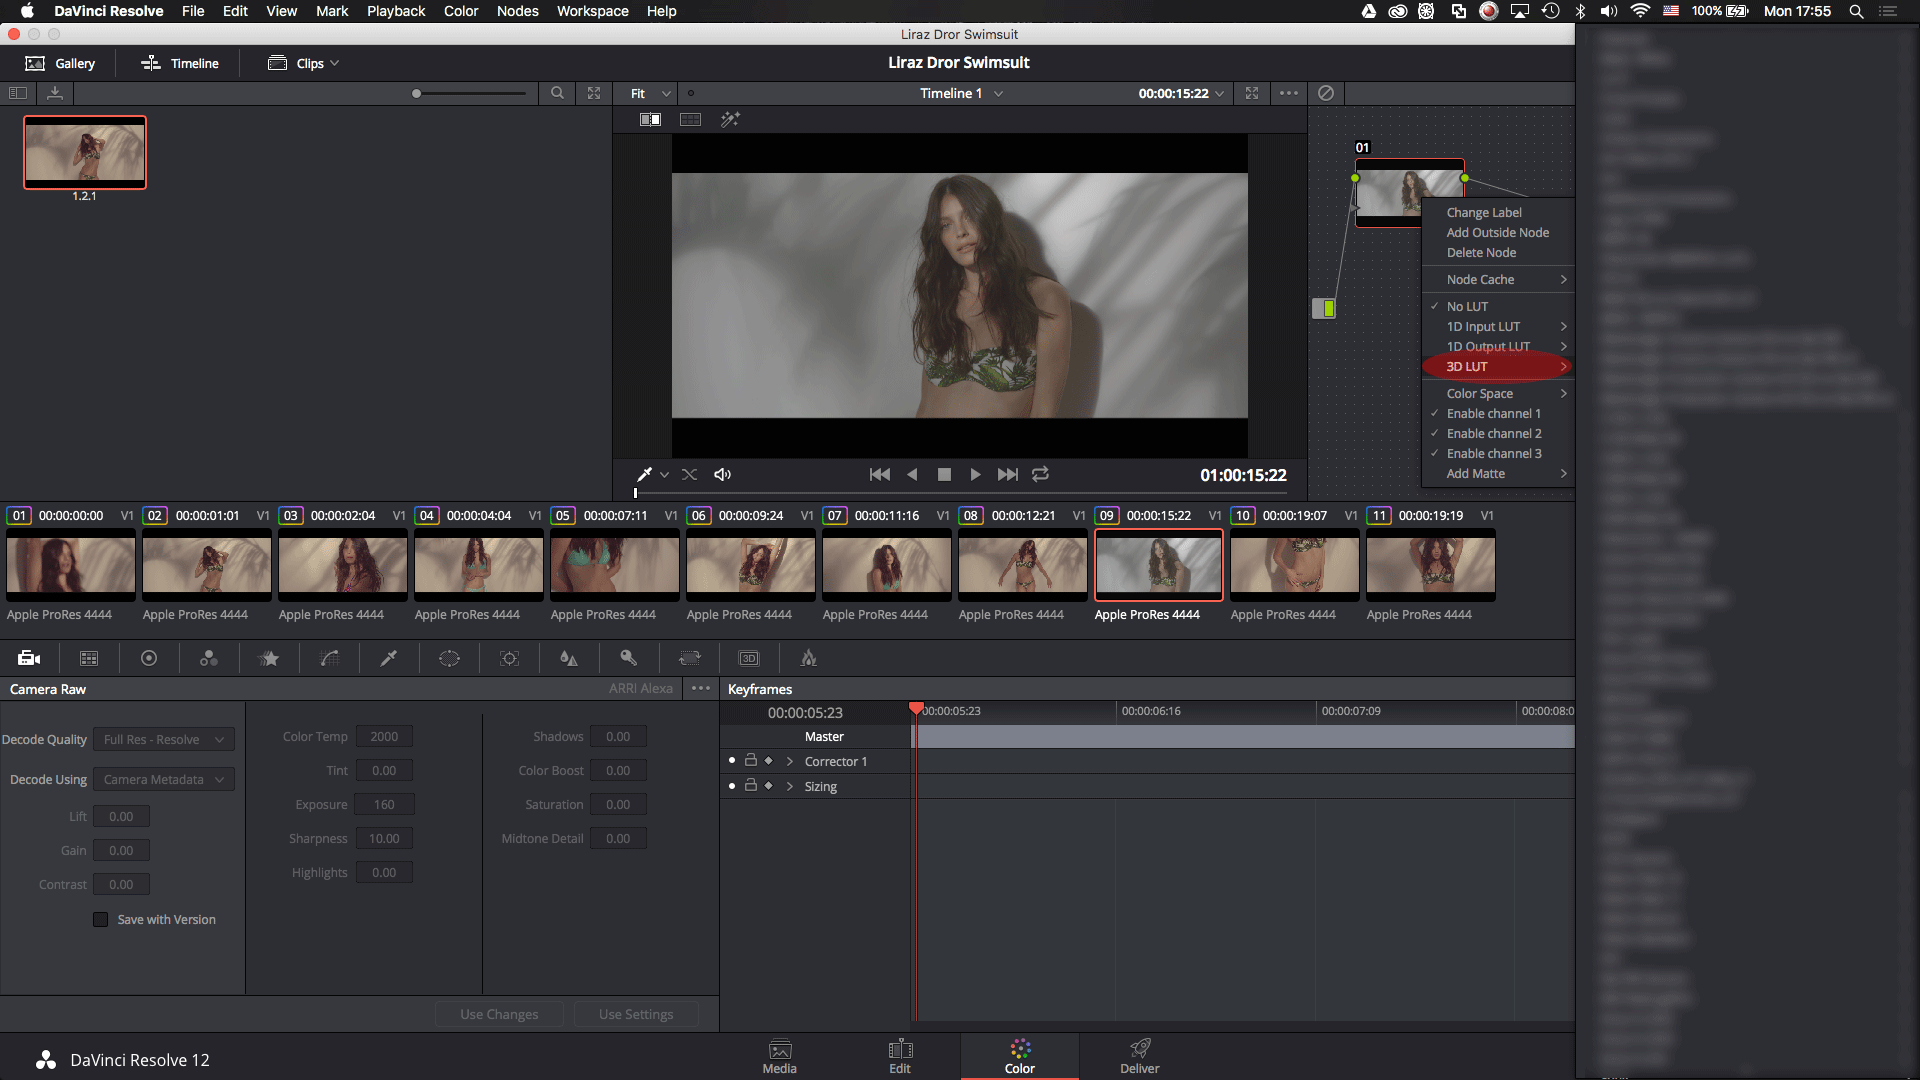
4. Right click on either the node in the upper right part of the window or the clip’s thumbnail and choose 3D LUT > Select your LUT. “Select your LUT” represents the name of the LUT you’ll be applying.
That’s it. The 3D LUT is applied to the footage.

