EDIT, NOVEMBER 2018: This method is now deprecated with the introduction of our Lutify.me LUTs Previewer.
Our most important mission here at Lutify.me is that you get the perfect color grade. We realize however, that at times choosing the best 3D LUT as your starting point for the color grade can be a daunting task.
That’s exactly why we have developed the Layer Comps files.
The Layer Comps file, which you can download from your My Account section have one purpose only: showcase the 3D LUTs in your package in a fast and convenient way in order to help you choose the best one for your color grade.
In this short tutorial I’ll explain everything there is to know about the Layer Comps files and how to use the file to decide what would be the most suitable 3D LUT for your color grade.
So let’s dive in.
First, you’ll have to download the Layer Comps files from your My Account section on our website. If you’re using our free package, the Layer Comps file is included inside the downloadable .zip file.
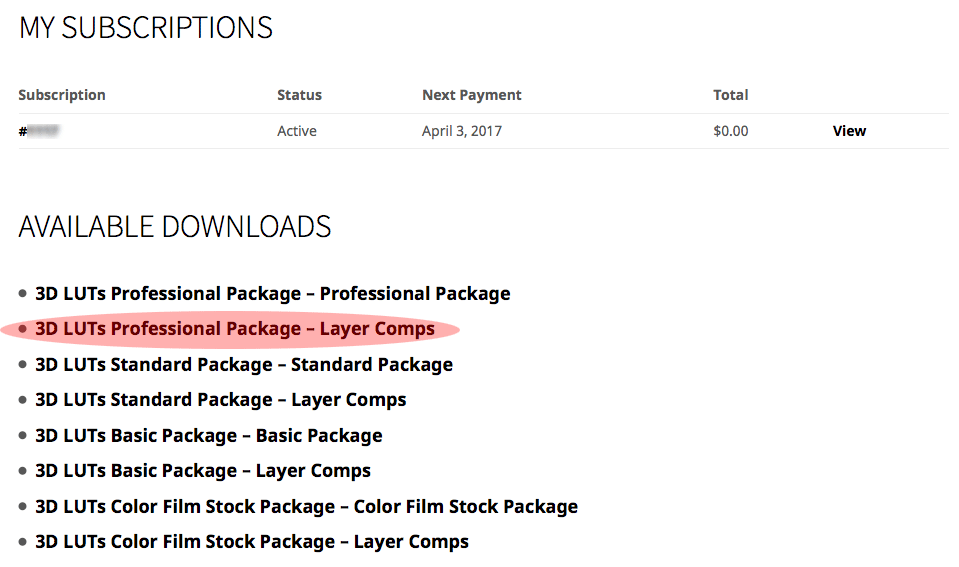
Here’s the list of available downloads inside My Account. Make sure you’re downloading the Layer Comps file. In this case I’ll download the Layer Comps file from the Professional Package. Once you’ve downloaded the file, extract it to a location of your choice.
Please note that inside the downloadable .zip file, the Layer Comps files are divided into categories according to the categories found within your 3D LUTs package. In this case, since we’re downloading the Layer Comps file from the Professional Package, we’ll get actually seven Layer Comps files with following names:
- Alternative Process 3D LUTs.psd
- Black & White 3D LUTs.psd
- Contemporary Color Films 3D LUTs.psd
- Instant Films 3D LUTs.psd
- Skin Tone 3D LUTs.psd
- Teal & Orange 3D LUTs.psd
- Vintage Films 3D LUTs.psd
Make sure you choose the appropriate Layer Comps file as each file contains only the 3D LUTs from its respective category. Open your Layer Comps file inside Adobe Photoshop. The Layer Comps files will not work in other software as they’re specific for the Adobe Photoshop. For the purpose of this tutorials, I’ll open the Instant Films 3D LUTs.psd file.
Once you open your file, you’ll be presented with the following window asking you to load your image on which you’d like to preview the 3D LUTs.
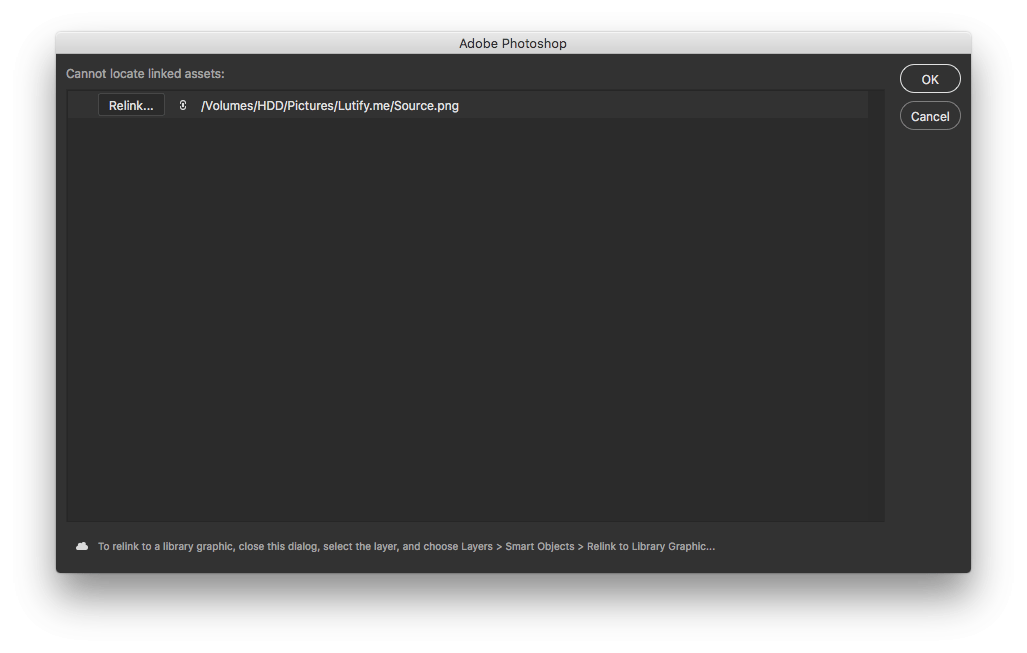
In this window choose Relink, browse to the image of your choice and choose OK. As this file serves for previewing purposes only, please make sure that the image you’re loading is 1920×1080 pixels or less as otherwise it may get cropped and you’ll only see part of your image.
Now that we’ve opened our Layer Comps file and placed our test image, let’s examine the file’s structure.
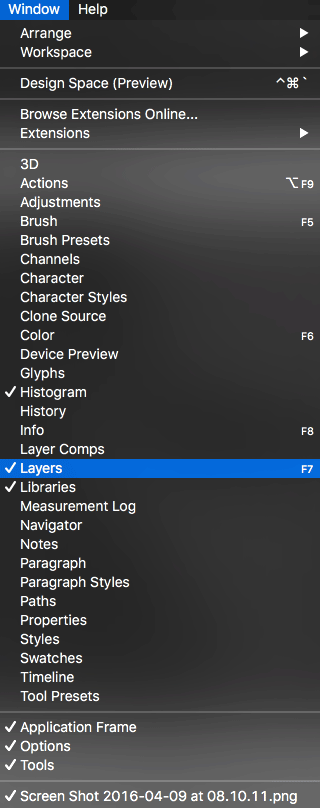
First let’s make sure your Layers panel is visible as we’ll want to take a look at the different layers in this file to see how it works. Go to Window and make sure there’s a check mark next to Layers. If not click on Layers to make the Layers panel visible.
Now that we have our Layers panel visible we can take a look at the file.
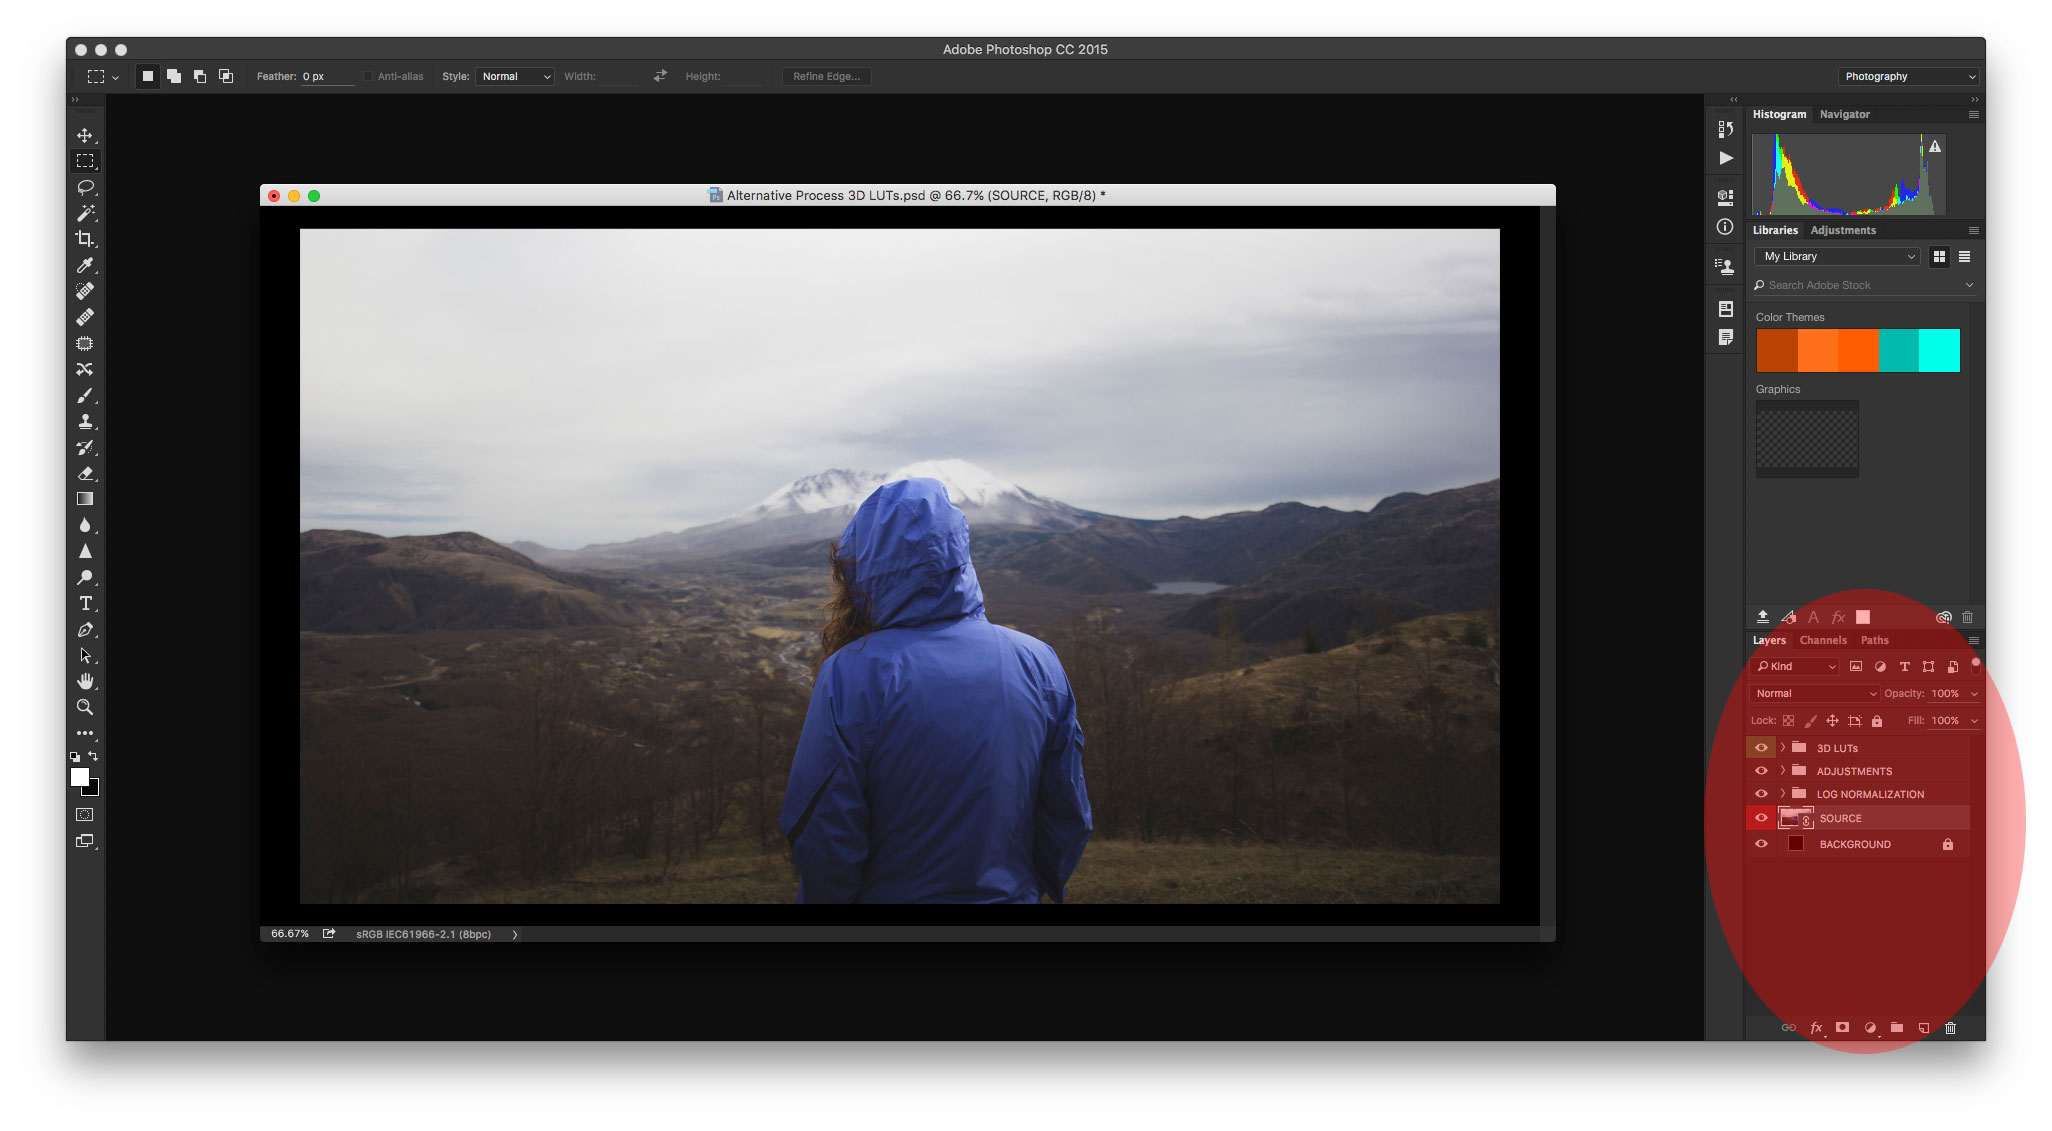
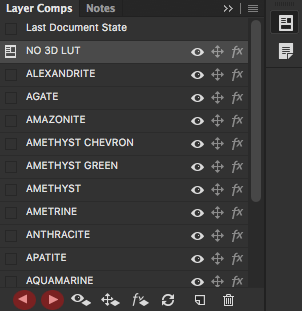
Let’s take a closer look at the Layers panel.
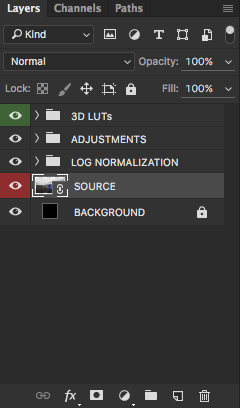
In the Layers panel we find the following:
- Background layer – This is simply a black background layer so if you insert a smaller image than 1920×1080 pixels it will appear on black background. It’s easier to judge color on darker backgrounds than it is on light ones. For most parts you can simply ignore this layer.
- Source layer – This is the layer containing the image you loaded in previous step. We’ll use this image to preview the effects each 3D LUT has.
- Log Normalization – This layer group is mainly for filmmakers. If the image you’ve loaded is of Log type, here you’ll find various Log normalization LUTs that will help you transform your image into Rec.709 space before previewing the 3D LUTs. To normalize your image, simply change the opacity of the appropriate layer inside the Log Normalization group from 0 to 100%. If you’re a stills photographer and not working with Log materials, you can safely ignore the layers in this group.
- Adjustments – Another layer group. Here you’ll find various adjustment layers that will help you correct your image’s exposure, contrast, color balance, hue and saturation if the image needs adjustment prior to applying the 3D LUTs. The various adjustment tools inside this layer group are beyond the scope of this short tutorial, but we will cover them in future post.
- 3D LUTs – This is the heart of this file. The 3D LUTs layer group contains all of the 3D LUTs from the respective category.
Now that we have a basic understanding of how our Layer Comps file is built, let’s see how we can actually use it to preview the 3D LUTs. Let’s go.
In order to preview our 3D LUTs we’ll first have to make sure our Layer Comps panel is visible. Go to Window and make sure there’s a check mark next to Layer Comps. If not, click on Layer Comps to make the Layer Comps panel visible.
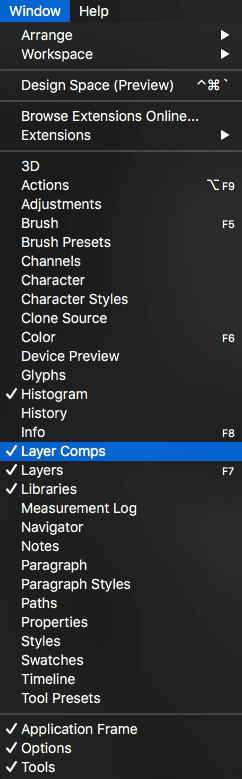
This will reveal the Layer Comps panel.
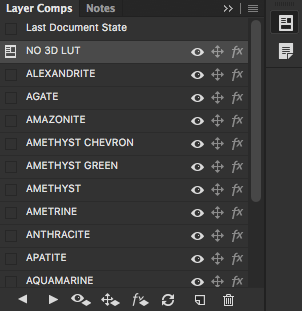
Once our Layer Comps panel is visible we can start previewing our 3D LUTs. Inside the Layer Comps panel you’ll see a layer comp for each 3D LUT in the file as well as a comp for NO 3D LUT. The later is our original image without LUT applied. The other layer comps will apply the respective 3D LUT on our image.
Use the left and right arrows at the bottom of the layer comps panel to go through different 3D LUTs and find the most suitable one. Boom. You have found your LUT for today! How easy was that?
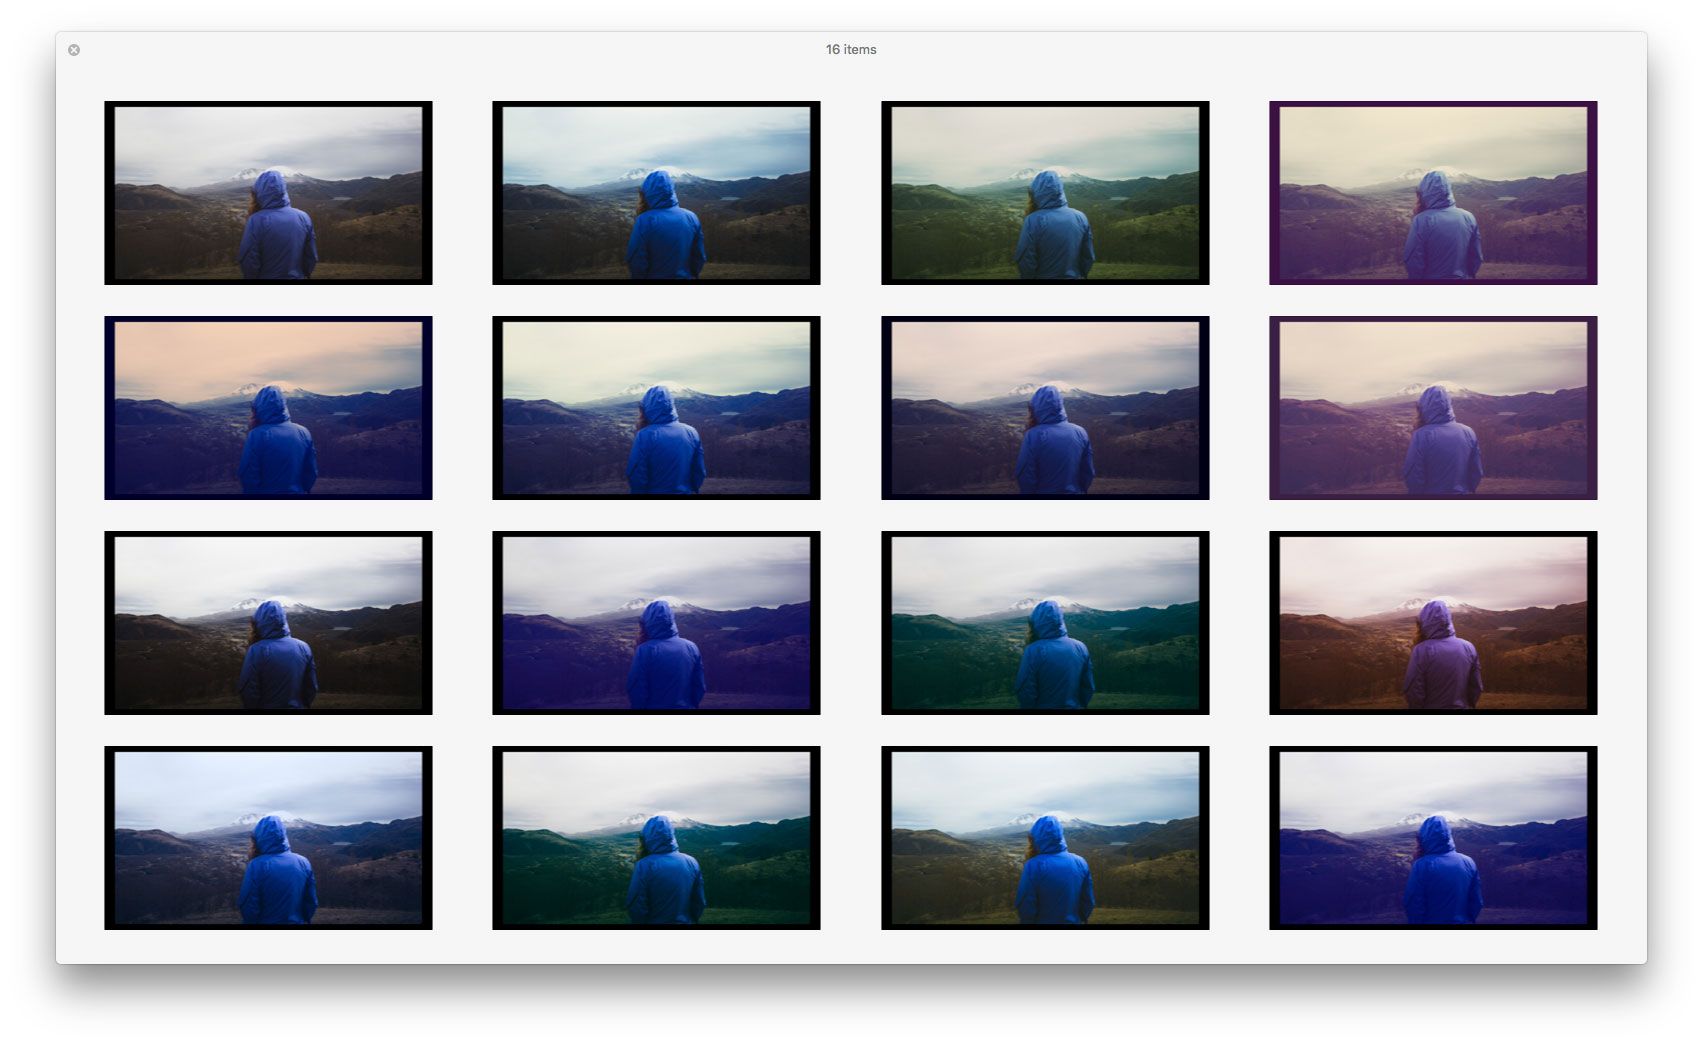
But wait. There’s more to this file. We can use our layer comps file to export a version of our image with every 3D LUT included in the file.
This means that if we have 15 LUTs in the layer comps file, we’ll get 15 color graded images with the LUTs respective names.
This is a great feature allowing you to have a quick glance at all of the 3D LUTs in the category while at the same time creating quick previews you can send to yourself as a reference or even your client.
In order to export the comps go to File > Export Layer Comps to Files (Adobe Photoshop CC 2015) or File > Script > Layer Comps to Files (Adobe Photoshop CC 2014 or earlier). This will open the export dialog screen.
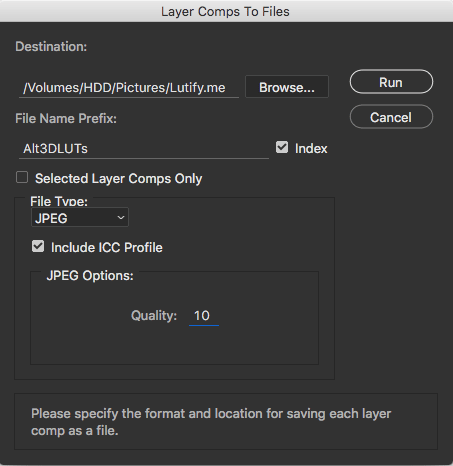
Choose the destination for your files, a file name prefix (usually I name it after the category of the 3D LUTs I’m exporting), a file type and file’s quality. Finally click on Run. Once the Photoshop finishes exporting the layer comps you’ll have your images with the respective 3D LUTs applied to them inside the location you specified.
It is very important that you do not save any changes to the Layer Comps file, otherwise it may loose its functionality.
If you accidentally made changes to the Layer Comps file and it no longer shows 3D LUTs previews correctly, please download a fresh copy of the file from My Account section of our website.
For your convenience I’ve made a short video demonstrating how easy it is to use the Layer Comps file to preview the 3D LUTs.
https://youtu.be/y_QI_FsqGCM
What do you think guys? What additional tools and tutorials would you like to see? I’d love to hear from you in the comments below.