This is probably one of the more common questions we get asked. “How can I make my S-Log2 footage easier to grade?” And it’s a good question indeed as it’s harder to grade S-Log2 footage than it is to grade S-Log3 or other log formats? But why?
To understand why S-Log2 footage is harder to grade we need to go back a bit. You see S-Log2 was actually developed to be used in Sony’s F65 camera. It was paired with Sony’s S-Gamut which was specifically designed to encompass all of the colors that can possibly be created by Sony F65 sensor. While S-Log2 is an excellent container, it was designed to work with 14 stops of dynamic range and was optimised to match the characteristics of video sensors. In theory this was a smart move by Sony as it would make it easier to match S-Log2 footage to other Sony cameras.
However, most color grading tools are really designed to work optimally with Cineon log curve, developed long time ago to allow digitising of film in 10 bit data. Arri’s Log-C for example, just as Sony’s S-Log3 are both based on the Cineon curve characteristics. I would really recommend you read this excellent blog post by Alister Chapman which covers pretty much all of the differences between S-Log2 and S-Log3 formats.
So what does this practically mean? It means that when you are working with S-Log2 footage, most of your color grading controls like lift, gamma, gain, offset, contrast and many others do not really work as they were intended to work. Specifically you’ll find out that the shadows in S-Log2 just as highlights are more compressed and that they need separate treatment. A simple exposure adjustment in S-Log2 usually requires a separate treatment of shadows, midtones, highlights and often contrast as well. I’m not saying you can’t achieve great results, you definitely can, but it’s harder.
So how can we solve this issue? First let’s take a look at the process of color grading to better understand the steps we would typically do to color grade our footage.
Usually the very first step we would want to do is balance our footage or color correct it as it’s often referred to. This is the process of balancing the exposure, contrast and white balance of the footage so we’re starting from a neutral point. This makes much sense as we always want to start from a neutral point. Otherwise we can’t be consistent in our color decisions.
Now bear in mind we’re not talking about making an absolutely neutral footage. We definitely don’t want to neutralise any creative decisions taken during the shooting process, so if, for example, we have a scene heavily lit by tungsten lights with white balance set to 4300K or even 5600K, that would usually mean this was the intended mood of the scene and a creative decision. So we’re talking about relative neutral starting point.
Often, you will hear that color correcting is the very first step you should take. That is correct. However, sometimes it’s hard to evaluate the log footage prior to converting it into a monitor referred space such as Rec709. So often, the first thing you will do is convert your footage from log into Rec709, to be able to properly evaluate it, however your color correction should almost always take place before that log conversion, therfore making it effectively the first step you are making.
For example, if you’re grading in Davinci Resolve, log conversion would happen on a node which takes place after the node on which we will do our color correction. The important thing to remember here is that you want to make your color correction on your log footage while it’s still in log and not after it has been converted into Rec709 (or any other color space). As a rule of thumb, you would want to make as much as possible of your color grading decisions on the original log footage before its gamma and gamut have been converted into a narrower space.
So the first step would be color correction, then we would usually have some creative decisions and then a conversion into Rec709 or some other space. If you’re using LUTs, if you have LUTs designed to work directly with your source log format like our IPP2 tailored LUTs, you would apply them before the log conversion. If on other hand, your LUTs are in Rec709 form, you would apply them after log conversion has taken place. This in itself is not bad because you can always adjust the corrections before log conversion to “feed” more info to your LUT to work with.
Now let’s get back to color correction. We said we want to make it directly on our log footage. We also mentioned that most tools in color grading software were designed to work with Cineon-like curves while S-Log2 is not based on Cineon. So what do we do? We simply convert the footage from S-Log2 to S-Log3.
At this point I hear you all screaming “no way, S-Log3 is way noisier, I’m never using S-Log3 with my A7s”.
Don’t worry, you won’t have any additional noise introduced by this technique.
Video Tutorial
So let’s have a look at a few samples.
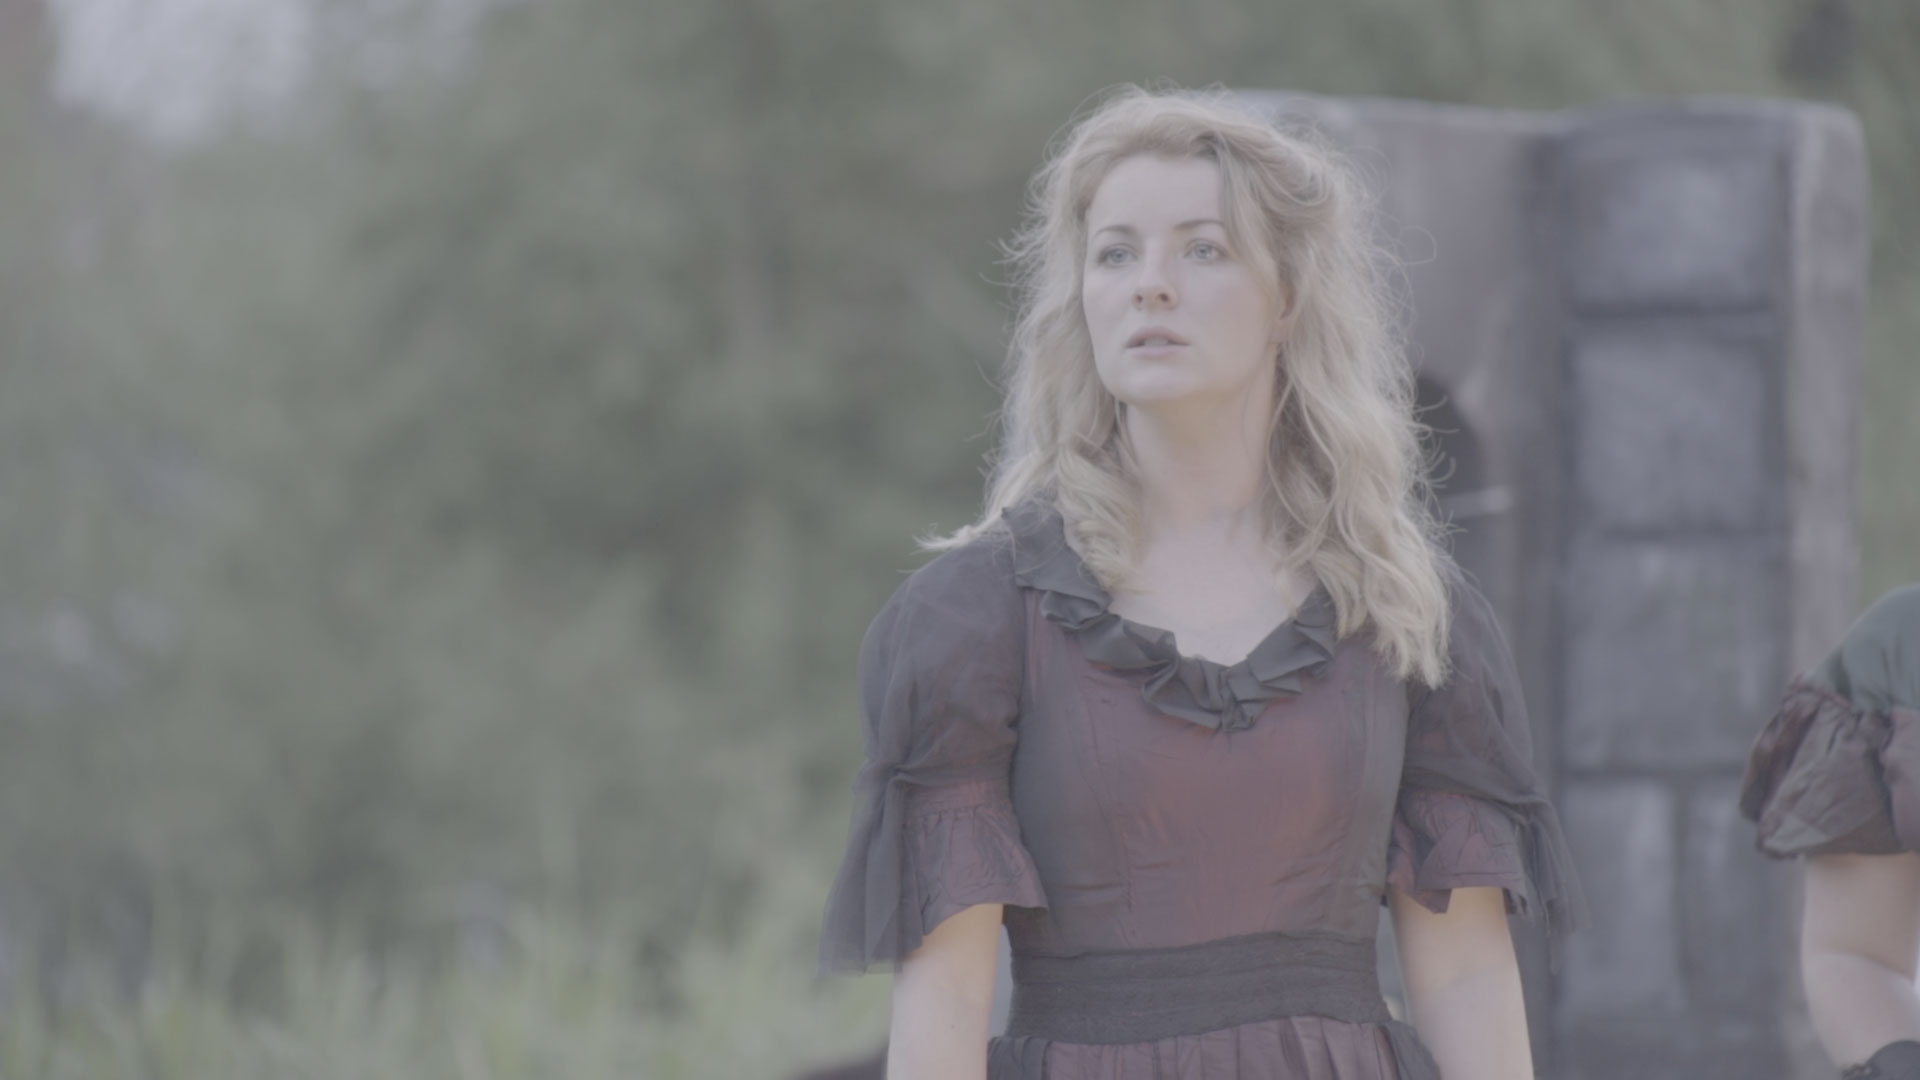
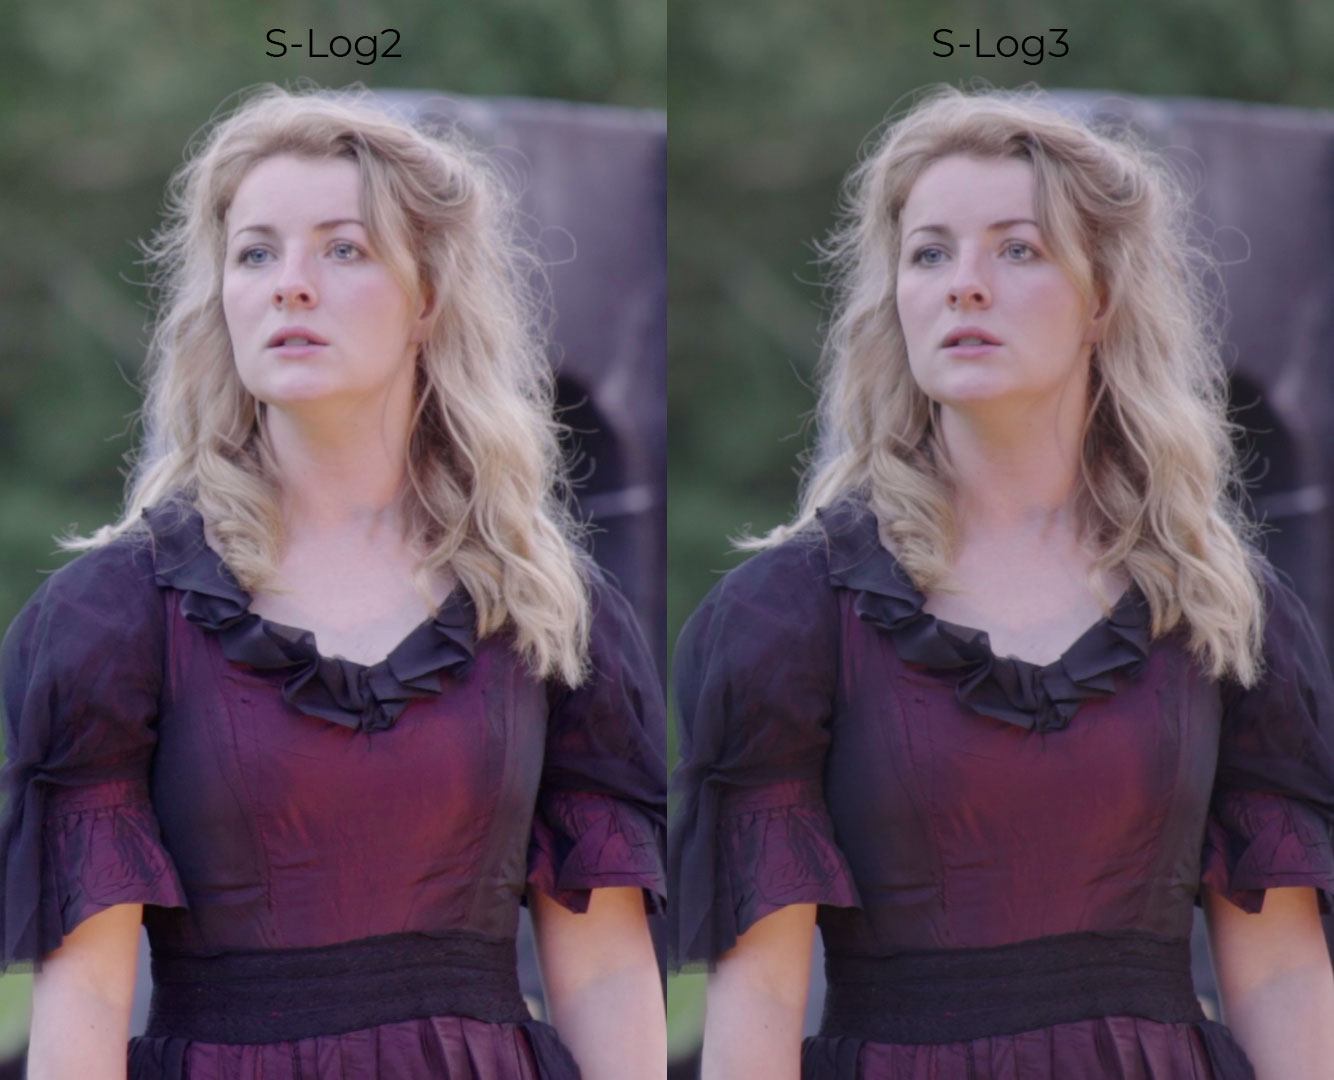
Here’s an original S-Log2 screen grab kindly provided by Leigh Rodgers.
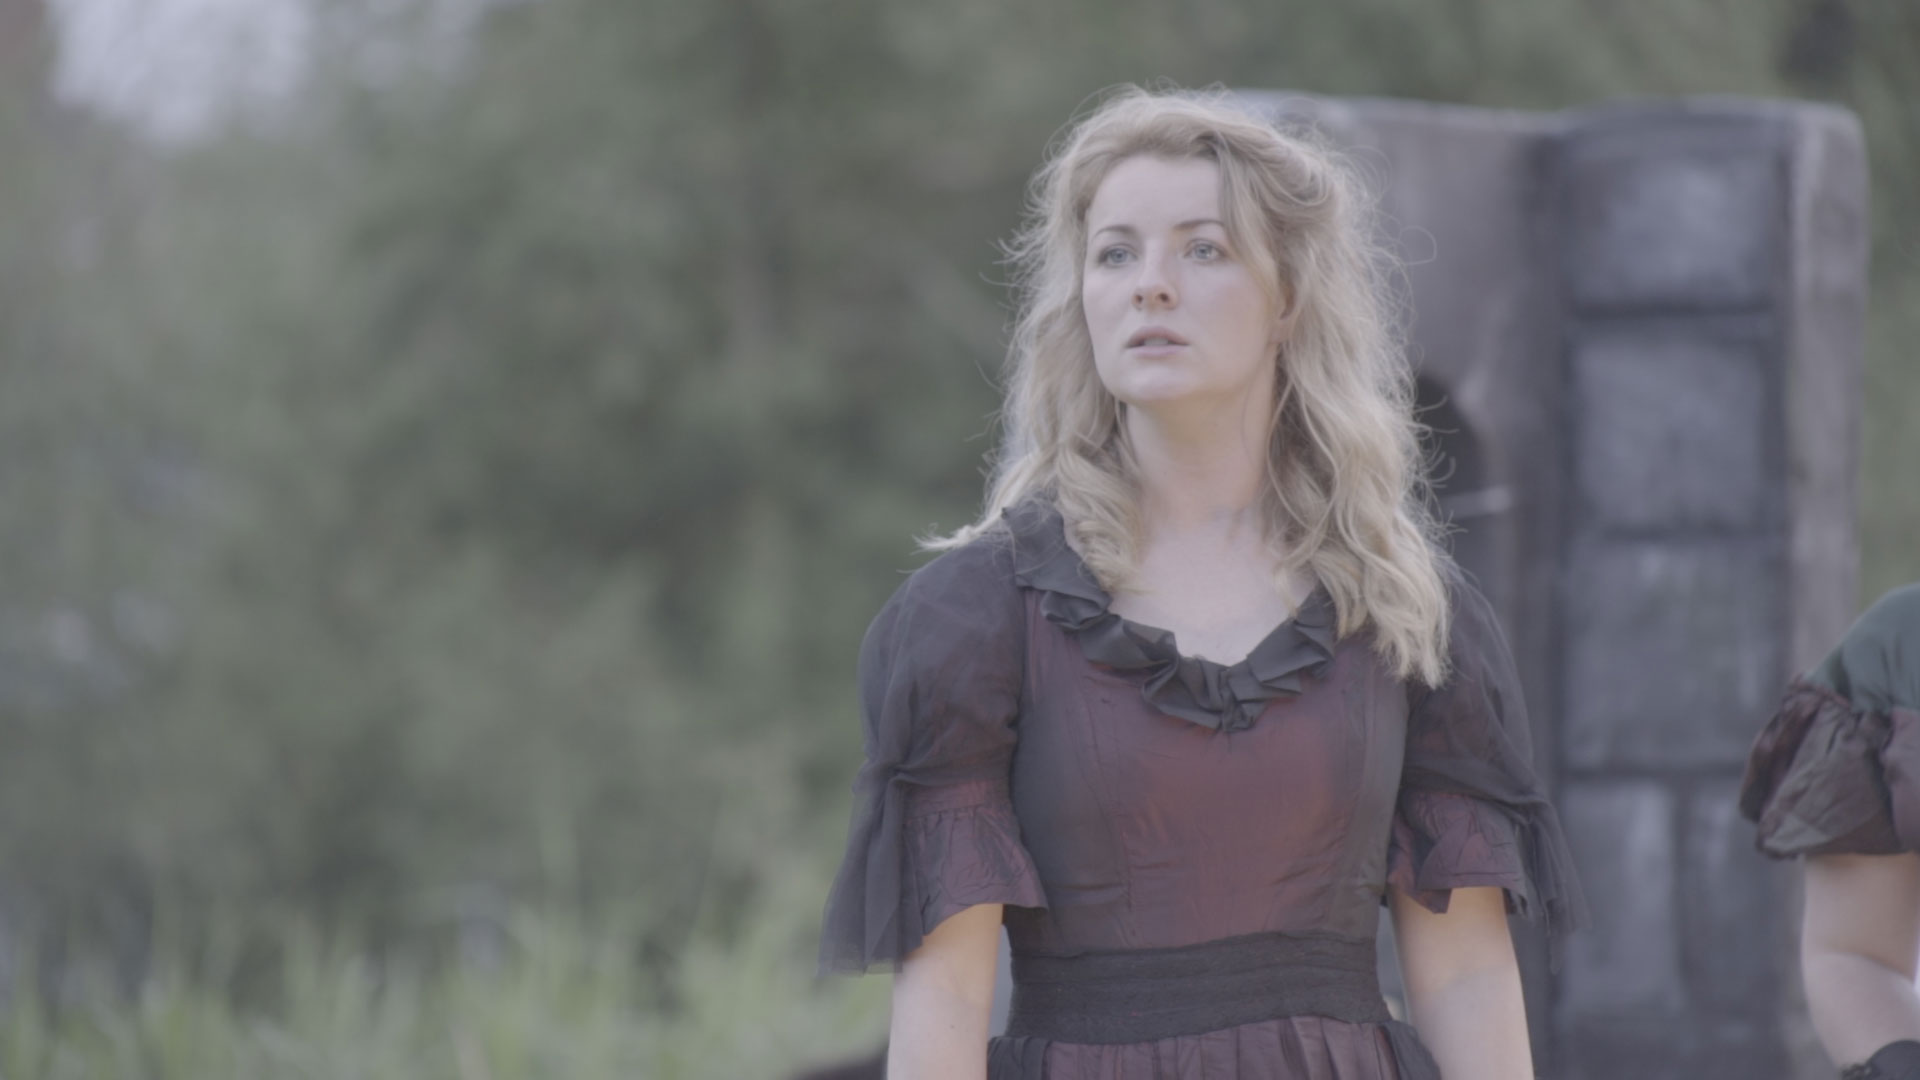
If we make a direct conversion of this frame to Rec709 without any exposure adjustments we get the following. Conversion was done using an S-Log2 log conversion LUT from our package.
Please note this image was shot overexposed so it needs exposure adjustments. We’ll get to that later.
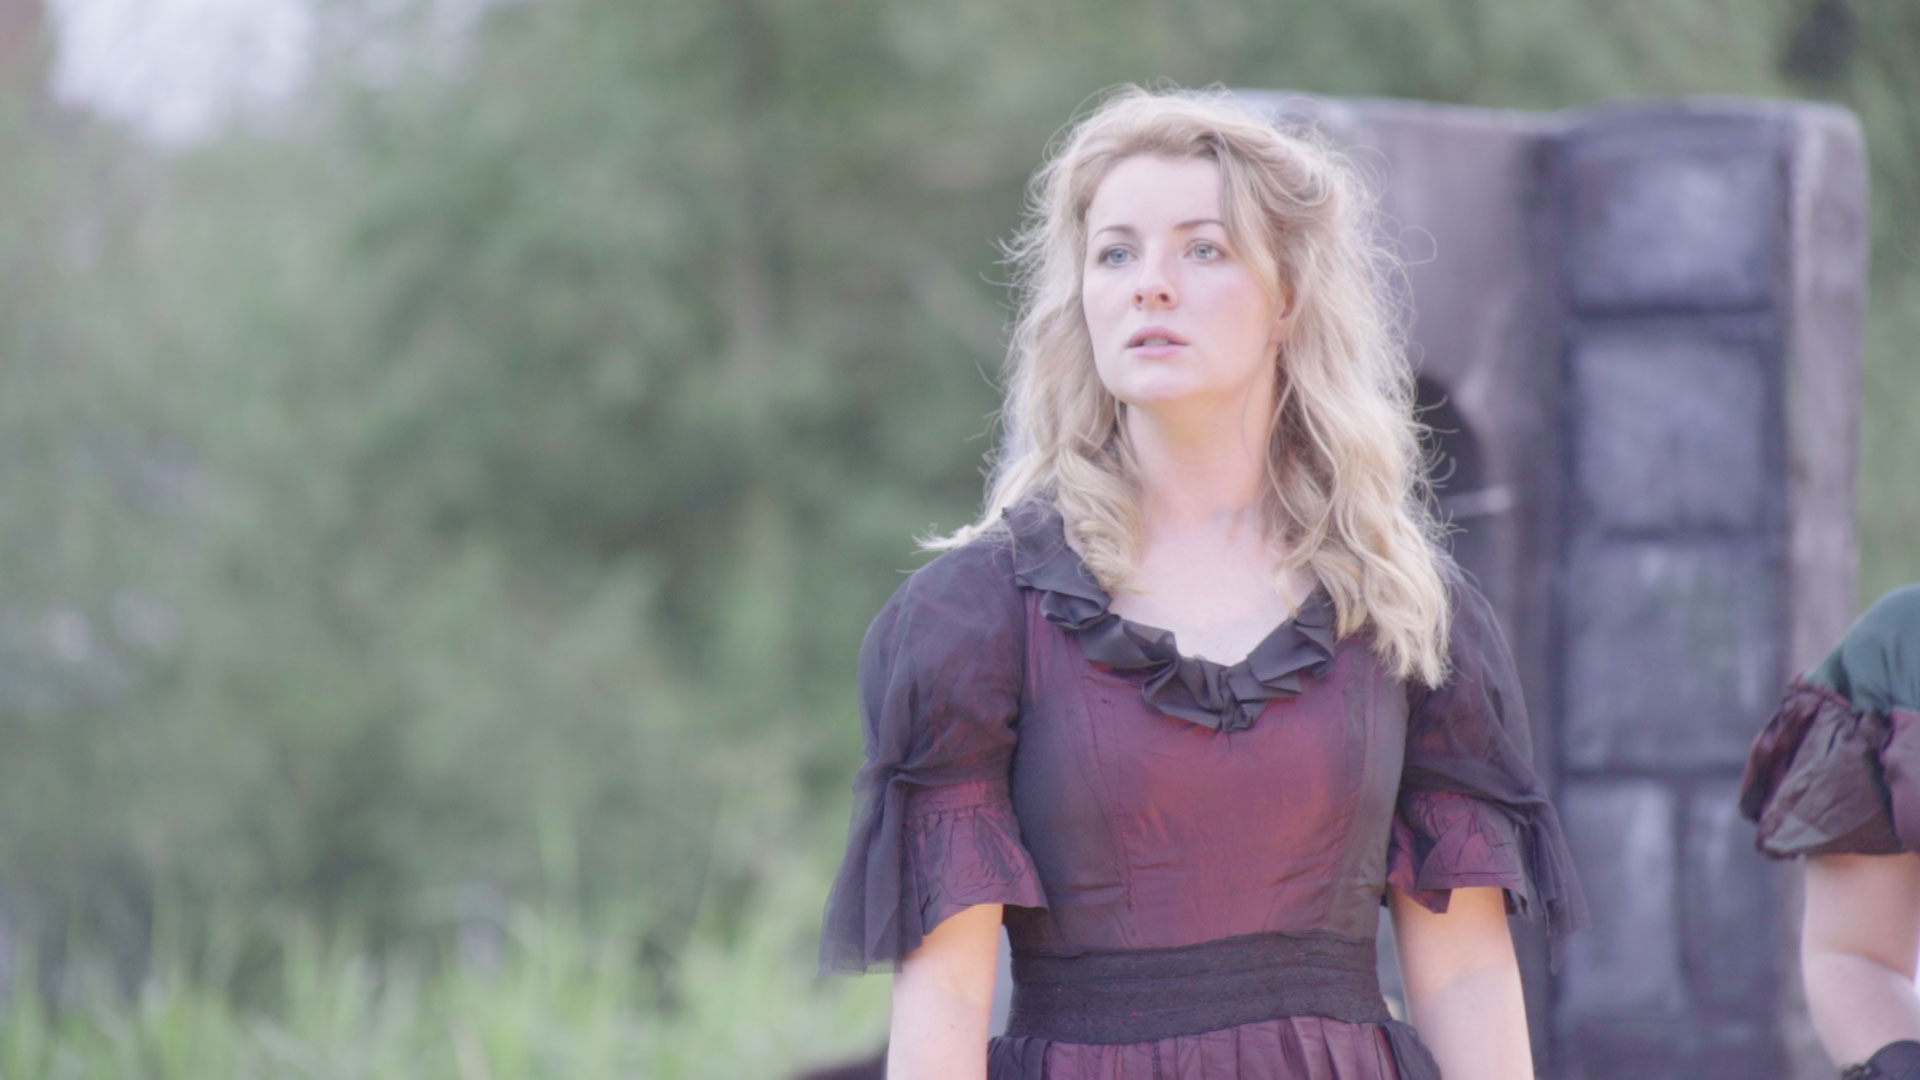
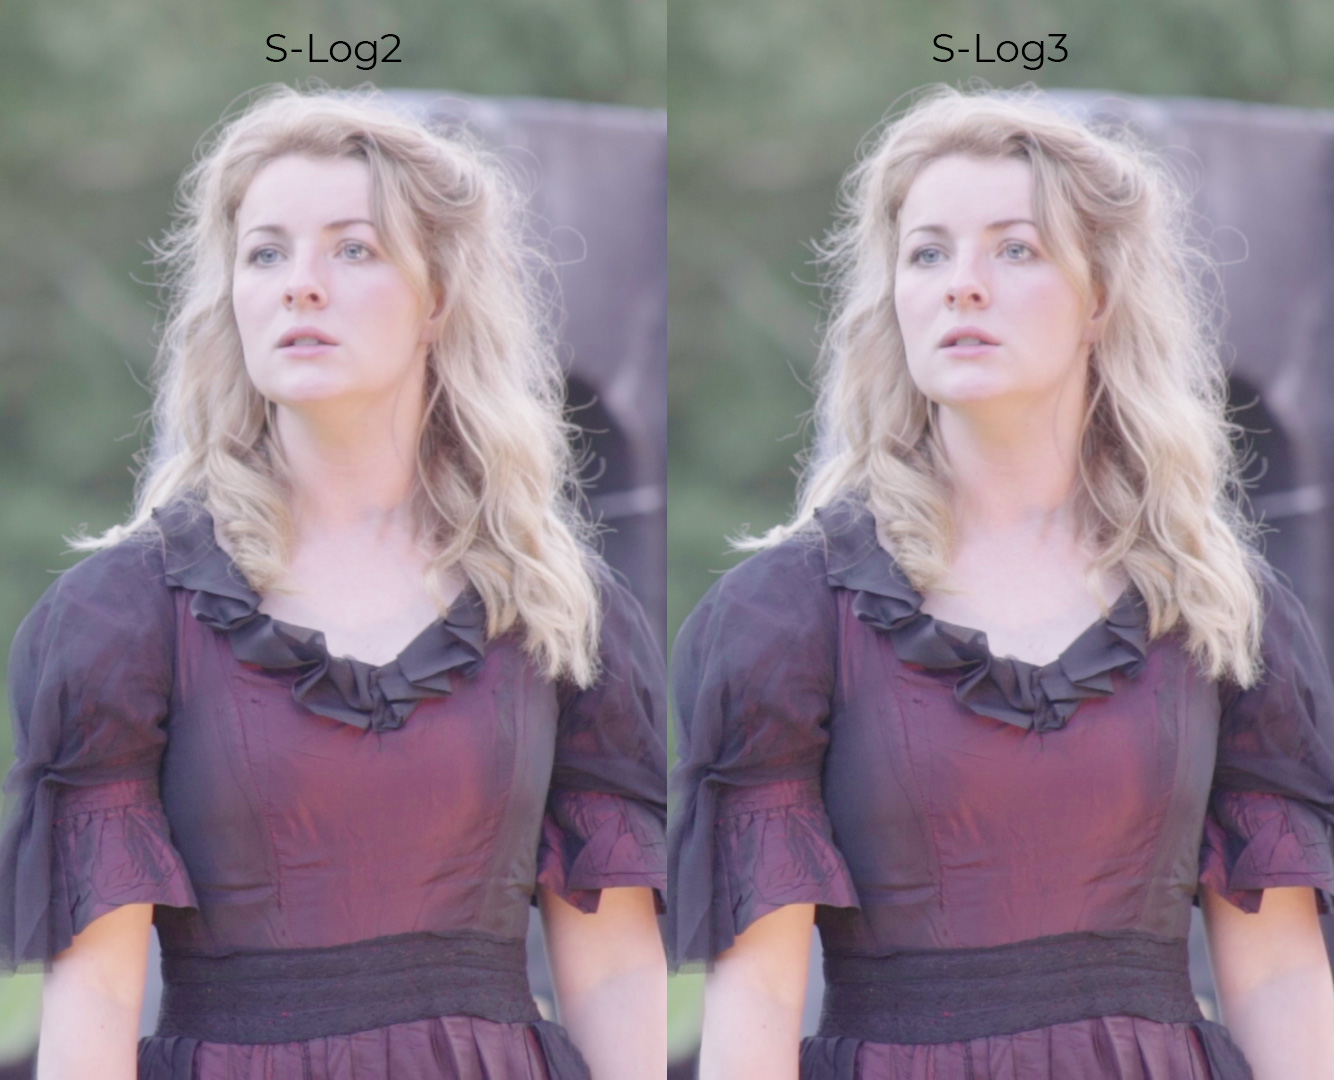
Here is the same S-Log2 frame converted into S-Log3.
Now if we convert this image into Rec709, this time using an S-Log3 log conversion LUT we get the following result.

They look identical. So far so good. This means our conversion from S-Log2 to S-Log3 is correct and that we’re not altering the image data in any way.
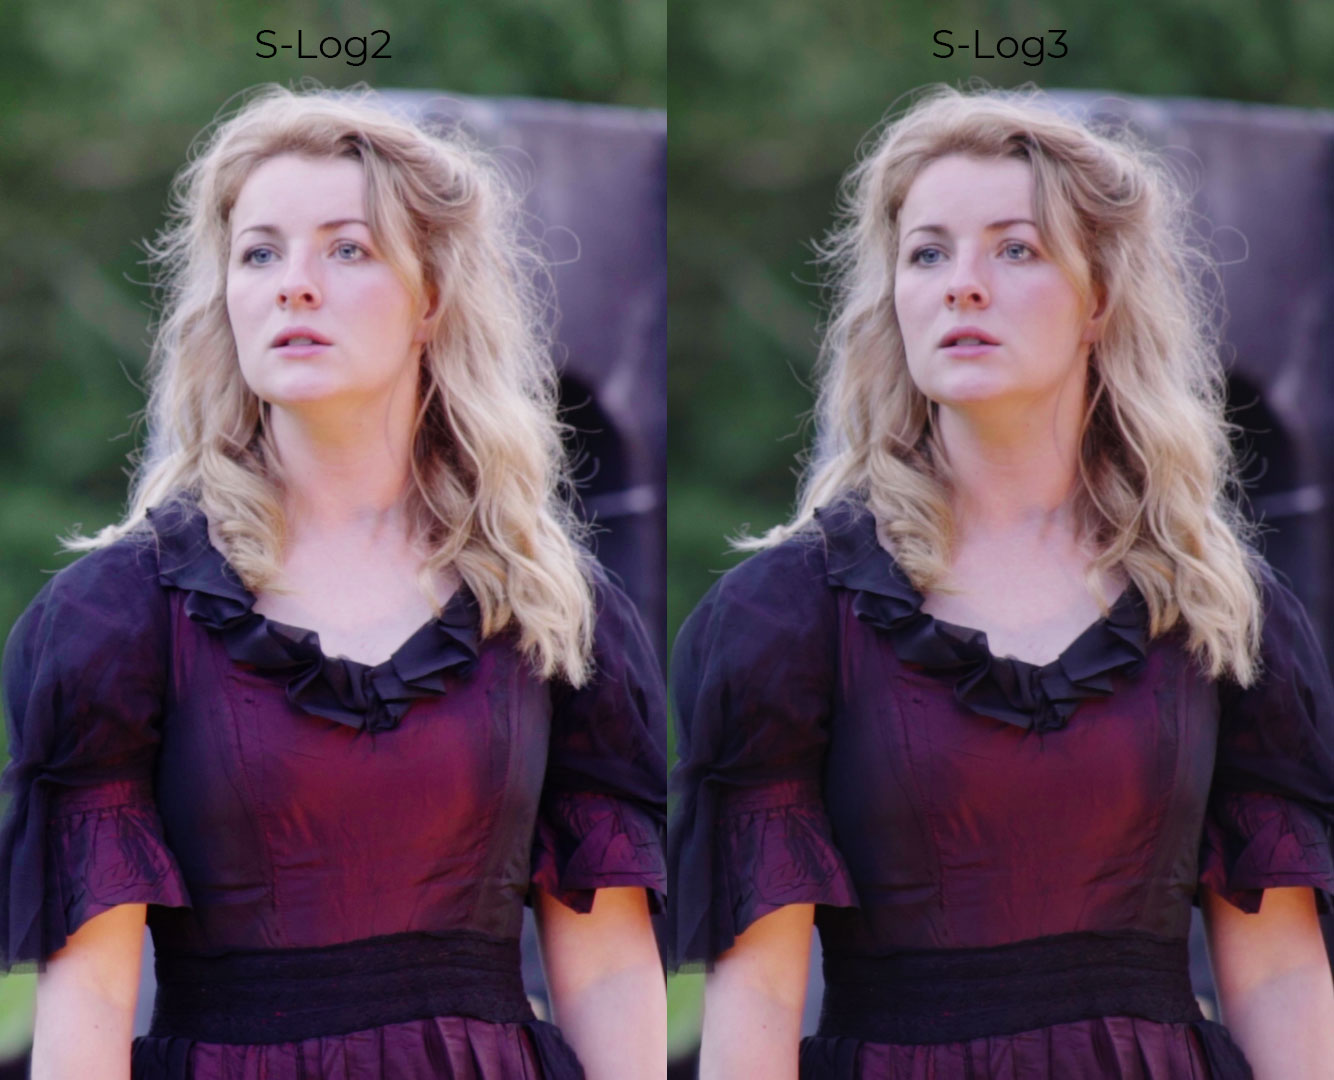
Let’s see a comparison side-by-side to compare noise levels. Following are crops at 100%.
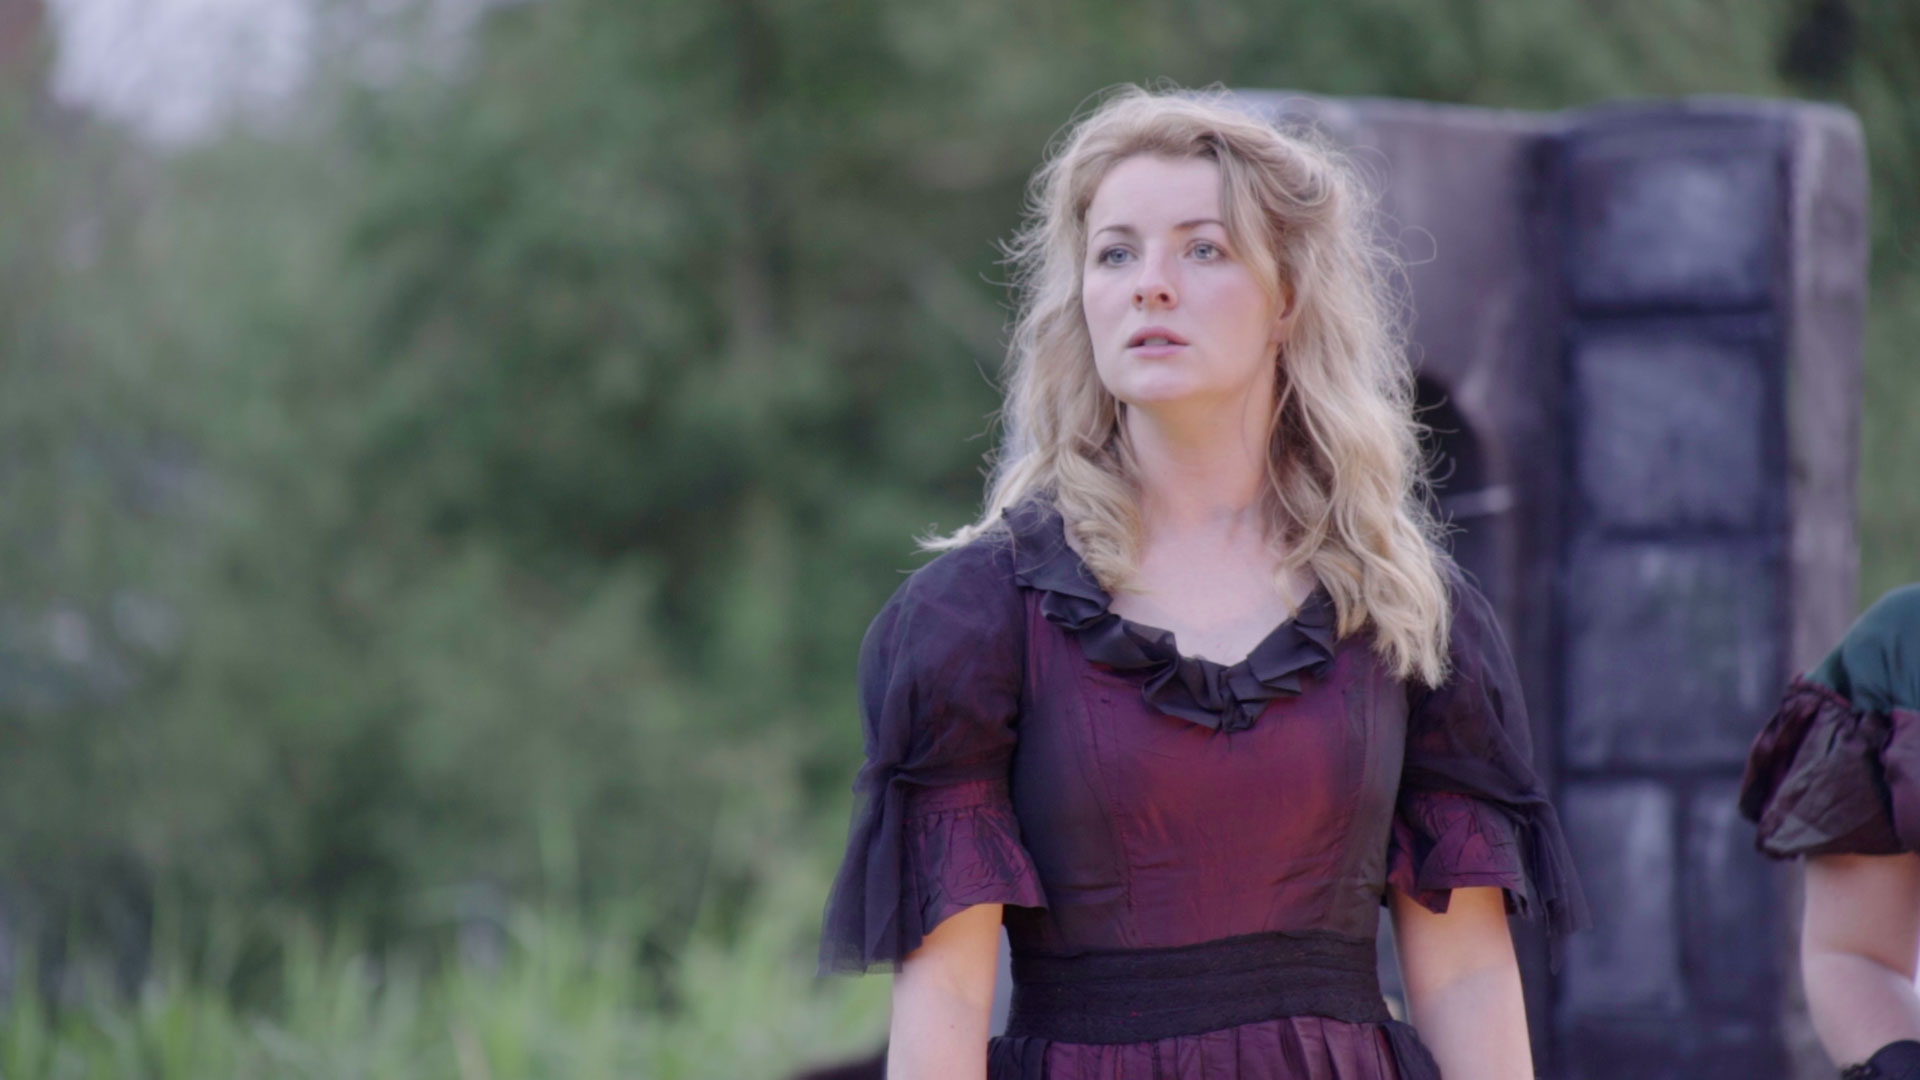
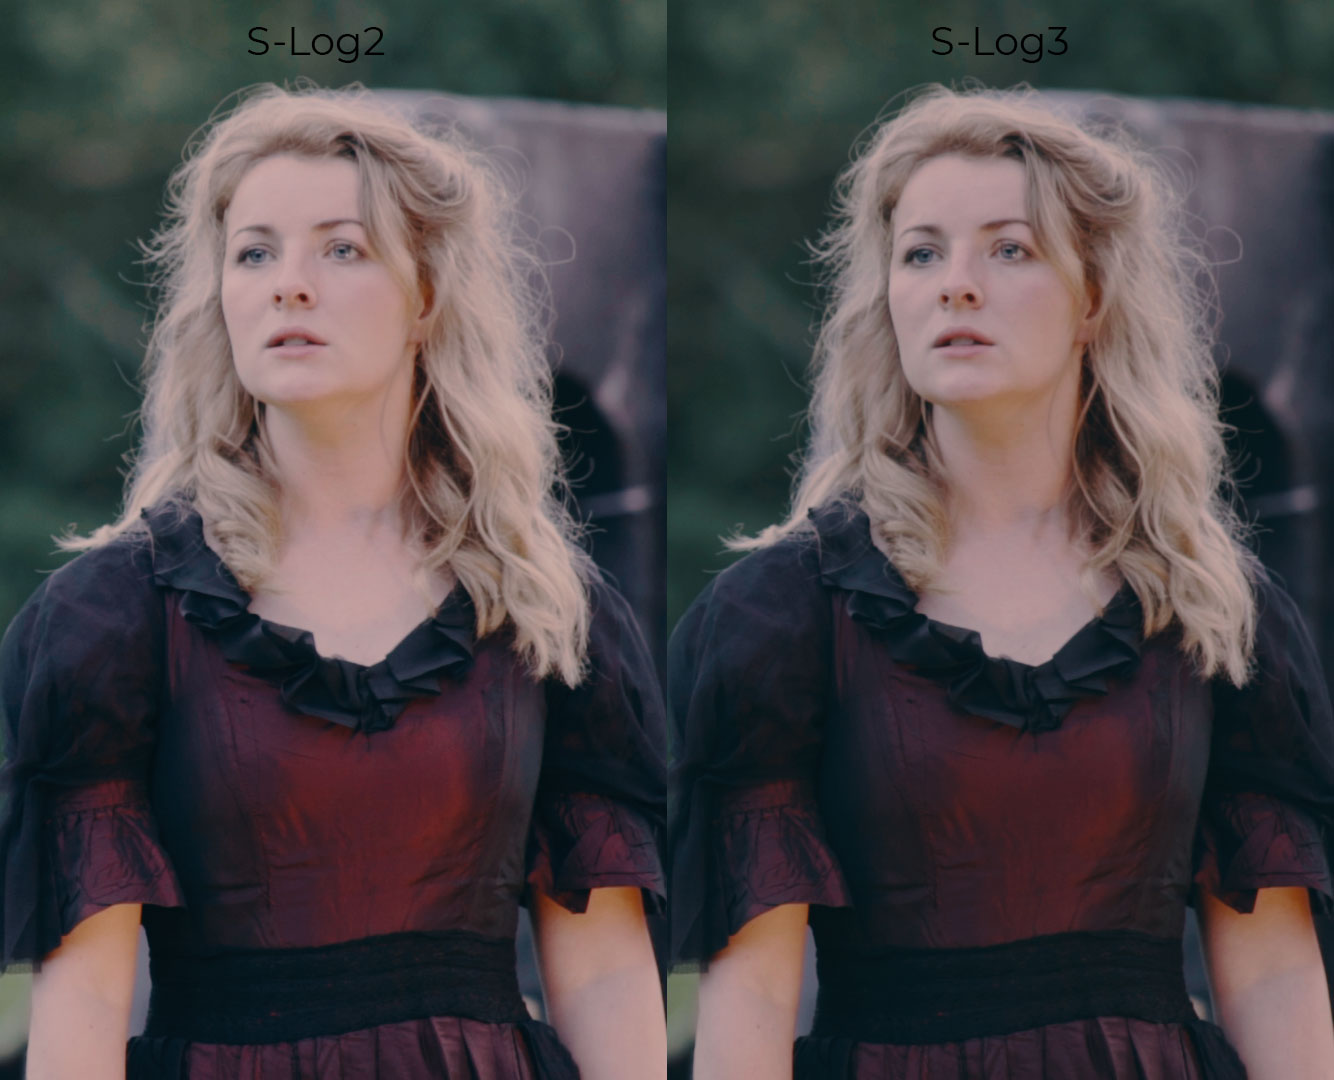
OK, so we have two identical images and converting S-Log2 to S-Log3 doesn’t introduce any additional noise. So what’s the deal? Here’s the deal. Let’s compare the S-Log2 version to S-Log3 with Offset control changed in Davinci Resolve to correct the exposure.
S-Log2
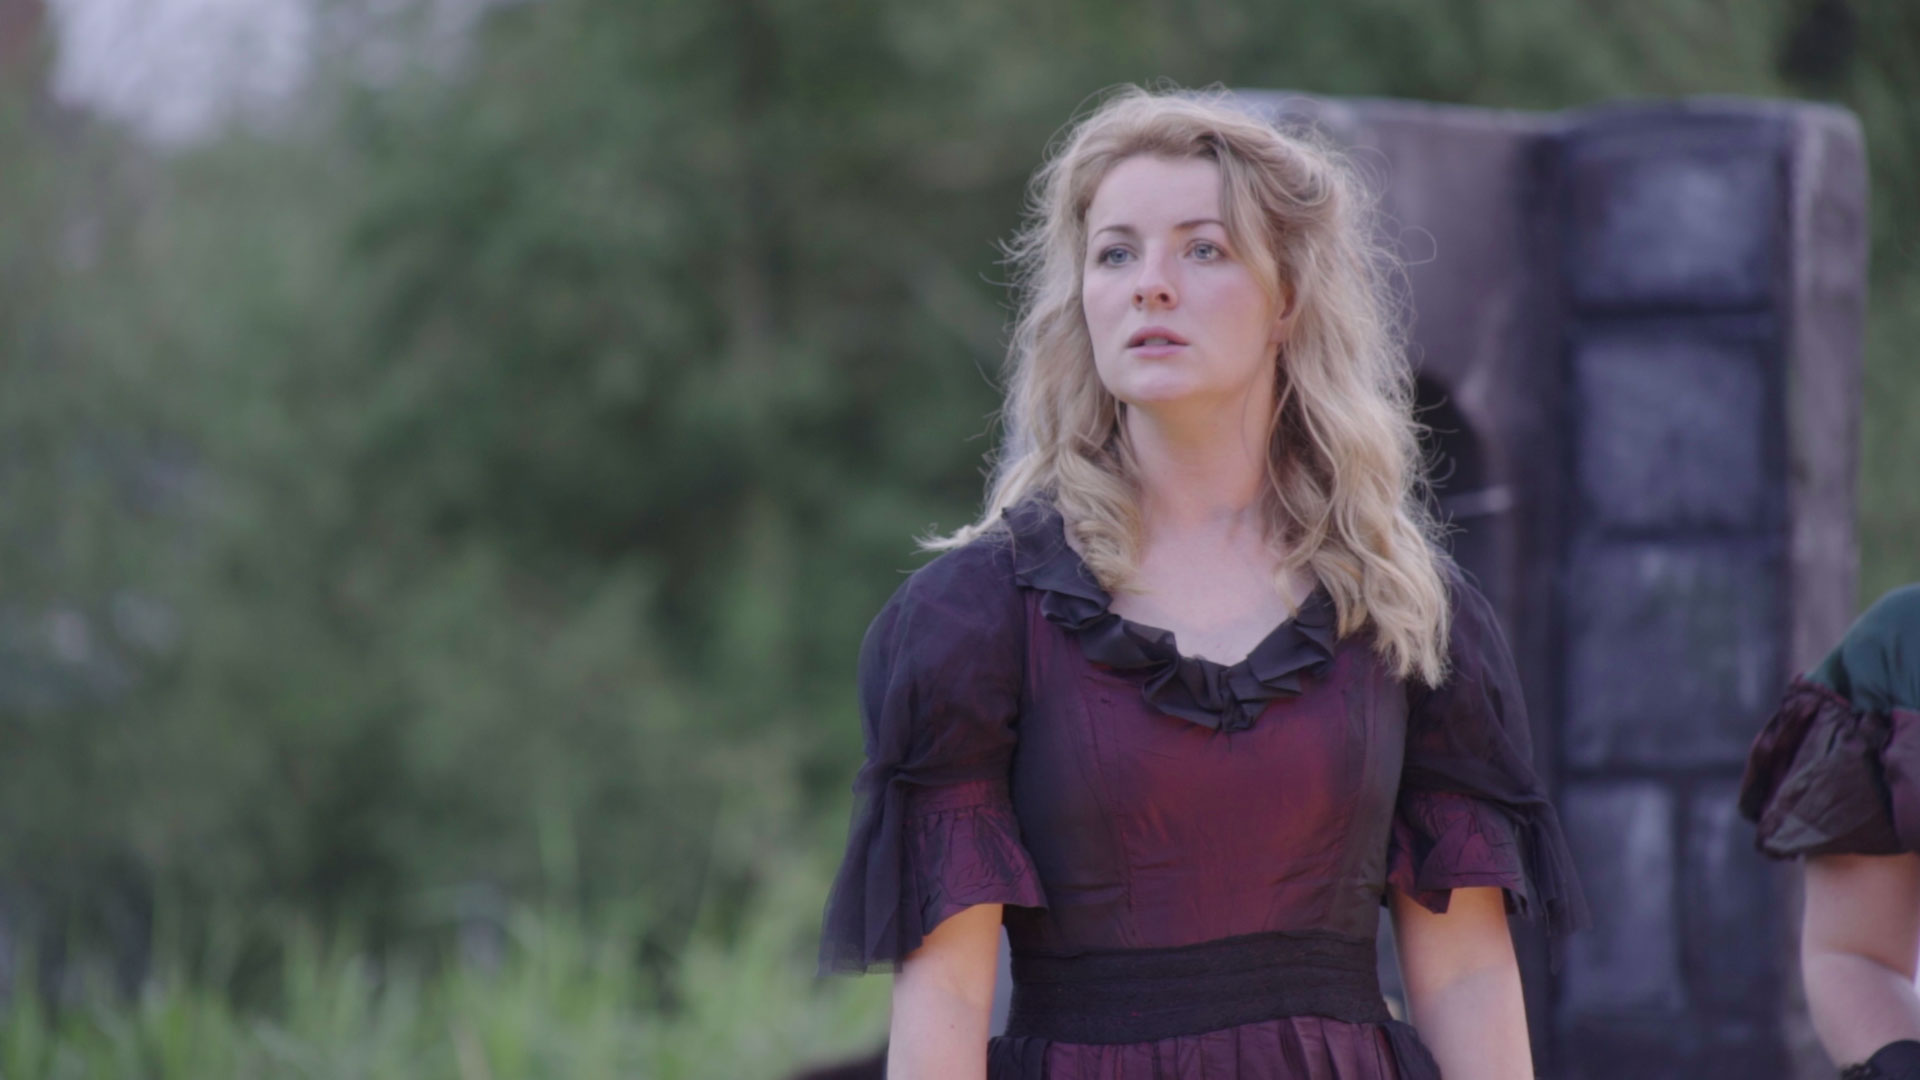
S-Log3
And side by side.
As you can see, S-Log2 version has more contrast with same Offset setting applied to both image. Also notice the roll-off into highlights. It’s harsher in the S-Log2 version. If you were looking for a softer look, you would have to manually adjust contrast on the S-Log2 version and it’s always easier increasing contrast than it is decreasing it. But it’s not just the contrast, the S-Log3 version is just more pleasing and more cinematic but more importantly a better starting point for your color grade.
Some of this is hard to explain in words and requires working with both versions to get a “feel” for the S-Log2 footage and the S-Log3 footage. Once you start working with it, you almost immediately feel that S-Log3 version behaves in a more straightforward way and is easier to work with.
When you start making additional changes to the image it becomes apparent how easier it is to work with S-Log3 version and how much better it holds off to the contrast and exposure changes.
If we really start pushing the footage applying the same settings to both we really see how much more work would S-Log2 require from us. I purposely pushed this more than I probably should for demonstration purposes.
So how do you convert S-Log2 into S-Log3?
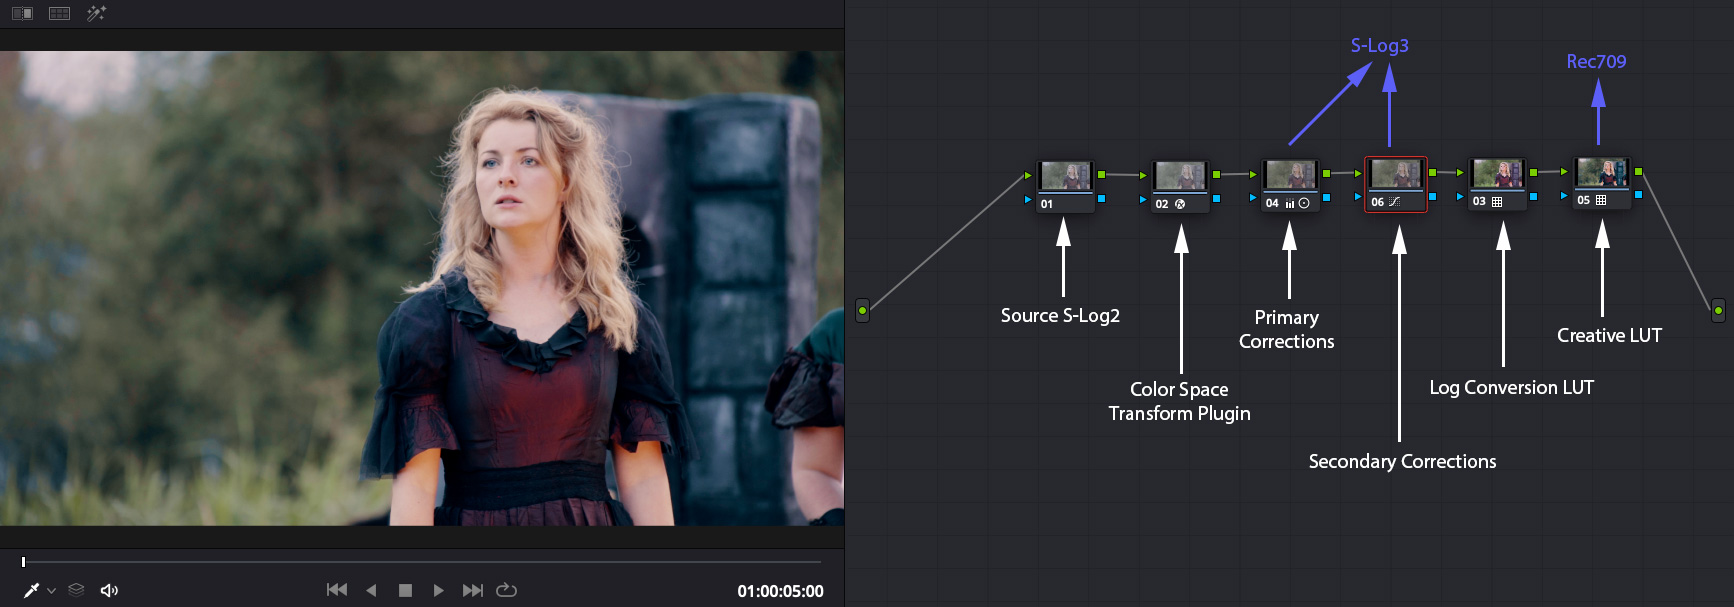
If you are using Davinci Resolve, you can use the Color Space Transform OpenFX plugin to convert your footage into S-Log3. Make sure you convert gamma only but leave gamut as it was. Of course, you can make the necessary gamut transformations if required, but for the purpose of this tutorial we want to convert gamma only.
![]()
Once you have dragged the Color space Transform plugin into correct location, make sure you use the correct conversion settings.
![]()
That’s it. You’re done. Everything that happens after the node on which you made the conversion is working with the S-Log3 footage. So typically you would want to make all your corrections after this node but before log conversion takes place. Whatever happens before the node to which you applied the conversion is working with the source S-Log2 footage.
If you are not working in Davinci Resolve but rather using, let’s say, Premiere Pro, you can use the following log conversion LUTs. Inside this free download you’ll find the following 3 folders:
- 1D Adobe-Iridas -S-Log2 to S-Log3 Shaper – This is a gamma only 1D LUT that will work only in Adobe software such as Premiere Pro or Photoshop
- 1D S-Log2 to S-Log3 Shaper – This is a gamma only 1D LUT that will work in any software that supports the use of 1D LUTs. It will not work in Premiere Pro. For Premiere Pro please use the LUT from folder No.1.
- 3D S-Log2 to S-Log3 Shaper – In case your software doesn’t support the use of 1D LUTs, you can use this 3D LUT for the S-Log2 to S-Log3 conversion. Usually, it’s best using 1D “shaper” LUTs for gamma only conversions because of their precisions, so use this LUT only if your software doesn’t support the use of 1D LUTs.
So what happens if you are working in Premiere Pro for example of Final Cur Pro? The technique stays very much the same. Just keep the correct order of actions. In Premiere Pro, if you are using adjustment layers, simply make sure to apply the appropriate S-Log2 to S-Log3 conversion on the first adjustment layer (bottom most) and make your corrections on adjustment layers above the adjustment layer containing the conversion. If you’re stacking Lumetri effects instead of applying your corrections to adjustment layers, make sure you apply the conversion to S-Log3 first and then make your correction on a new instance of Lumetri effect which comes after the instance containing the conversion.
Same thing for Final Cut Pro. Add your effects to your clip in a such order that conversion to S-Log3 is done first and then make your other corrections.
We hope you enjoyed this tutorial and that you’ve learned something new that will further improve your color grading game. We would love to hear back from you in comments down below what you think of this workflow.
As always, should you have any questions please contact us.